How to Make Apple Cider Vinegar From Scratch (With Mother)

Make raw apple cider vinegar with mother in two stages over 6 to 8 weeks: ferment chopped apple scraps with sugar water for 2 weeks (alcohol stage), then strain and let the alcoholic liquid oxidize for another 4 to 6 weeks (acetic acid stage). The finished vinegar tests at 4 to 6% acidity, matching commercial Bragg’s organic ACV.
Apple cider is one of six home vinegars I run perpetually; the broader mother-management, substrate, and acetobacter workflow lives in my home vinegar making guide.
I started making apple cider vinegar four years ago when my orchard CSA sent me 20 pounds of seconds with one email: “use these or they’re compost by Friday.” That first batch taught me everything about two-stage fermentation, and after dozens of batches since, I can say ACV is the most forgiving fermented food to learn. Unlike red wine vinegar, which starts from finished wine and skips the alcohol stage entirely, ACV requires both stages to work. The mother that forms during fermentation can be saved and used to inoculate future batches, so subsequent batches finish in 4 to 5 weeks instead of 6 to 8.
The whole process uses kitchen scraps (apple cores, peels, and bruised apples that would otherwise compost) plus sugar and water. Total ingredient cost: roughly $1 to $3 for a quart of finished vinegar, well under what a bottle of commercial raw ACV runs.
The Two-Stage Fermentation
Stage 1 (alcohol fermentation): yeast converts apple sugars into ethanol. This takes 1 to 2 weeks at room temperature in a covered jar with a breathable cloth lid. The smell shifts from sweet apple to slightly alcoholic and yeasty. Visible bubbling indicates active yeast activity.
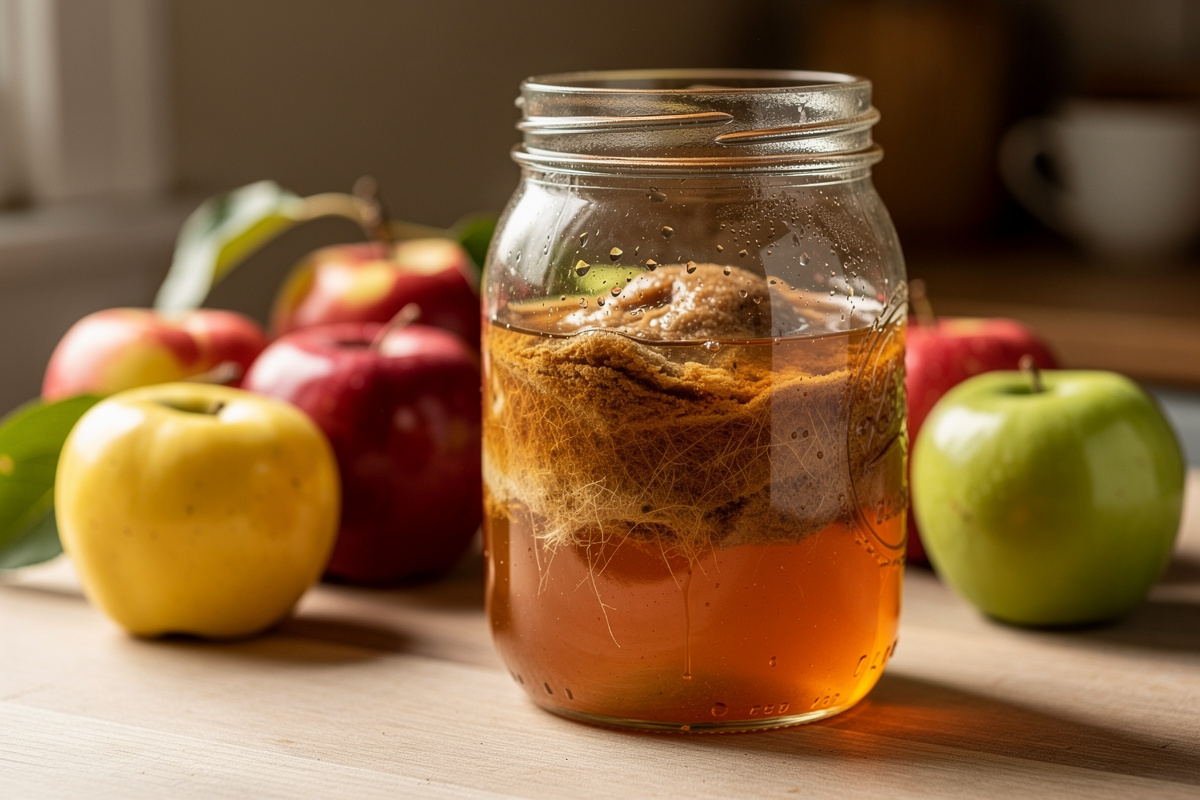
Stage 2 (acetic acid fermentation): acetic acid bacteria (Acetobacter species) convert the ethanol into acetic acid. This takes 4 to 6 weeks at room temperature in the same covered jar. The mother (a thick cellulose mat) forms on the liquid surface during this stage as the Acetobacter establish a colony. The smell shifts from alcoholic to sharp vinegar.
The two stages happen sequentially, not simultaneously. Yeast and Acetobacter need different conditions: yeast wants anaerobic (closed), acetic bacteria want aerobic (open). For ACV, you start aerobic from day 1 and the yeast tolerates the oxygen exposure long enough to complete stage 1. By stage 2, oxygen is mandatory. Acetic acid fermentation has a long regulatory safety history: acetic acid is affirmed as a GRAS (Generally Recognized as Safe) substance under 21 CFR 184.1005, and a pH at or below 4.6 — which finished vinegar in the 4 to 6% acidity range comfortably clears — is the recognized threshold below which Clostridium botulinum cannot grow.
Ingredients and Equipment
Apples or apple scraps: 2 to 3 cups chopped apples, cores, and peels. Use any apple variety; sweet apples (Gala, Fuji, Honeycrisp) ferment slightly faster than tart varieties (Granny Smith). Bruised or imperfect apples are perfect — they’re often discounted at farmers markets specifically for fermentation.
Sugar: 1 tablespoon plain table sugar per cup of water (or 1/4 cup per quart). The sugar feeds the initial yeast fermentation. After stage 1, the sugar is fully consumed and the resulting alcohol is what stage 2 converts.
Filtered water: 3 to 4 cups, enough to cover the apples by 1 inch. Use filtered or boiled-and-cooled water — chlorinated tap water can inhibit the wild yeast and bacteria.
Equipment: 1 quart wide-mouth glass jar, cheesecloth or coffee filter for the lid, rubber band to secure the cloth, fine-mesh strainer, second clean glass jar or swing-top bottle for finished vinegar. Optional: pH test strips ($5 for a pack of 100) to confirm acidity at the end. I use a 2-quart Kilner fermentation jar with a silicone-gasket lid I leave unclamped — the wide mouth makes adding and removing apple scraps effortless, and the thick glass buffers countertop temperature swings better than standard mason jars. Any wide-mouth half-gallon mason jar works equally well; just avoid narrow-neck bottles, which turn the stage-1 straining step into a frustrating mess of spooning out apple mush through a bottleneck.
Step 1: Prep the Apples and Sugar Water
Wash the apples thoroughly. Chop into 1-inch chunks (cores, peels, and all). For an active-batch ACV, you can use 2 to 3 whole apples chopped roughly. For a kitchen-scraps batch, save apple cores and peels in the freezer for a few weeks until you have 2 to 3 cups, then thaw and use.
Don’t peel or core. Apple peels carry the most wild yeast (visible as a slight whitish bloom on freshly-picked apples), and the core’s seeds and pith add additional flavor compounds to the finished vinegar.
Mix the sugar water: 1 tablespoon sugar per cup of water, fully dissolved. For a 1 quart jar, that’s 4 tablespoons sugar in 4 cups water. The sugar should be completely dissolved before adding the apples.
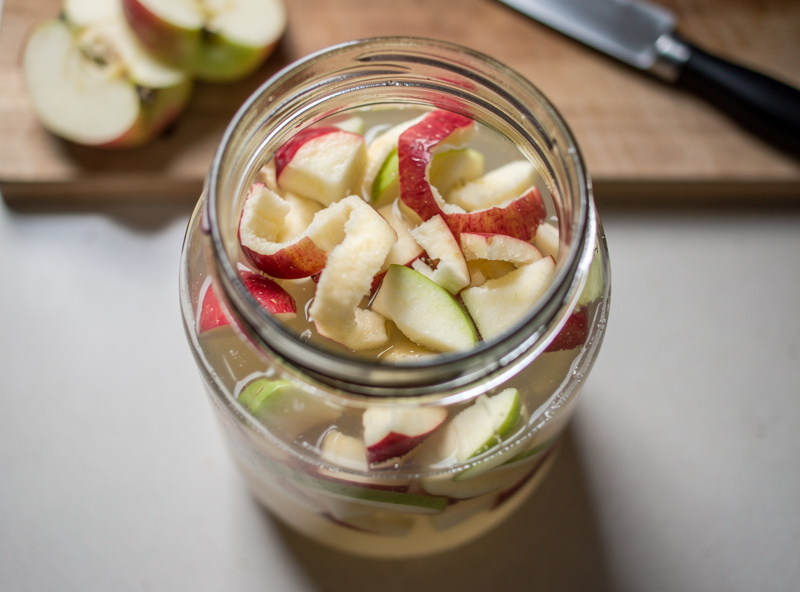
Step 2: Combine and Cover
Place the chopped apples in the wide-mouth glass jar (about 2/3 full of apples). Pour the sugar water over the apples until they’re fully submerged with at least 1 inch of liquid covering them. Some apple pieces will float; that’s normal but use a small fermentation weight or a smaller jar pressed inside to keep most pieces submerged.
Cover the jar mouth with cheesecloth, a coffee filter, or a clean kitchen towel. Secure with a rubber band. The cloth keeps insects out (especially fruit flies) while allowing the oxygen exchange that both fermentation stages need. Don’t use a sealed lid — the CO2 from active fermentation can build pressure.
Place the jar at room temperature (65 to 75°F) in a low-light area. Direct sunlight can heat the contents and inhibit the bacterial fermentation. A kitchen pantry or counter corner works.
Step 3: Stage 1 Fermentation (Days 1 to 14)
Stir or gently shake the jar once daily for the first week. This keeps the apples below the brine surface and prevents mold from establishing on exposed apple pieces. Use a clean wooden spoon if needed to push apples back down.
Day 1-3: visible bubbling starts. Smell shifts from fresh apple to slightly alcoholic. The sugar water becomes cloudy.
Day 4-7: active alcoholic fermentation, with visible bubbles forming around apple pieces. Strong yeasty/cidery smell. Apples start sinking to the bottom of the jar as their sugar content depletes.
Day 8-14: bubbling slows down. Smell becomes distinctly alcoholic, similar to hard cider. Apples are mostly soft and sitting at the jar bottom. Stage 1 is complete when bubbling has nearly stopped (around day 10-14).

Step 4: Strain and Begin Stage 2 (Day 14)
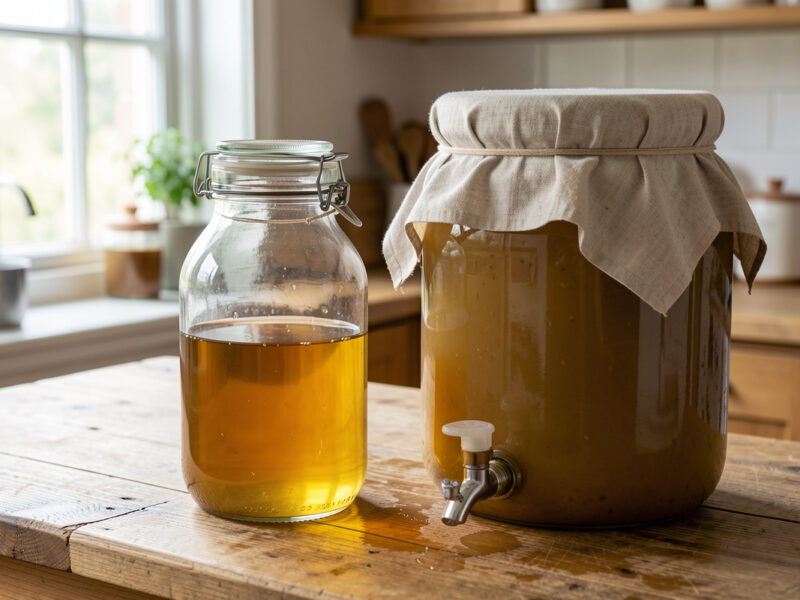
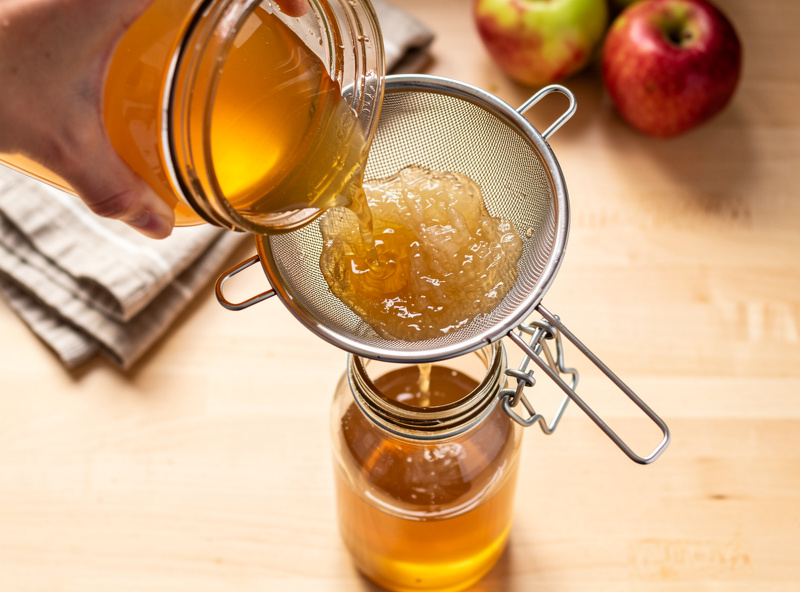
Pour the entire jar contents through a fine-mesh strainer into a clean wide-mouth glass jar of the same size. Discard the solid apple pulp (or compost it). The liquid you’ve kept is hard apple cider — about 4 to 6% alcohol by volume.
Re-cover the new jar with the cheesecloth and rubber band. Place back in the same room-temperature low-light area. Stage 2 (acetic acid fermentation) is now underway, driven by ambient Acetobacter species that establish on the liquid surface.
Tip for faster stage 2: add 2 tablespoons of unfiltered raw apple cider vinegar (Bragg’s, or a previous batch’s vinegar) to inoculate. This introduces an established Acetobacter population and reduces stage 2 time from 4-6 weeks to 3-4 weeks.
Step 5: Stage 2 Fermentation (Weeks 2 to 8)
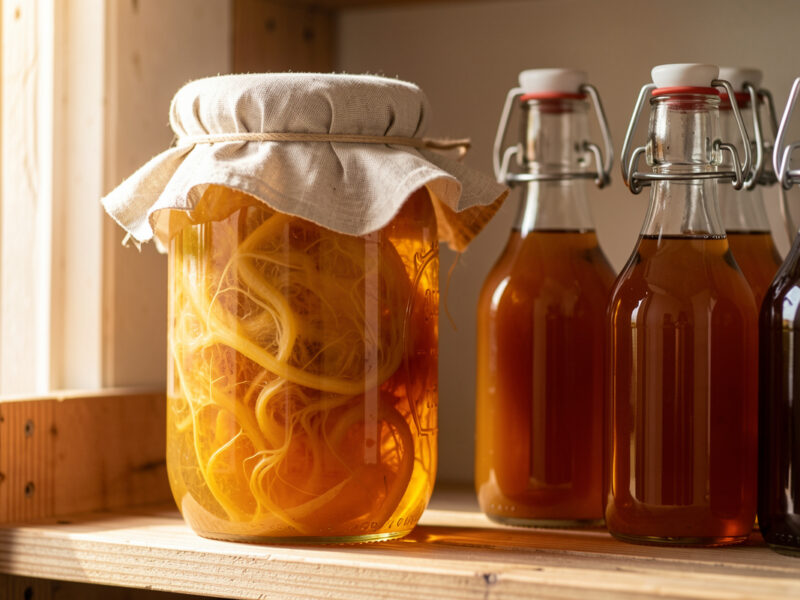
Don’t disturb the jar after stage 2 starts. Stage 2 forms a thin film on the liquid surface within 1 to 2 weeks — this is the early mother. Over 4 to 6 more weeks, the mother thickens into a 2 to 4 mm cellulose mat.
Week 2-3: faint vinegar smell starts to emerge. Surface develops a thin transparent film.
Week 4-5: smell is clearly vinegar. Mother is visibly thicker, sometimes with bubbles trapped beneath it.
Week 6-8: smell is sharp vinegar comparable to commercial ACV. Mother is fully formed (thick gelatinous mat). Test a tablespoon — should taste like sharp acidic vinegar with apple notes.
Test acidity with pH strips: target pH 3.0 to 3.5 (matches commercial vinegar acidity of 4 to 6%). Below pH 3.0 is over-acidified (still safe to use); above pH 3.5 means stage 2 needs more time.
Step 6: Strain, Bottle, and Store
Once acidity is right, pour the vinegar through a fine-mesh strainer into clean glass swing-top bottles. The mother will catch in the strainer — save it in a small jar with a tablespoon of vinegar to inoculate the next batch.
Store in glass swing-top bottles or mason jars at room temperature, away from direct sunlight. Homemade ACV with mother keeps indefinitely (vinegar is its own preservative). The mother may continue forming small amounts in the bottles; this is normal and the vinegar is still good.
For “filtered” vinegar without visible mother particles, strain through cheesecloth or a coffee filter for the second pour. The flavor is identical; the only difference is appearance.
Apple Cider Vinegar Recipe Summary
| Variable | Specification |
|---|---|
| Apples (or scraps) | 2-3 cups chopped (cores and peels OK) |
| Sugar | 1 tablespoon per cup of water |
| Water | 3-4 cups filtered (cover apples + 1 inch) |
| Stage 1 time (alcohol) | 10 to 14 days |
| Stage 2 time (acetic acid) | 4 to 6 weeks (3-4 with starter inoculation) |
| Total time | 6 to 8 weeks (or 5 weeks with starter) |
| Temperature | 65 to 75°F room temperature |
| Cover | Cheesecloth or coffee filter (NOT sealed lid) |
| Yield | ~3 cups finished vinegar from 1 quart batch |
| Total cost | $1 to $3 per quart |
| Storage | Glass bottles, room temperature, indefinite |
| Acidity target | pH 3.0 to 3.5 (4 to 6% acetic acid) |
Common ACV Brewing Mistakes
My worst batch failure happened during my second summer brewing ACV. I used a single layer of cheesecloth draped loosely over the jar mouth — and came back two weeks later to a jar swarming with fruit flies, their larvae threading through the thickening mother like white veins. The cover gap was barely 2 millimeters, but that is three times the width a fruit fly needs to crawl through. I lost that entire batch, learned a cheap lesson, and have never had a fruit-fly infestation since. Now I double-layer the cheesecloth and tension it with a rubber band pulled taut to the point of slight stretching, then press the center of the fabric to confirm no gap opens at the rim before the jar goes onto the shelf.
Mistake 1: Sealed lid. CO2 builds up during stage 1 and the jar can crack or pop the lid. Always use cheesecloth or other breathable cover.
Mistake 2: Skipping stage 2 too early. The hard cider after stage 1 is alcoholic, not vinegar. If you bottle and refrigerate at the end of stage 1, you have hard cider — useful for cooking but not vinegar. Stage 2 is mandatory for actual vinegar.
Mistake 3: Too cold. Below 60°F, stage 2 stalls and the mother won’t form properly. Move to a warmer location (top of refrigerator, near a heat source).
Mistake 4: Apples not submerged. Apple pieces poking above the brine surface mold instead of fermenting. Use a fermentation weight or smaller jar pressed inside to keep apples below the liquid. If you notice a thin white film that looks like powder on the brine surface — not the thick gelatinous mother — it might be kahm yeast rather than mold; kahm is harmless but should be skimmed off to prevent off-flavors from developing.
Mistake 5: Ignoring the mother. The thick cellulose mat that forms is the most valuable part — save it to inoculate future batches. Discarding the mother means starting from scratch every time. The vinegar brewing guide covers mother management in detail.
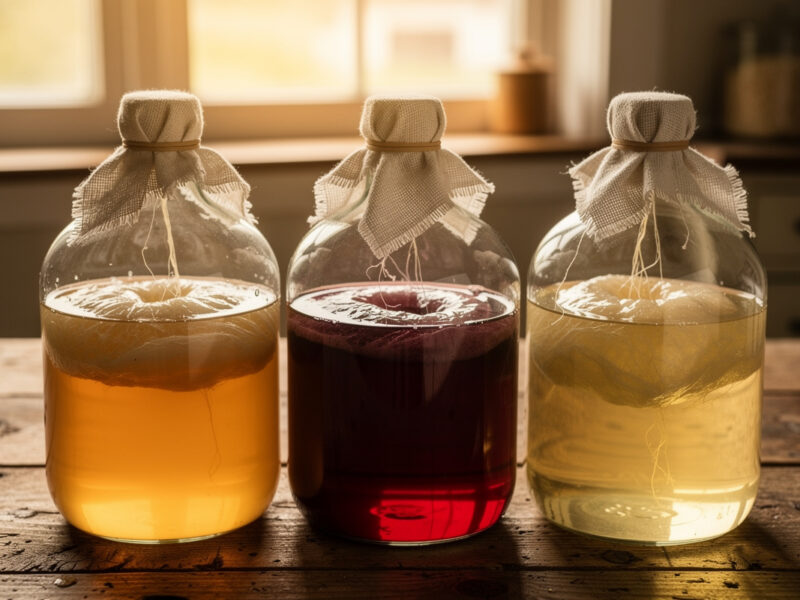
Variations: Beyond Plain ACV
Honey ACV: substitute honey for some or all of the sugar. The yeast and bacteria handle honey just like sugar. Result has slight floral notes from the honey type used. Manuka or wildflower honey produces the most interesting variations.
Spiced ACV: add cinnamon stick, cloves, or fresh ginger during stage 2. The spices infuse over the 4 to 6 week ferment. Fall and winter holiday gift bottles often feature spiced ACV.
Fire cider variant: after stage 2 completes, infuse the finished vinegar with horseradish, garlic, fresh ginger, hot peppers, and turmeric for 2 to 4 weeks. Strain and bottle. The folk-remedy spicy vinegar tradition is built on this base. If you enjoy fermenting with peppers, our fermented hot sauce guide uses a similar approach with chiles as the fermentable base instead of fruit sugars.
Other fruit vinegars: the same 2-stage process works with grapes, pears, plums, or any sugary fruit. Wine vinegar (red or white) follows the same protocol starting from finished wine instead of fresh fruit. The vinegar brewing guide covers fruit-specific recipes.
If I Were Starting ACV Brewing Today
If I were starting ACV brewing today, I would skip the kitchen-scrap approach and use 3 whole organic apples instead — better flavor, cleaner fermentation, and no risk of mold from apples that have been sitting in the fridge drawer for two weeks. I would add 2 tablespoons of raw Bragg’s ACV on day 1 to jumpstart the mother formation instead of waiting weeks for wild Acetobacter to drift in from the air. And I would double-layer the cheesecloth from the start, because losing a batch to fruit flies is a lesson you learn exactly once. The entire setup costs under $10 in equipment and under $3 in vinegar ingredients, and you walk away with a living mother culture you can feed indefinitely — the same mother I am still keeping alive from that CSA-sourced batch four years, two apartment moves, and seven subsequent batches ago.
Frequently Asked Questions
How long does it take to make apple cider vinegar from scratch?
6 to 8 weeks total: 1 to 2 weeks for stage 1 alcohol fermentation, then 4 to 6 weeks for stage 2 acetic acid fermentation. Adding 2 tablespoons of unfiltered raw ACV (Bragg’s) to inoculate stage 2 reduces total time to 4 to 5 weeks.
What is the mother in apple cider vinegar?
A thick gelatinous cellulose mat formed by acetic acid bacteria (Acetobacter species) during stage 2 fermentation. Visible signal that acetic bacteria have established. Save the mother to inoculate future batches — subsequent batches with mother starter finish 1 to 2 weeks faster.
Can I use apple scraps to make apple cider vinegar?
Yes — chopped apple cores, peels, and bruised apples are perfect for ACV. Save them in the freezer until you have 2 to 3 cups, then thaw and use. The peels carry the most wild yeast and the cores add complex flavor. This is essentially free vinegar from kitchen waste.
What sugar to water ratio for homemade apple cider vinegar?
1 tablespoon plain sugar per cup of filtered water — about 1/4 cup sugar per quart batch. The sugar feeds the initial yeast fermentation. After stage 1, the sugar is fully consumed and converted to alcohol, which stage 2 then converts to acetic acid.
Why does my apple cider vinegar smell alcoholic instead of sour?
You are still in stage 1 (alcohol fermentation) and need to continue to stage 2 (acetic acid fermentation). After 1 to 2 weeks the smell will shift from alcoholic to sharp vinegar. Stage 2 takes another 4 to 6 weeks. Don’t bottle and refrigerate at the end of stage 1.
How do I know when my apple cider vinegar is ready?
Test acidity with pH strips — target pH 3.0 to 3.5 (matches commercial 4 to 6 percent acetic acid). Smell should be sharp vinegar comparable to Bragg’s. Mother should be a thick 2 to 4 mm cellulose mat. Taste a tablespoon: should be acidic and tart, not alcoholic.
Related Articles
- How to Make Red Wine Vinegar at Home
- Vinegar Brewing at Home: Mother Cultures Guide
- Kahm Yeast: What It Is, How to Prevent It
- Fermentation Weights: Glass vs Ceramic vs Ziplock
- How to Make Fermented Hot Sauce

About Kenny Nyhus Fadil
A home fermenter documenting brines, bubbles, and the occasional moldy tragedy.