Best Bottles for Fermented Soda: Swing-Top vs Plastic vs Glass

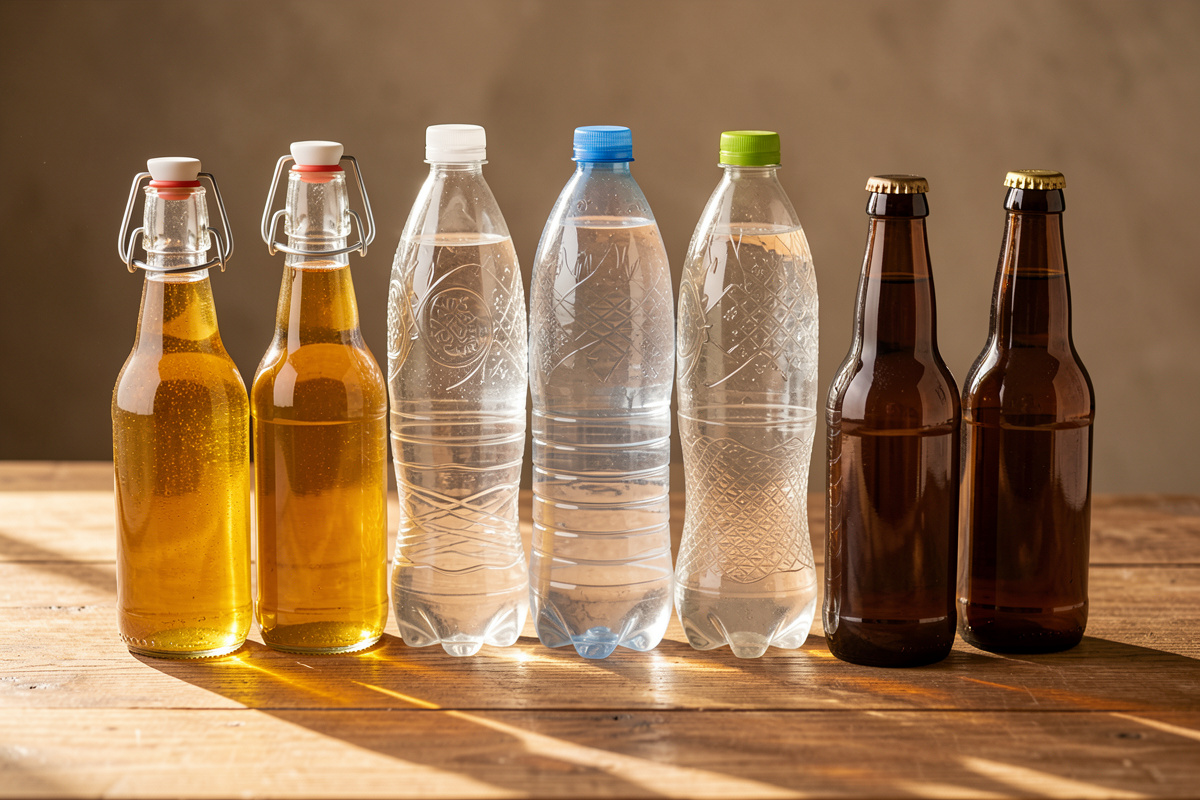
The best bottles for fermented soda are swing-top (Grolsch-style) glass for everyday use, clear PET plastic for a squeeze-to-check pressure gauge, and capped beer bottles for long storage. All three are built to hold the 30–45 psi a carbonated soda generates. What you must never use is a mason jar, a jam jar, or any container with a flat lid that isn’t rated for pressure.
I’ve bottled home soda in all of these, and after years of it my working shelf is mostly swing-tops with a couple of plastic bottles mixed into every batch as gauges. The choice isn’t really about looks — it’s about which vessel holds pressure safely, seals reliably, and tells you when to stop fermenting. Pick wrong and you either lose your fizz to a bad seal or lose the bottle to over-pressure.
This guide walks through each type, what it’s good and bad at, and which one to buy for your situation. If you haven’t yet read how pressure builds and why the plastic-bottle trick matters, start with bottle-conditioning fermented soda without exploding bottles — the bottle choice only makes sense once you understand the pressure it has to contain.
What Makes a Bottle Safe for Fermented Soda?
A soda bottle is safe when it’s engineered to hold internal pressure — meaning it has thick, pressure-rated walls and a seal designed to contain gas, not just keep dust out. A carbonated soda reaches roughly 3–4 volumes of CO2, around 30–45 psi at room temperature, and the bottle has to hold that with margin. Bottles built for still liquids like juice, wine, or jam are not designed for this and can fail.
Two features separate a pressure bottle from a pretender. First, wall design: bottles meant for carbonation are either thick tempered glass (beer and Champagne bottles, swing-tops) or engineered plastic (PET soda bottles), both made to flex or resist rather than shatter. Second, the seal: a swing-top’s rubber gasket, a crown cap, or a screw cap on a PET bottle all seal against pressure, where a flat canning lid or a cork will either pop or leak. The Glass Packaging Institute (gpi.org) and PET industry references like petresin.org are useful if you want the materials-science side; for home use, the shortcut is “was this made to hold soda or beer?” If yes, it’s fine.
The failure I see most often isn’t a bottle exploding on the counter — it’s a slow leak that lets all the fizz escape, ruining the batch quietly. A worn gasket or a hairline chip on a swing-top’s glass lip will vent gas over a day or two and leave you with flat soda and no idea why. So “safe” also means “sealing,” and the seal is the part that wears out.
Swing-Top (Grolsch-Style) Bottles: My Everyday Default
Swing-top bottles are the home fermenter’s default: reusable, well-sealing, easy to open and reseal, and rated for the pressure soda builds. The ceramic-or-plastic stopper clamps down a rubber gasket with a lever, giving a tight seal you can open and close a hundred times. This is what most of my soda lives in, and the satisfying snap of the lever is half the fun of the hobby.
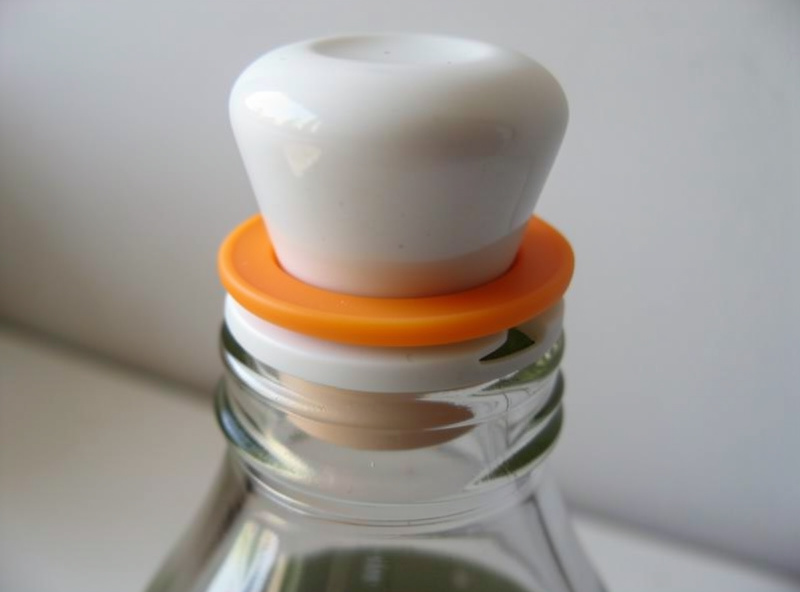
The advantages are real. No capper or caps to buy — the seal is built in and reusable. They come in handy 500 ml and 1-liter sizes, hold pressure with margin, and look good enough to bring to a table. The one maintenance point is the gasket: those orange rubber rings perish over time, going hard and cracked, and a tired gasket is the number-one cause of a swing-top that won’t hold fizz. I replace mine roughly once a year, and I keep a bag of spare gaskets on hand — they cost pennies and save batches. My one early mistake here was reusing a batch of old kombucha swing-tops whose gaskets had gone stiff; three of six bottles carbonated fine and three came out flat, and it took me a wasted batch to realize the bottles, not the culture, were the problem.
Inspect the glass lip too. A tiny chip where the gasket sits breaks the seal, and it’s easy to miss. I run a fingertip around each rim when I fill, and any bottle with a nick gets retired to holding water, not soda.
PET Plastic Soda Bottles: The Safest Gauge and the Cheapest Start
Clear PET plastic soda bottles are the safest option and double as a pressure gauge, which makes them indispensable even if you bottle everything else in glass. They’re engineered to hold commercial carbonation, they never shatter, and — critically — you can squeeze them to feel exactly how much pressure has built. I keep at least one in every single batch for this reason.
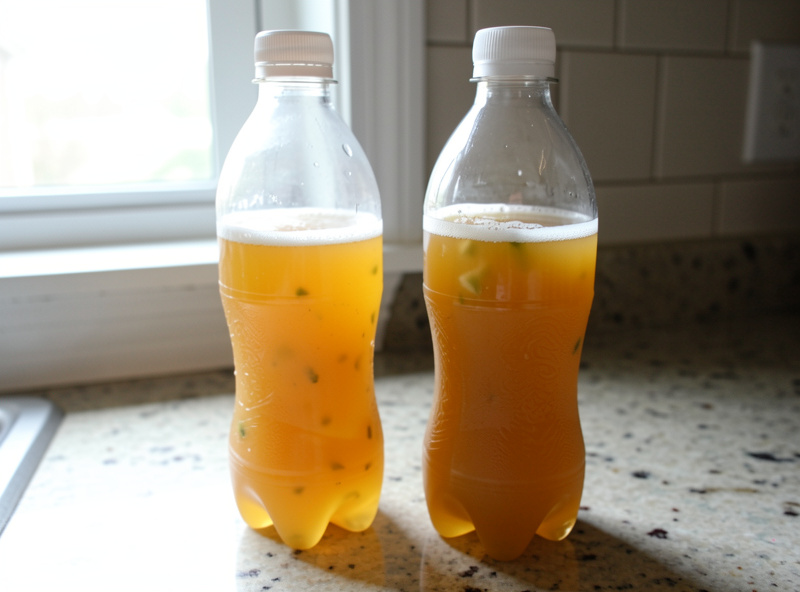
The gauge function is the whole reason they earn a permanent spot. Because plastic flexes, a PET bottle goes from soft and dentable to rock-hard as the soda carbonates, giving you a physical read on invisible pressure. When the plastic won’t dent under firm thumb pressure, the batch is done and it’s time to refrigerate — a trick I lean on in every batch and cover in the complete fermented soda guide. They’re also free if you save store bottles, unbreakable around kids, and light for taking soda to a picnic. The downsides: they’re less attractive, they scratch and cloud over time, and each one is best retired after several uses because CO2 slowly permeates plastic and old bottles hold pressure less predictably. Buy food-grade PET made for carbonation, not a repurposed water bottle, which is thinner and not built to hold gas.
Glass Beer Bottles: Cap-and-Crown for Long Storage
Capped glass beer bottles — the brown longnecks you crimp a crown cap onto — are excellent for long storage and big batches, at the cost of needing a capper and fresh caps each time. Pry-off or pop-top beer bottles handle soda pressure easily and, being brown, protect light-sensitive flavors. This is the route I use when I bottle a large ginger beer run I want to age.
The trade-off is single-use caps and a bit of gear. You need a bench or wing capper and a supply of crown caps, and once you pry a cap off you can’t reuse it. That makes beer bottles less convenient for the everyday “make a quart, drink it this week” rhythm and better for volume you’ll store for weeks or months. The brown glass is a genuine advantage for hop- or citrus-forward sodas that can go skunky or fade in light. If you’re already a homebrewer with a capper, this is nearly free; if you’re not, the swing-top saves you the equipment. The classic long-store use case is a strong batch from my ginger beer fermentation guide, which rewards a few weeks of conditioning.
Bottles You Should Never Use
Never bottle fermented soda in mason jars with flat lids, jam jars, screw-top wine bottles, or any container built for still liquids. These aren’t pressure-rated, their seals either pop or leak under gas, and glass ones can fail suddenly. This is the most important line in this whole guide, because a wrong bottle turns a fun hobby into a genuine hazard.
Mason jars are the most common mistake because they’re everywhere in a fermenter’s kitchen, but a two-piece canning lid is designed to seal inward under a vacuum, not to hold pressure pushing outward — the flat lid will bulge and pop, and at worst the jar can crack. Corked wine bottles push their corks out. Repurposed thin water bottles aren’t built for gas and deform. Even a swing-top with a chipped lip or a perished gasket belongs on this list until it’s fixed. I did once seal a batch in a screw-top wine bottle “just to see,” and it quietly forced the cap loose overnight and drooled soda across the shelf — harmless that time, but a clear vote for using the right vessel. When in doubt, ask whether the container was made to hold soda or beer. If it wasn’t, don’t trust it with pressure.
Swing-Top vs Plastic vs Glass: The Comparison
| Bottle type | Reusable | Pressure gauge? | Extra gear | Best for | Watch out for |
|---|---|---|---|---|---|
| Swing-top glass | Yes, many times | No | Spare gaskets | Everyday soda | Perished gaskets, chipped lips |
| PET plastic soda | A few uses | Yes — squeeze it | None | Gauge bottle, kids, travel | CO2 permeates old bottles |
| Capped beer glass | Bottle yes, caps no | No | Capper + crown caps | Long storage, big batches | Single-use caps, needs a capper |
| Champagne bottle | Yes, with cage/cork | No | Corker, cages | Highest-pressure sodas | Fiddly to seal at home |
| Mason / jam jar | — | — | — | Never — not rated | Lid pops or jar cracks |
How Do You Clean and Reuse Soda Bottles?
Wash soda bottles in hot soapy water right after emptying, rinse thoroughly, and sanitize before refilling — but you don’t need the aggressive sterilization a low-acid canning project demands, because a fermented soda’s own acidity does most of the defensive work. The goal is clean bottles with healthy gaskets, not a lab. Still, cleaning matters, because dried sugar and old sediment are exactly what off-flavors and stray molds feed on.
My routine is simple. The moment a bottle is empty, I rinse it before the sugar residue dries into a film that’s a pain to remove later. A bottle brush gets the shoulders and base where sediment collects; swing-tops need attention around the gasket groove where sticky residue hides. For sanitizing, I use a no-rinse brewing sanitizer — the same StarSan-type acid sanitizer homebrewers use — because it’s food-safe, fast, and leaves nothing behind. A dilute bleach rinse followed by a thorough water rinse works too, but I prefer the brewing sanitizer for anything that touches a live culture. Plastic PET bottles scratch easily, so I skip abrasive brushes on them and just rinse and sanitize; scratches harbor bacteria and cloud the plastic, which is another reason PET bottles are best retired after a handful of uses.
Two habits save the most grief. First, pull and inspect swing-top gaskets periodically — soak them separately if they’re sticky, and replace any that have gone hard or cracked. Second, never store bottles sealed and damp; let them dry fully upside down, because a capped wet bottle grows exactly the funk you’re trying to avoid. Clean, dry, well-gasketed bottles are half of a reliable soda program.
Which Bottle Should You Actually Buy?
For almost everyone, buy a case of 500 ml swing-top bottles and a bag of spare gaskets, then keep two or three PET soda bottles in rotation as gauges. That combination gives you reusable, good-looking bottles for the soda you’ll drink and an unbreakable pressure gauge for every batch — the exact setup on my own shelf. Add capped beer bottles only if you already own a capper or you’re storing large batches long-term.
Start smaller than you think you need — a six- to twelve-bottle case is plenty for a home rhythm of a quart or two a week, and swing-tops last years so you won’t rebuy often. Match bottle size to how fast you drink: once opened, a soda goes flat within a day or two, so 500 ml singles beat one big liter you can’t finish. Keep the plastic canaries even after you’ve graduated to a shelf of glass, because they’re what let you cold-crash at exactly the right moment. A practical starting kit for most kitchens: twelve 500 ml swing-tops, a bag of spare gaskets, three PET gauge bottles, and a bottle brush — under the cost of a month of store-bought craft soda, and it’ll outlast years of batches. Get the bottle right and the rest of the hobby — the ginger bug, the sugar, the flavors — becomes the fun part, with the pressure handled safely underneath it all.
As an Amazon Associate I earn from qualifying purchases. My shelf runs on 500 ml swing-top bottles with a bag of replacement gaskets, plus a few PET soda bottles as gauges.
Keep Building
- Fermented Sodas: The Complete Guide to Wild Fizz
- Bottle-Conditioning Fermented Soda Without Exploding Bottles
- How to Make and Maintain a Ginger Bug Starter
- Ginger Beer Fermentation Guide: Ginger Bug to Bottle

About Kenny Nyhus Fadil
A home fermenter documenting brines, bubbles, and the occasional moldy tragedy.
Keep Bubbling
Fermenting Alcohol at Home: A Complete Guide to Beverage Ferments
How to Make and Maintain a Ginger Bug Starter