Bottle-Conditioning Fermented Soda Without Exploding Bottles

To bottle-condition fermented soda safely, seal it in pressure-rated swing-top or PET bottles, keep one clear plastic bottle in every batch as a pressure gauge, and refrigerate the moment that plastic bottle feels rock-hard — usually 1–3 days at room temperature. A sealed soda keeps building pressure until it runs out of sugar, and a swing-top can hold only about 30–50 psi before something gives.
This is the one stage of home soda-making where I refuse to be relaxed. Everything else — the culture, the flavor, the sugar — is forgiving. Bottle-conditioning is physics, and a full bottle of fermenting soda is a small pressure vessel sitting on your counter. Get it right and you get a crisp, well-carbonated soda that hisses open like Champagne. Get it wrong and you get glass across the kitchen, or a warm bottle that gushes half its contents onto the ceiling.
The good news: the fix is a single 30-cent plastic bottle. Once you understand that the danger is mechanical pressure and not the microbes, bottle-conditioning stops being scary and becomes a routine you run on autopilot.
What Does Bottle-Conditioning Mean for Soda?
Bottle-conditioning means carbonating a soda inside its sealed bottle by trapping the CO2 the culture produces, rather than injecting gas from a tank. The culture keeps eating residual sugar after you seal the bottle; the gas it exhales has nowhere to go, so it dissolves into the liquid as fizz. This is the exact method brewers use to carbonate bottle-conditioned beer, and it’s the second stage — F2 — of the soda process.
The sequence is simple. In the first stage (F1) you culture your sweetened juice or tea loosely covered to build an active population. Then you bottle it while there’s still fermentable sugar left, seal it tight, and let it sit at room temperature. During this F2 window the trapped CO2 saturates the liquid. When it’s carbonated, you refrigerate to slow the culture to a near-stop and lock the fizz in. The whole approach depends on having an active starter driving it — the ginger bug from my guide to making a ginger bug starter is what I use, and the broader method sits inside the complete fermented soda guide.
The critical insight is that bottle-conditioning is a race between carbonation and over-pressurization. You want to stop it — by chilling — at the moment the fizz is right but before the pressure climbs into dangerous territory. Since you can’t see through most bottles or measure the pressure directly, you need a proxy. That proxy is the plastic bottle.
How Much Pressure Does a Fermented Soda Actually Build?
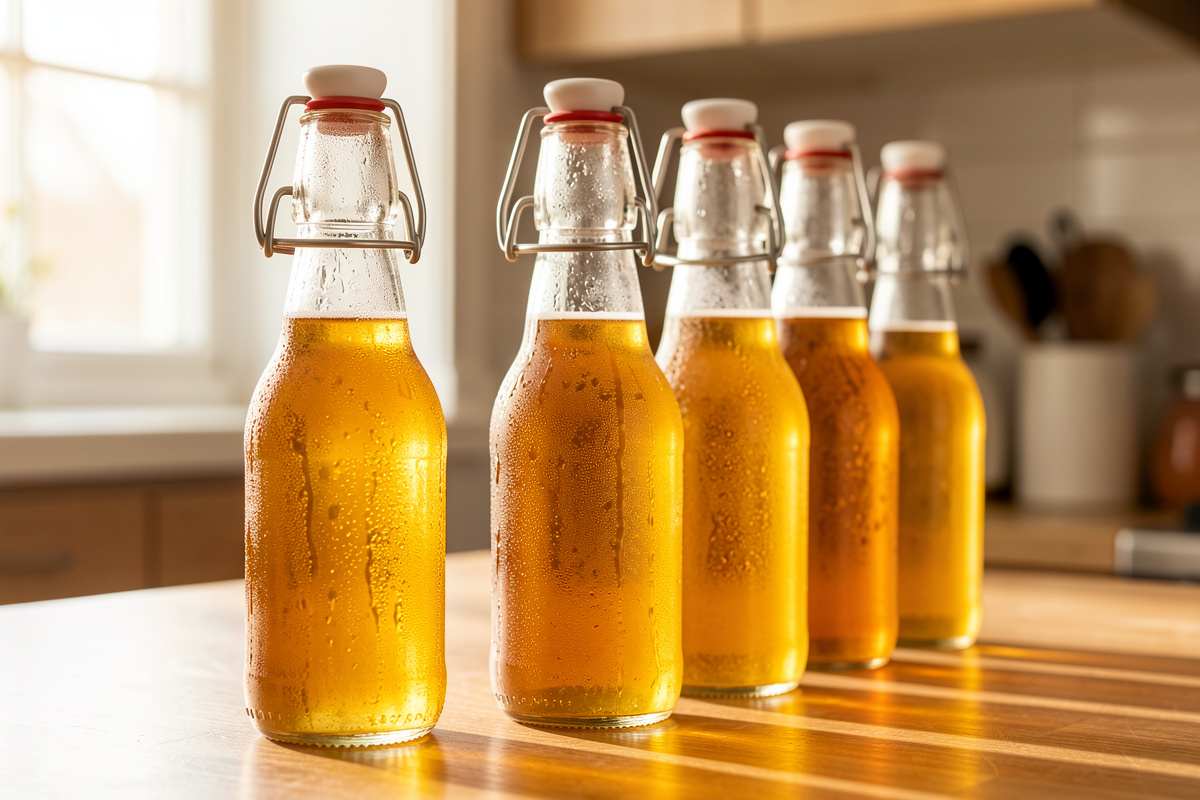
A fully carbonated soda sits around 3–4 volumes of CO2, which translates to roughly 30–45 psi at room temperature — genuinely dangerous if the bottle can’t hold it. For comparison, a car tire runs about 32 psi. A swing-top (Grolsch-style) bottle handles that range with margin; a repurposed jam jar or a mason jar with a flat lid does not, and will fail unpredictably.
The reason pressure is open-ended is that the culture doesn’t stop on its own — it keeps fermenting until the sugar is gone or the cold shuts it down. Leave a sealed, sugar-rich soda on a warm counter and it will happily push past what the glass can hold. Heat accelerates everything: the same batch that carbonates gently over three days at 18°C can over-pressurize in under 24 hours at 27°C, which is exactly the trap my Swedish kitchen sets in July. The National Center for Home Food Preservation (nchfp.uga.edu) is worth reading for the microbial-safety side of home fermentation; the pressure side is pure mechanics, and it’s on you to manage it.
Temperature also affects how much gas the liquid can hold, which is why cold-crashing matters beyond just slowing the yeast. By Henry’s law, cold liquid dissolves far more CO2 than warm liquid — a soda that seems only lightly fizzy at room temperature will be sharply carbonated once it’s been chilled overnight, because the gas that was sitting in the headspace goes back into solution. That’s also why you should never judge “done” by a warm bottle, and never open one warm if you can help it.
The Plastic Bottle Trick: Your Pressure Gauge
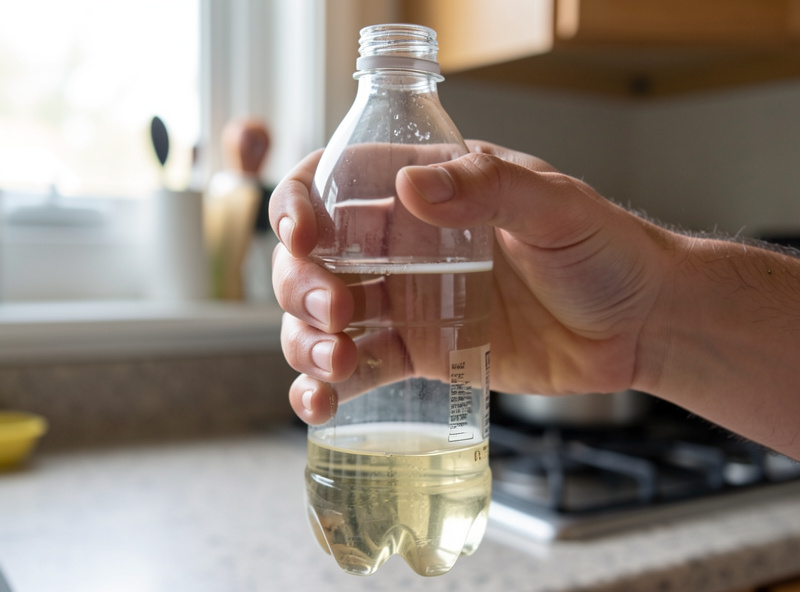
The single most important safety habit is keeping one clear PET plastic bottle in every batch as a pressure gauge. Fill it alongside your glass bottles, and squeeze it daily: when the plastic goes from soft-and-dentable to rock-hard and won’t dent under firm thumb pressure, the whole batch is carbonated and it’s time to refrigerate. The plastic tells you what you can’t see through glass.
I cannot overstate how much this one trick de-risks the hobby. A PET soda bottle is engineered to hold commercial carbonation — several volumes of CO2 — so it flexes as a gauge without ever being the thing that fails. Every batch I bottle gets one plastic canary among the swing-tops. Each morning I give it a squeeze; the day it stops denting, everything goes cold. I have not lost a glass bottle since I adopted this, where before I was guessing off a timer and occasionally guessing wrong.
If you’d rather not keep plastic in rotation, the alternative is disciplined timing plus refrigeration — but timing is unreliable because it depends on temperature, sugar, and culture strength all at once, and those change with the season. The plastic bottle integrates all of them into one physical signal you can feel with your thumb. For the full breakdown of which bottles hold pressure and which don’t, I go deep in the companion piece on choosing bottles, linked below.
How Do You Burp Bottles Safely?
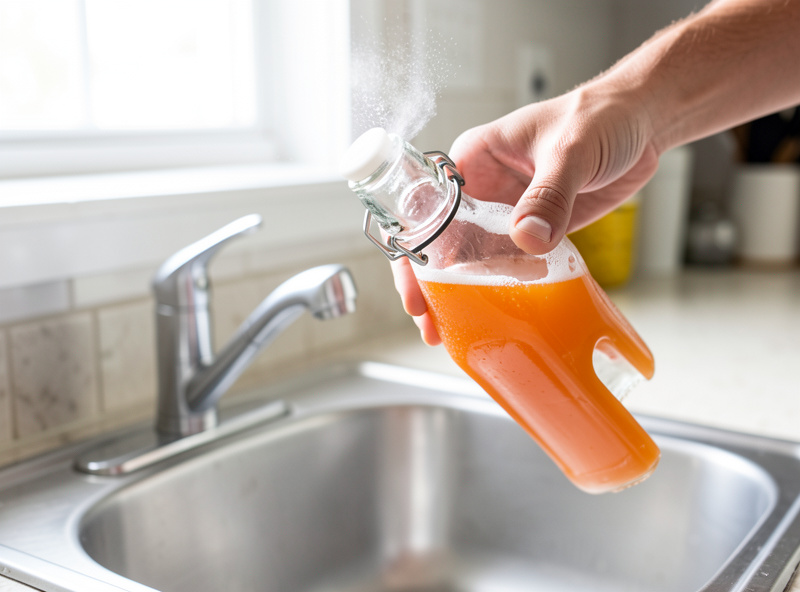
Burping means briefly cracking each bottle’s seal to release excess gas, then re-sealing, and it’s a backup for batches you can’t refrigerate on time. Open the swing-top slowly over a sink until you hear a hiss, let the pressure ease, then close it again before it foams over. For a hot batch or a very sugary soda, burp once a day during F2.
Do it over a sink or a bowl, every time, no exceptions — a bottle that’s further along than you think will foam up the instant the seal breaks, and you want that mess contained. Open the swing-top lever only partway at first; crack it just enough to vent, listen to the hiss taper off, then reseat it. With PET screw caps, a quarter turn to hiss and then re-tighten does the same job. Burping buys you time when life gets in the way of a timely cold-crash, but it’s a patch, not the plan — the plan is to chill the batch when the canary bottle firms up.
One detail that quietly affects safety is headspace — the air gap you leave at the top of each bottle. Fill to about an inch (2–3 cm) below the seal, no higher. That gap gives the CO2 somewhere to collect as pressure builds and leaves room for the foam surge when you open. Fill a bottle to the brim and you get two problems: the liquid gushes the instant you crack the seal because there’s no buffer, and a swing-top with no air gap transmits pressure straight to the seal with no give. I leave a consistent finger-width on every bottle, glass or plastic, and my canary gauge reads more honestly for it because the flex has somewhere to happen.
When Should You Refrigerate — and Does It Really Stop the Fizz?
Refrigerate as soon as the plastic gauge bottle feels rock-hard, typically after 1–3 days at room temperature. Cold doesn’t kill the culture, but below about 40°F (4°C) yeast activity slows to a near-standstill, so pressure stops climbing meaningfully and the carbonation you’ve built stays locked in. Cold-crashing is how you freeze the soda at exactly the fizz level you want.
Give it at least overnight in the fridge before opening, and longer is better — 24 hours lets the CO2 fully settle into solution and takes the edge off the pressure so the bottle opens with a civilized hiss instead of a gush. This is where cold does double duty: it stalls the ferment and it dissolves the headspace gas back into the liquid. A batch I chill for a full day opens clean; the same batch opened straight off the warm counter foams like a shaken can. Once cold, sodas keep for weeks in the fridge, slowly gaining a touch more fizz and dryness. The same cold-crash logic applies across the board, from these sodas to kegged and force-carbonated brews like the ones in my guide to kegging kombucha, which is the tank-driven opposite of bottle-conditioning.
How Do You Open an Over-Carbonated Bottle Without a Mess?
Chill it hard first, then open it slowly over a sink, cracking the seal in stages to vent gas gradually rather than all at once. If a bottle has clearly over-carbonated — bulging plastic, or a swing-top you can hear straining — put it in the fridge for a full day before you even think about opening it. Cold and patience defuse almost any bottle bomb.
I learned the opening technique on a batch of over-carbonated citrus soda early on. It had run two warm days too long, and I cracked one at room temperature to “just check it” — the whole bottle geysered up out of the neck and across the counter before I could reseat the lever, and I lost most of it to the floor. Now an over-carbonated bottle goes cold for 24 hours, gets opened over the sink with a towel over the top, and gets vented in three or four small cracks rather than one. The hiss should taper between each crack. If it doesn’t taper — if it just keeps roaring — reseal, chill longer, and try again. Respect the pressure and it stays a hiss, not a hazard.
The One Rule I Never Break
Never seal a fermented soda and forget it on a warm counter. Every safe bottle-conditioning routine comes down to that single discipline, backed by the plastic-bottle gauge. Bottle in real pressure vessels, keep a PET canary, squeeze it daily, and cold-crash the instant it firms up. Do that and you’ll never sweep glass out of your sink.
Starting today, my advice is to buy one bag of cheap PET soda bottles purely to use as gauges, even if you bottle everything else in glass swing-tops. That one habit converts bottle-conditioning from the intimidating part of home soda-making into the boring, reliable part — which is exactly what you want a pressure vessel to be. The reward is a fridge full of soda that opens with a clean, confident hiss, carbonated by nothing but sugar, a culture, and a little patience.
As an Amazon Associate I earn from qualifying purchases. I keep a few PET soda bottles with caps on hand purely as pressure gauges, and bottle the rest in 16 oz swing-top bottles.
Further Reading
- Fermented Sodas: The Complete Guide to Wild Fizz
- How to Make and Maintain a Ginger Bug Starter
- Ginger Beer Fermentation Guide: Ginger Bug to Bottle
- How to Keg Kombucha and Force-Carbonate with CO2
How long does bottle-conditioning fermented soda take?
Usually 1 to 3 days at room temperature. Warmer kitchens carbonate faster, sometimes in under a day, while cool rooms can take four or five. Do not trust the calendar. Use a clear plastic bottle as a gauge and refrigerate the moment it feels rock-hard.
Can fermented soda bottles actually explode?
Yes. A sealed soda keeps building pressure until the sugar runs out, and a fully carbonated soda reaches roughly 30 to 45 psi. That is enough to fail a jam jar or a mason jar with a flat lid, which can shatter. Always use pressure-rated swing-top or PET bottles.
Why keep a plastic bottle in every batch?
A clear PET bottle acts as a pressure gauge you can feel. Squeeze it daily, and when it goes from soft to rock-hard the whole batch is carbonated and ready to refrigerate. Since you cannot see the pressure inside glass bottles, the plastic one tells you when to stop.
Does refrigerating fermented soda stop the fermentation?
It does not kill the culture, but below about 40 degrees Fahrenheit yeast activity slows to a near standstill, so pressure stops climbing and the fizz stays locked in. Chill for at least a full day before opening so the carbon dioxide settles and the bottle opens gently.
How do I open an over-carbonated bottle without a mess?
Chill it hard for 24 hours first, then open it slowly over a sink, cracking the seal in stages so gas vents gradually. The hiss should taper between cracks. If it keeps roaring, reseal, chill longer, and try again.

About Kenny Nyhus Fadil
A home fermenter documenting brines, bubbles, and the occasional moldy tragedy.