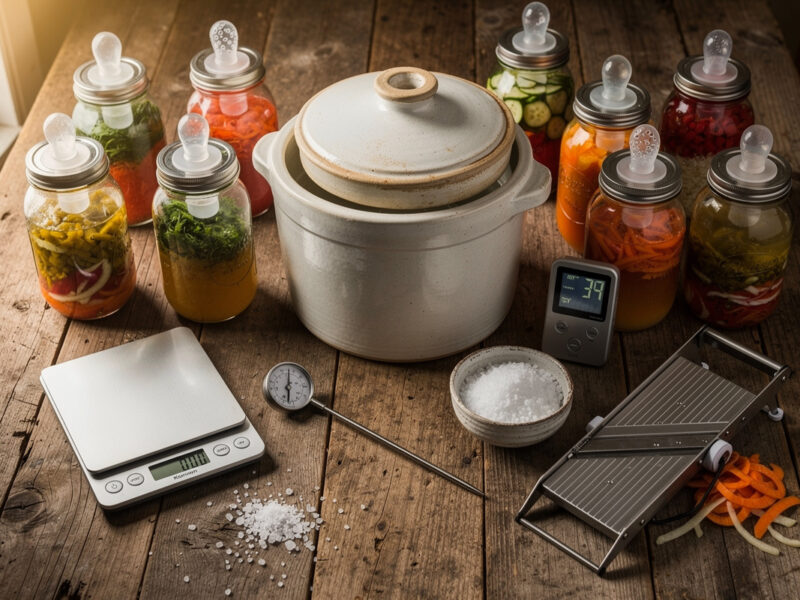
Fermentation Airlock vs Silicone Lid: Which to Use

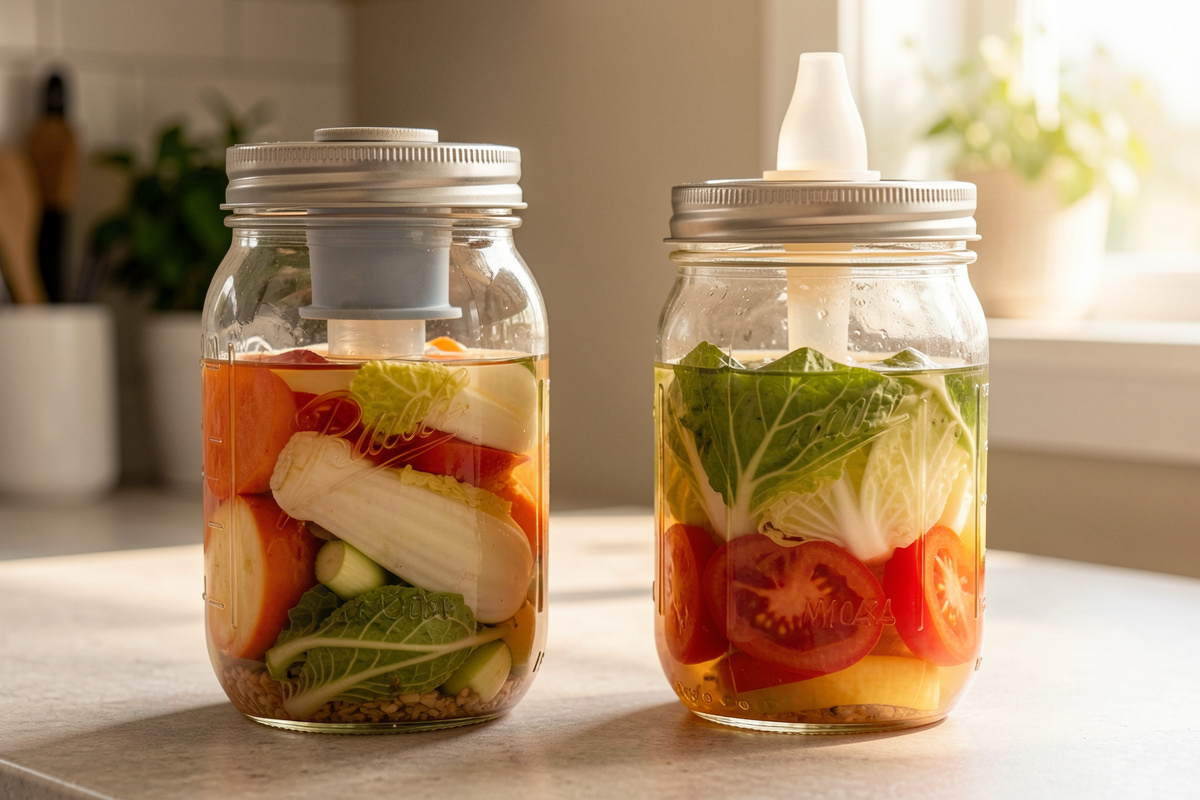
The honest verdict on a fermentation airlock vs a silicone lid: a silicone waterless airlock lid is the easier, mess-free choice for most home batches, while a three-piece water airlock on a drilled lid is the cheaper, more visible option that proves it is venting. Both do the same job — let CO2 escape while keeping oxygen out — and both work. The difference is maintenance, reliability of the seal, and whether you want to see the bubbles.
I run both styles on my jars and have for years, swapping between them depending on the batch. This is the comparison from the bench: how each one actually seals, where each one fails, and which I reach for when. If you are choosing a lid setup for wide-mouth jars, this is the decision in plain terms.
What an Airlock Actually Does
Every fermentation lid is solving one problem: a sealed jar builds CO2 pressure as Lactobacillus works, and that gas has to leave without letting fresh air back in. A one-way vent lets CO2 bubble out while blocking oxygen, which keeps the headspace anaerobic and starves the kahm yeast and mold that need air at the surface. Without a vent, a tightly sealed jar either leaks, pops its lid, or forces you to burp it by hand every day.
Both contenders here are one-way vents. A water airlock uses a small water-filled S-bend or three-piece trap that CO2 bubbles through; a silicone waterless lid uses a slit nipple valve that opens under outward pressure and seals shut against inward suction. The mechanism differs but the goal is identical, and either one keeps a batch anaerobic far more reliably than a hand-burped solid lid.
Silicone Waterless Lids: The Low-Maintenance Default
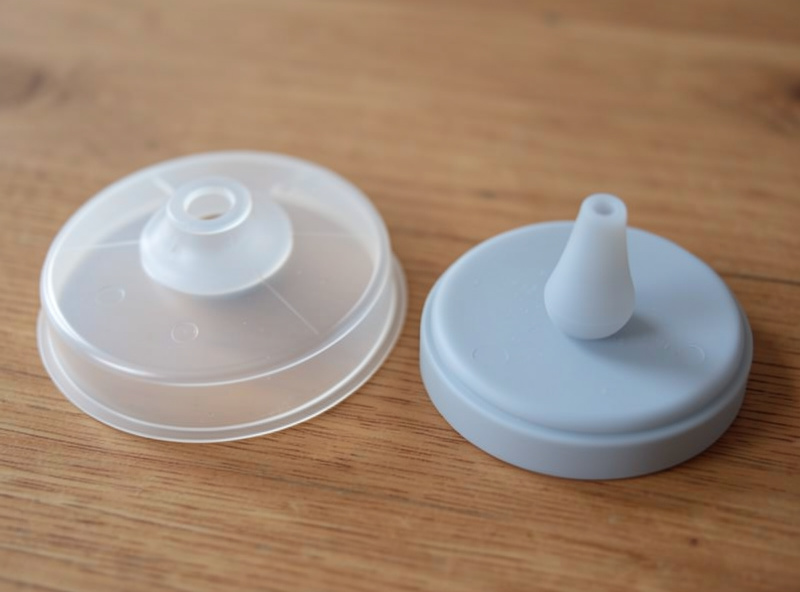
A silicone waterless airlock lid — the nipple-valve style — is the setup I reach for most. It drops onto a wide-mouth jar, needs no water to maintain, vents CO2 through a self-sealing slit, and there is nothing to spill or evaporate. For someone running several jars at once it removes a whole category of fiddling: no water levels to check, no airlock to knock over when you move a jar.
The trade-offs are subtlety and price. A silicone valve does not give you a visible bubble, so you trust that it is working rather than watching it, and a stiff or low-quality valve can occasionally fail to seat and let a little air past. They also cost more than a bag of grommets and plastic airlocks. I keep a set of quality silicone waterless airlock lids for wide-mouth jars and they have outlasted several batches of cheaper ones. Pair them with a weight — the fermentation weights comparison covers which to use.
Water Airlocks: Cheap, Visible, Slightly Fussier
A three-piece water airlock on a drilled-and-grommeted lid is the budget classic, and it has one real advantage the silicone lid cannot match: you can see it work. CO2 bubbles up through the water trap on a rhythm, so the airlock is a live readout of how hard your ferment is going. For a beginner learning what an active ferment looks like, that visible feedback is genuinely useful.
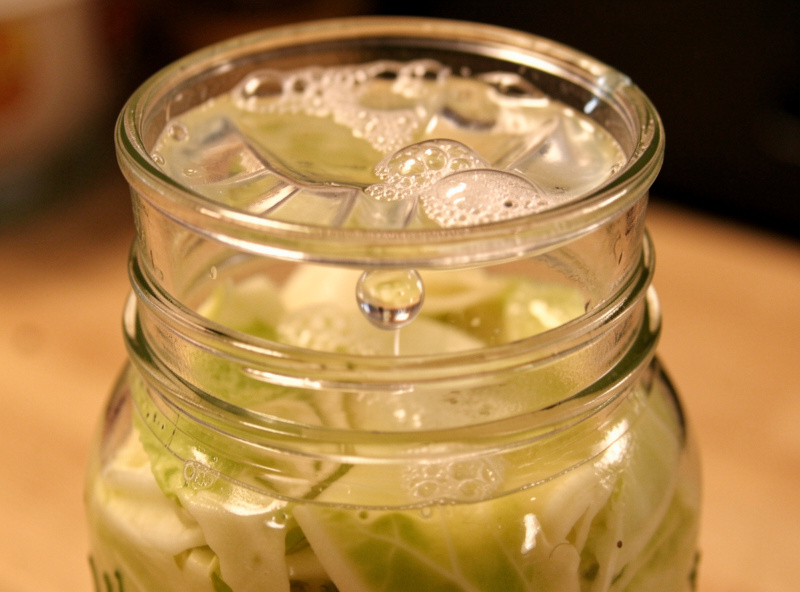
The fussy parts are the water and the seal. The trap water slowly evaporates and must be topped up, especially on a long or warm ferment; if it dries out, the seal is gone and air walks in. The grommet around the airlock has to seat tightly in the drilled lid or it leaks. And a knocked-over jar can siphon airlock water down into the ferment — harmless but annoying. I run a three-piece airlock and grommet lid set on batches I want to watch closely, especially anything new where the bubble rhythm tells me the ferment took off.
Head to Head: Which Seals Better?
In practice both seal well enough to keep a batch safely anaerobic, and I have pulled clean kraut from each. The silicone lid wins on convenience and on surviving being moved; the water airlock wins on visible feedback and lower cost. Neither replaces a weight — the lid manages gas, but keeping the vegetables physically under the brine is the weight’s job, and that is what actually stops surface kahm and mold.
One subtler difference shows up on long ferments. A water airlock loses trap water steadily over three or four weeks at room temperature, so a month-long batch needs at least one top-up to keep its seal, while a silicone valve simply sits there sealing the whole time with nothing to maintain. On the flip side, a silicone valve under a very vigorous early ferment can chatter or weep a little brine if the jar is overfilled — the fix is the same headspace discipline you would use anyway, leaving a few centimetres above the brine line so the foam and gas have somewhere to go before they reach the lid.
| Feature | Silicone Waterless Lid | Water Airlock |
|---|---|---|
| Maintenance | None | Top up trap water |
| Visible bubbling | No | Yes |
| Spill risk if moved | None | Can siphon water in |
| Cost | Higher | Lower |
| Failure mode | Stiff valve not seating | Trap dries out, grommet leaks |
| Best for | Many jars, set and forget | Beginners, watching the ferment |
Which I Use and When
My rule: silicone lids for the everyday jars I run in volume and do not want to babysit, water airlocks for any batch I am dialing in or teaching from, where the visible bubble rhythm is worth the small maintenance. If you are buying one type to start, the silicone waterless lid is the lower-frustration choice and forgives being moved around a busy kitchen. If you want to learn what a healthy ferment looks like and spend the least money, the water airlock teaches you more.
Whichever you choose, remember the lid is only half the system. A vent without a weight still lets vegetables float up into the air and grow kahm; a weight without a vent still builds pressure. Run them together and either airlock style will carry a clean ferment to the finish.
Some links above are Amazon affiliate links; if you buy through them I may earn a small commission at no extra cost to you. I only point to gear I actually use on my own jars.
Frequently Asked Questions
Do I need an airlock to ferment vegetables?
Not strictly, but it removes daily burping. A sealed jar builds CO2 pressure as it ferments and will leak or pop without a vent. An airlock or silicone waterless lid lets that gas out one way while keeping oxygen out, which also suppresses surface kahm yeast.
Is a silicone lid or a water airlock better?
A silicone waterless lid is lower maintenance and survives being moved, which makes it the easier default. A water airlock is cheaper and shows visible bubbling, which is useful for beginners learning what an active ferment looks like. Both seal well enough to keep a batch safely anaerobic.
Why does my water airlock stop bubbling?
Usually the ferment slowed as it finished, the trap water evaporated, or the grommet seal loosened. Check that the trap still holds water and the airlock seats tightly. A quiet airlock late in a ferment is normal; an early stall can mean the seal is leaking air.
Can a silicone fermentation lid fail?
Yes, occasionally. A stiff or low-quality silicone valve may not seat fully and can let a little air past, which raises kahm risk. Buying quality lids and replacing them when the valve hardens keeps the one-way seal reliable across batches.
Does an airlock replace a fermentation weight?
No. An airlock manages gas pressure at the top of the jar, but keeping the vegetables physically submerged under the brine is the weight’s job. You need both: the weight holds food below the surface and the airlock vents CO2 while excluding oxygen.
Keep Building
- Fermentation Equipment: The Complete Home Brewer Toolkit
- Fermentation Weights: Glass vs Ceramic vs Ziplock Bag Compared
- Crock vs Jar vs Vacuum Bag: Which Fermentation Vessel Wins
- Kahm Yeast: What It Is, How to Prevent It, When It Is Safe

About Kenny Nyhus Fadil
A home fermenter documenting brines, bubbles, and the occasional moldy tragedy.
Keep Bubbling
Fermentation Weights: Glass vs Ceramic vs Ziplock Bag Compared
Fermentation Equipment: The Complete Home Brewer Toolkit