How to Lacto-Ferment Garlic: Honey vs Brine Methods

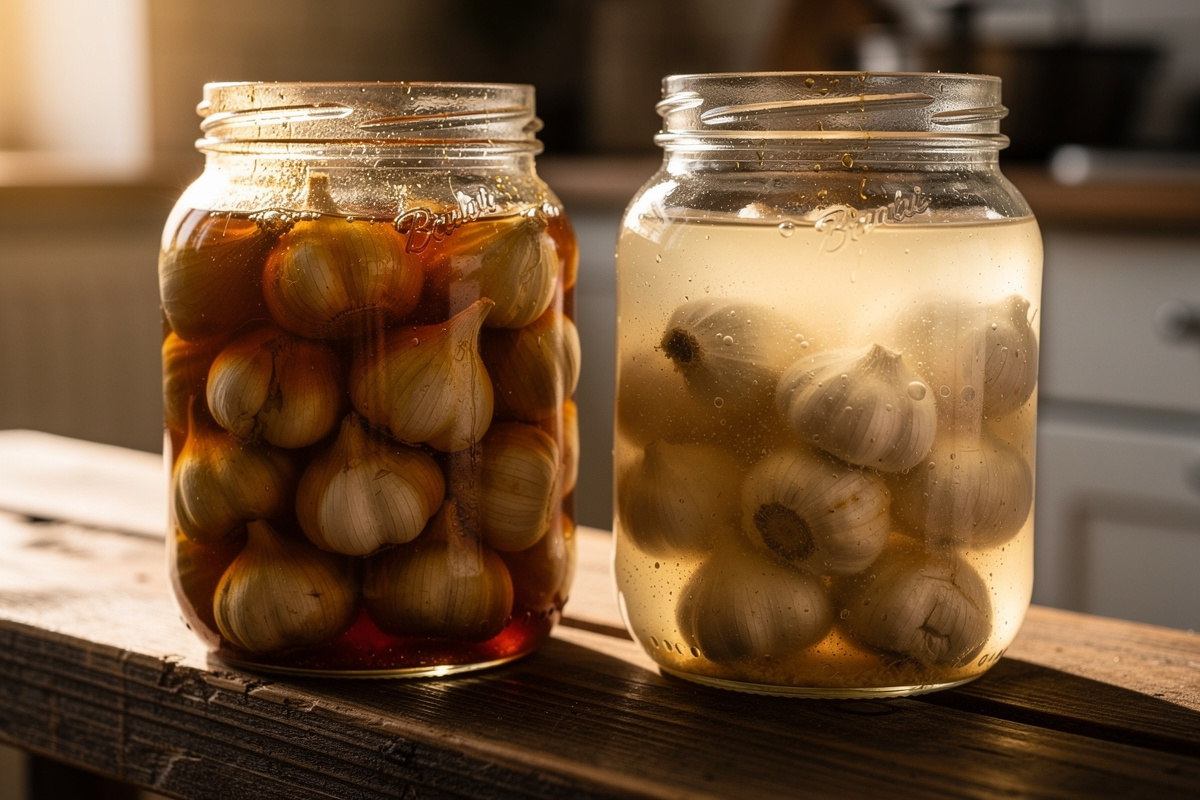
Lacto-ferment garlic using either raw honey (4-8 weeks, sweet-savory caramel flavor) or 3-5% salt brine (2-4 weeks, tangy pickle-like crunch). Both methods produce shelf-stable products lasting 6-12 months with dramatically different end results.
Lacto-garlic is one of six vegetables I always have fermenting; salt percentages, equipment, and the weekly rotation cadence are in my lacto fermentation guide.
I keep three jars of honey-fermented garlic running at all times — one actively fermenting, one aging in the fridge, and one that I am actively using in cooking and marinades throughout the week. Honey-fermented garlic was the project that made me understand why people dedicate entire pantry shelves to fermentation. The first time I tasted a four-week-old clove — caramelized sweetness from the honey balanced against mellow garlic depth — I immediately started a second jar with a different honey varietal.
Garlic is the easiest single-ingredient lacto-fermentation project. If you grow your own garlic, read our guide on garden-to-jar fermenting what you grow for timing the harvest-to-jar window. The peeled cloves contain natural sugars that feed fermentation, the high allicin content provides natural antimicrobial protection, and the resulting product is genuinely useful in everyday cooking. Both honey and brine methods produce dramatically different end products from the same starting ingredients — comparing them reveals how much fermentation medium changes the final result.
Method 1: Honey-Fermented Garlic
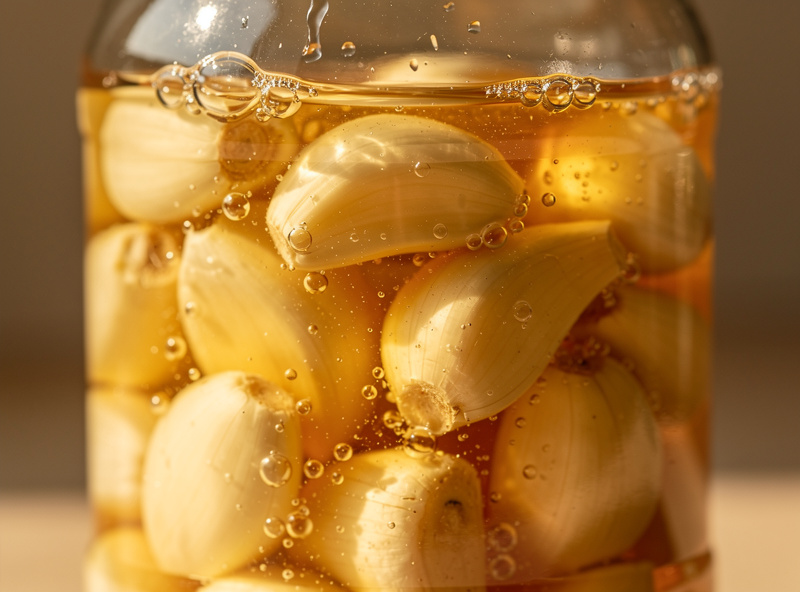
Honey-fermented garlic is made by submerging peeled garlic cloves in raw unfiltered honey, sealing the jar loosely (to vent gases), and storing at room temperature for 4-8 weeks. The garlic releases water that thins the honey and provides the moisture needed for slow fermentation. The result is mellow caramel-flavored garlic cloves and a flavorful honey-garlic syrup useful for cooking, marinades, and home remedies.
Honey method procedure:
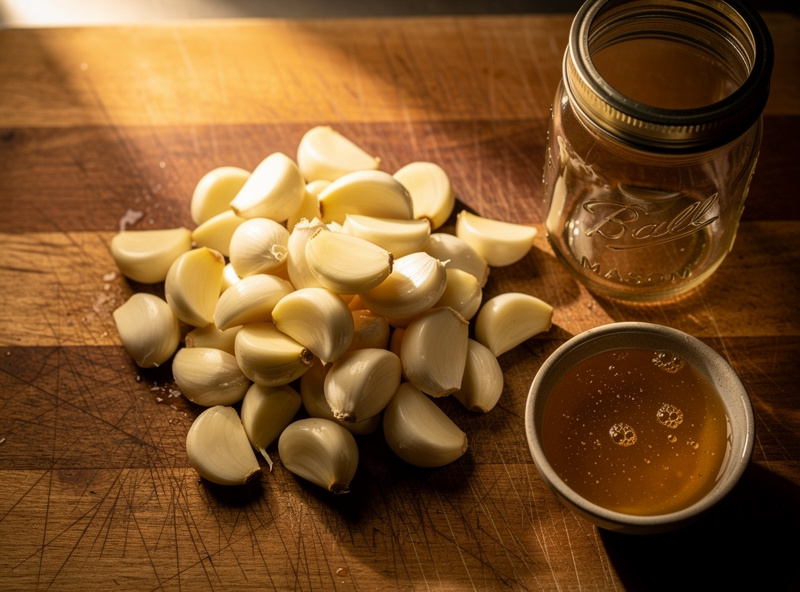
- Peel 1 cup of fresh garlic cloves: About 6-8 heads. Remove papery skins; leave cloves whole.
- Pack into a clean glass jar: Pint or quart mason jar. Leave 1 inch headspace.
- Cover completely with raw unfiltered honey: Pour over until cloves are fully submerged. Use raw honey specifically; pasteurized honey lacks the natural cultures that drive fermentation.
- Loose lid (not sealed): CO2 builds up during fermentation. A loosely-tightened standard mason jar lid works.
- Store at room temperature: 65-75°F. Out of direct sunlight.
- Flip the jar daily: First 1-2 weeks. The cloves release water that initially floats; flipping ensures even coverage.
- Watch for changes: Honey thins and becomes more liquid; bubbles appear; garlic darkens.
- Wait 4-8 weeks: Minimum 4 weeks for fermentation; 6-8 weeks produces deeper flavor.
- Test by smell and taste: Should smell mild and sweet, not sulfurous or alcoholic. Cloves should taste mellow and slightly sweet.
- Move to refrigerator after fermentation: Slows further changes; keeps for 6-12 months.
As an Amazon Associate I earn from qualifying purchases.
Honey-fermented garlic is one of the most-prized DIY pantry staples — the deep caramel flavor and tender texture work in dozens of dishes. Use the cloves whole on toast, chopped into pasta, blended into salad dressings; use the syrup as a glaze for roasted meat or vegetables.
Method 2: Brine-Fermented Garlic
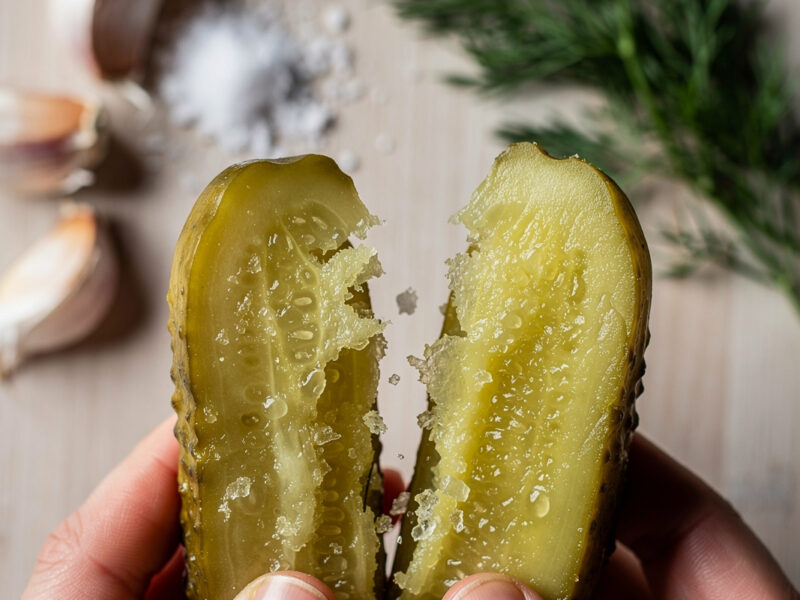
Brine-fermented garlic uses a 3-5% saltwater solution to lacto-ferment peeled cloves at room temperature for 2-4 weeks. The cloves stay crunchy throughout fermentation, develop a tangy pickle-like flavor, and produce excellent eating-cloves for charcuterie boards, salads, or as a snack alongside cheese. Faster fermentation than honey method but different end product.
The brine method follows the same principles as larger pickle projects — read about chamber setups in our fermented pickle brining and curing chamber guide.
Brine method procedure:
- Peel 1 cup of fresh garlic cloves: Same starting amount as honey method.
- Make 3% brine: 3g salt per 100ml water. For typical jar: 1 cup water (about 236ml) + roughly 1¼ teaspoons salt (about 7g) — not a full tablespoon, which would push the brine closer to 7-8%. Adjust salt for taste preference within the 3-5% range.
- Pack cloves into a clean glass jar: Pint or quart. Leave 1 inch headspace.
- Pour brine over cloves: Until fully submerged. Add a fermentation weight to keep cloves below the surface.
- Cover with airlock or loose lid: Allows CO2 escape; prevents oxygen ingress.
- Store at 65-72°F: Out of direct sunlight.
- Watch for fermentation activity: Bubbling visible within 2-3 days; cloves may develop slight blue or green color (normal — not contamination).
- Skim any white film: Kahm yeast can develop; harmless but reduces flavor quality.
- Wait 2-4 weeks: 2 weeks for mild flavor; 4 weeks for fully developed pickle character.
- Refrigerate after fermentation: Stops continued fermentation; keeps for 6-9 months.
The blue-green color change is unique to garlic fermentation — caused by allicin reacting with trace amino acids and copper ions. Looks alarming but is harmless and disappears in cooked applications. Read about specific food-safety in our sauerkraut mold vs kahm yeast guide.
Comparison Table: Honey vs Brine vs Other Methods
| Method | Time | Flavor Profile | Best For |
|---|---|---|---|
| Honey-fermented | 4-8 weeks | Sweet-savory, caramel | Cooking ingredient, glazes, home remedies |
| Brine-fermented (3-5%) | 2-4 weeks | Tangy, pickle-like, crunchy | Snacking, salads, charcuterie |
| Vinegar pickle (no fermentation) | 1-2 days | Sharp, vinegar-forward | Quick pickles, less complex flavor |
| Black garlic (heat-cured) | 3-4 weeks at 140°F | Sweet, balsamic | Premium cooking ingredient |
| Confit (oil) | 1-2 hours sous-vide | Mellow, oil-soft | Spreading, finishing oils |
For first-time fermenters, the brine method is simpler and faster — a 2-week project with reliable results. Honey method is more rewarding but requires more patience and uses more expensive ingredients (raw honey).
Common Mistakes
Five mistakes show up in beginner garlic ferments: pasteurized honey instead of raw (no live cultures, fermentation stalls), too-tight jar lids (CO2 builds up dangerously), skipping daily flips for honey method (uneven fermentation), exposed cloves above brine (mold), and storing in direct sunlight (UV degrades cultures).

Mistakes and corrections:
- Pasteurized honey: Lacks live cultures. Use raw unfiltered honey only; check label specifically.
- Sealed-tight jars: CO2 cannot escape; pressure builds and can crack glass. Always loose lid or airlock.
- Not flipping the honey jar: Cloves on top stay drier than those at bottom; uneven fermentation. Flip daily for first 1-2 weeks.
- Forgetting to burp the honey jar: CO2 builds up and can crack glass or spray honey when eventually opened. I once forgot to flip a jar for four days — when I twisted the lid, honey syrup shot across my kitchen ceiling. Always loose lid or daily burp.
- Cloves floating above brine: Surface mold develops. Use weights to keep submerged.
- Direct sunlight storage: UV light damages fermentation cultures. Store in dark cabinet or covered area.
- Using already-peeled garlic from grocery: Pre-peeled garlic is often treated with preservatives that prevent fermentation. Peel fresh from heads.
- Adding to a low-quality honey: The fermented product reflects the source honey quality. Local raw honey produces best results.
- Worrying about blue-green color: Garlic naturally turns blue-green in fermentation; harmless and disappears when cooked.
Garlic-in-oil preparations at room temperature carry a real, documented botulism risk — a 1989 outbreak traced to a garlic-in-oil product tested at pH 5.7 and found to contain high concentrations of C. botulinum organisms and toxin, which pushed the FDA to require acidification in all commercial garlic-in-oil products starting in 1991 (PMC case report, garlic-in-oil-associated botulism, content-verified). Fermented garlic in brine or honey is fundamentally different: lactic acid drops the ferment’s pH below 4.6 — the threshold below which C. botulinum cannot grow or produce toxin (FDA Bad Bug Book, C. botulinum chapter: “almost any type of food that is not very acidic (pH above 4.6) can support growth and toxin production”) — typically within the first one to two weeks of active fermentation. This is why lacto-fermented garlic is safe at room temperature while oil-preserved raw garlic is not.
The reliable practice is to start with the brine method first (faster, less expensive) before tackling honey method (longer, requires good honey investment). After 2 successful brine batches, the honey method follows the same principles with longer timing.
Conclusion
Start with the brine method for your first garlic ferment — it costs less than $3 in ingredients, completes in 2-3 weeks, and teaches you to read fermentation activity without the honey variable. Once you have tasted brine-fermented garlic and trust the process, invest in a jar of local raw honey for the honey method. Most experienced fermenters eventually run both methods in parallel because the end products serve completely different kitchen roles.
Frequently Asked Questions
Why does my fermented garlic turn blue or green?
Allicin in garlic reacts with trace amino acids and copper ions to produce blue-green pigments during fermentation. Completely harmless and a sign of active fermentation. The color disappears when garlic is cooked, leaving the normal off-white appearance.
Can I use pre-peeled garlic for fermentation?
Not recommended. Pre-peeled garlic is often treated with preservatives like sulfites that prevent fermentation. Always peel fresh garlic from whole heads. The peeling effort is small (10-15 minutes for a pint jar) and the results are dramatically better.
How long does honey-fermented garlic last?
6-12 months in the refrigerator after the initial fermentation. The honey continues to mellow and the garlic continues to caramelize, both improving rather than degrading the final product. Some honey-garlic ferments are aged 2+ years for maximum flavor depth.
Is fermented garlic good for you?
I approach fermented garlic as a flavor and preservation project, not a health treatment, and I don’t make medical claims about it either way. What’s factually true is that fermentation is a food-safety-driven preservation method: the acid and salt (or honey’s low water activity) create an environment that suppresses spoilage organisms, which is why it keeps for months. The flavor transformation, not any health outcome, is the reason I keep making it.
What kind of honey works for fermenting garlic?
Raw unfiltered honey is essential. Pasteurized honey lacks the live cultures needed for fermentation. Local raw honey from beekeepers produces the best results. Avoid ‘organic’ honey from large brands — many are still pasteurized despite the label.
Can fermented garlic go bad?
Yes. Signs of failed fermentation: alcoholic smell (over-fermented), sour or rancid smell (contamination), surface mold (real mold, not the harmless blue-green color change), or slimy texture (bacterial wet spot). Discard if any of these appear; otherwise the ferment is safe even if appearance changes.
Related Articles
- Lacto-Fermented Pickles That Stay Crunchy
- Why Did My Sauerkraut Turn Mushy?
- Sauerkraut Mold vs Kahm Yeast
- Kahm Yeast Guide
- Fermentation Weights Compared

About Kenny Nyhus Fadil
A home fermenter documenting brines, bubbles, and the occasional moldy tragedy.
Keep Bubbling
Fermented Carrots Recipe with Ginger (Crunchy + Tangy)

How to Keep Fermented Vegetables Crunchy: Texture Science