Fermenting Alcohol at Home: A Complete Guide to Beverage Ferments

Fermenting alcohol at home is just controlled yeast respiration: feed Saccharomyces sugar in a clean, oxygen-free vessel and it converts that sugar to ethanol and CO2. The single number that governs everything is sugar concentration — roughly 17 grams of sugar per litre yields about 1% ABV, so a juice at 1.050 specific gravity ferments out to about 6.5% alcohol. Get the sugar, the sanitation, and the temperature right and the rest is patience.
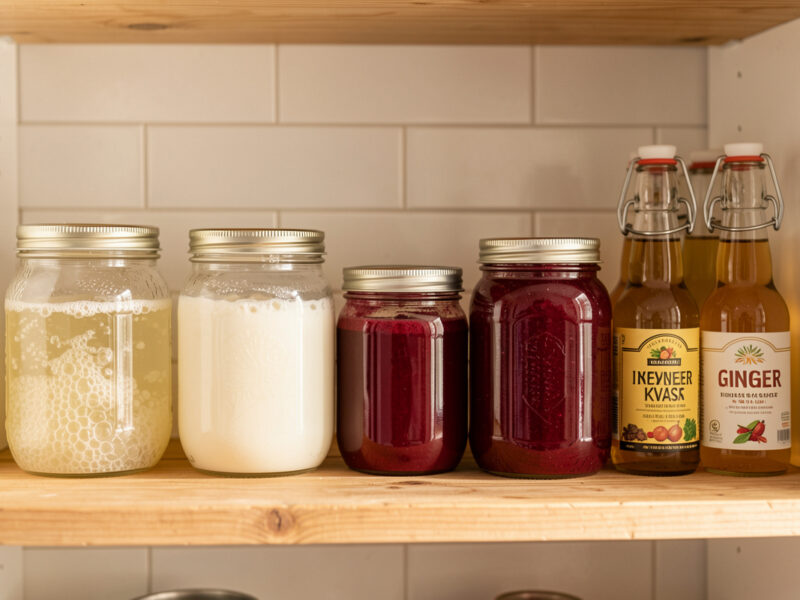
I came into beverage fermentation sideways. For years my bench was lacto-vegetables, kombucha, and vinegar — wild-ish, open-ish, Lactobacillus and Acetobacter doing the work. Alcohol is the same family of patience with a different organism and a tighter need for anaerobic conditions. Once I built a hard-kombucha rig — a hydrometer, a sachet of EC-1118 champagne yeast, an airlocked vessel, and eventually a Cornelius keg to carbonate the output — the door to cider, wine, mead, and the low-alcohol folk drinks swung wide open. This is the hub guide that ties all of it together. Every spoke below goes deeper on one beverage; this page is the map and the shared science.
What “Fermenting Alcohol” Actually Means
Alcoholic fermentation is anaerobic. Yeast consumes simple sugars — glucose, fructose, sucrose once it is split — and excretes ethanol and carbon dioxide. That is the whole reaction. Everything you read about cider, wine, mead, tepache, and kvass is a variation on managing three inputs: how much sugar is in the must, which yeast eats it, and at what temperature. On my bench the dial I trust is the hydrometer, because sugar is invisible and weight is not.
Two broad camps exist. Wild ferments rely on yeast already present on fruit skins and in the air — this is how traditional tepache and farmhouse cider start. Pitched ferments use a measured dose of a known strain, which is how I run anything I want to be repeatable. Wild is romantic and gives you surprises; pitched gives you a beverage that tastes the same in March and October. Most beginners are happier pitching a clean wine or champagne yeast and saving wild experiments for when a failure costs nothing.
The Measurement Bench: Hydrometer, pH, and the Numbers That Matter
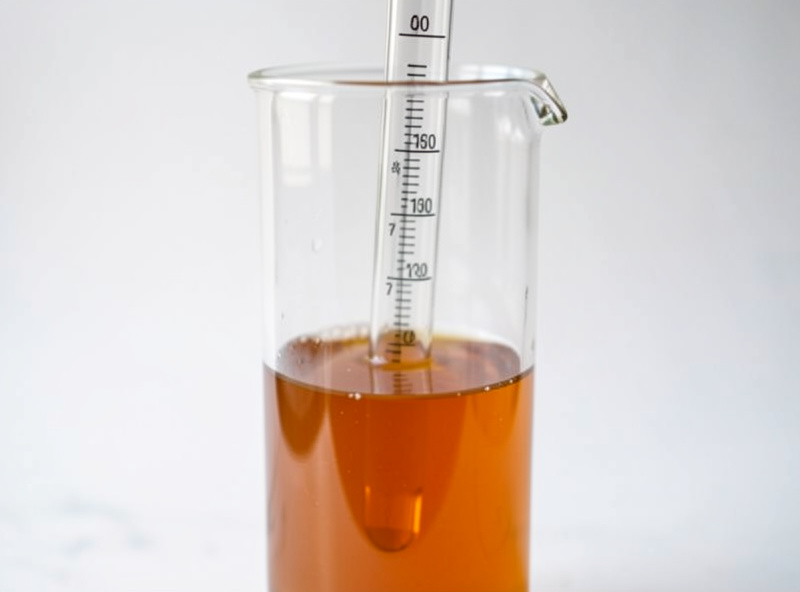
This is where a fermentation site that respects numbers separates from folklore. A hydrometer measures specific gravity — the density of your liquid relative to water (1.000). Sugar is denser than water, so a sweet juice reads high (1.045–1.090) and a fully fermented dry beverage reads near or below 1.000. The gap between your original gravity (OG) and final gravity (FG) is your alcohol. The working formula I use is ABV ≈ (OG − FG) × 131.25. A cider that starts at 1.050 and finishes at 1.000 is (0.050 × 131.25) = about 6.6% ABV.
pH matters less for safety in alcohol than it does in my lacto crocks — ethanol plus the natural acidity of fruit keeps these beverages well below the pH 4.6 pathogen floor that governs canning. But pH still shapes flavour and yeast health. Most fruit musts sit between pH 3.0 and 3.8, which is exactly where wine yeast is happy and spoilage bacteria are not. A refractometer reads sugar from a single drop and is faster than a hydrometer for spot checks, though I always confirm finished ABV with a hydrometer because alcohol throws off refractometer readings. Across the batches I have run, the hydrometer and a 0.1 g scale are the two tools that turn “it tastes done” into “it is 6.2% and stable.”
| Beverage | Typical OG | Approx. ABV | Base sugar source | Beginner difficulty | Time to drink |
|---|---|---|---|---|---|
| Hard cider | 1.045–1.060 | 5.5–8% | Apple juice | Easy | 3–6 weeks |
| Country / fruit wine | 1.075–1.095 | 10–13% | Fruit + added sugar | Moderate | 2–6 months |
| Grape wine (beginner) | 1.080–1.090 | 11–13% | Grape juice / kit | Moderate | 2–4 months |
| Mead | 1.090–1.120 | 10–16% | Honey | Easy start, long wait | 2–12 months |
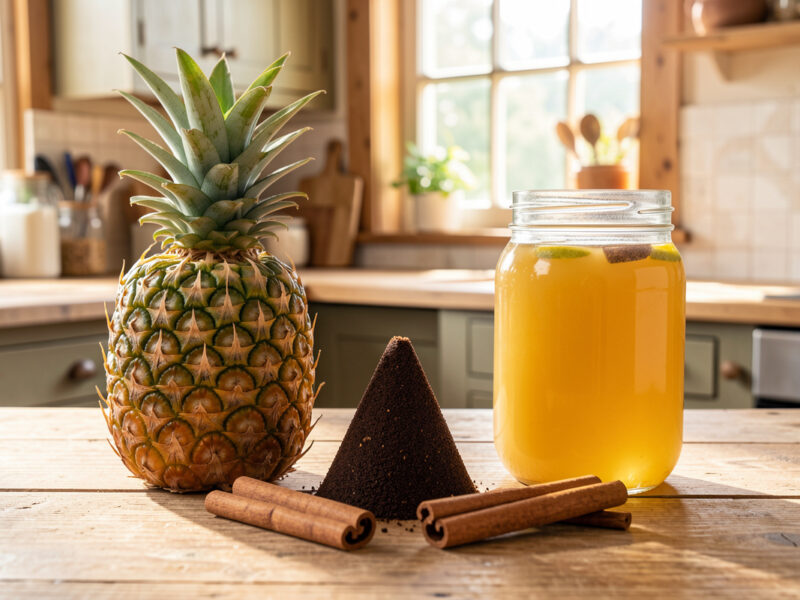
| Tepache | 1.030–1.040 | 1–3% | Pineapple + piloncillo | Very easy | 2–4 days |
| Bread kvass | 1.020–1.035 | 0.5–2% | Rye bread sugars | Very easy | 2–4 days |
Yeast: The One Decision That Shapes the Whole Batch
Yeast strain sets your ceiling. EC-1118 (a Lalvin champagne strain) is the workhorse I reach for first because it tolerates alcohol up to ~18%, ferments clean and fast, and restarts a stuck batch when nothing else will. It ferments bone-dry, which is exactly what you want for cider and most wines, and exactly what you do not want if you crave residual sweetness. For meads and dessert wines where I want body left behind, a strain like 71B or a sweet-mead yeast that quits around 14% is friendlier. Baker’s yeast technically works for tepache and kvass but throws a bready, rough flavour I avoid in anything I plan to keep.
The other reason to pitch a known strain is speed of dominance. A vigorous yeast colony lowers pH and raises alcohol fast enough to outcompete the spoilage organisms that ruin a wild batch. This is the same logic as back-slopping a chili mash — establish your organism’s dominance early and the off-flavours never get a foothold. If you are choosing one packet to start, make it EC-1118; it is the closest thing to a universal beverage yeast on my shelf.
Sanitation: The Real Risk in Alcohol Ferments
Here is the food-safety reality, stated plainly because vagueness here is unacceptable. Alcoholic beverages made from fruit, honey, or grain are remarkably safe from a pathogen standpoint — the combination of low pH (usually 3.0–3.8), the alcohol itself, and an anaerobic environment is hostile to Clostridium botulinum and to foodborne pathogens. Botulism is a risk in low-acid, anaerobic, non-alcoholic environments; a fermenting cider is acidic and alcoholic, which is why home brewing has a centuries-long safety record.
The real enemy is not poison, it is spoilage: wild bacteria and rogue yeast that turn your batch to vinegar or off-flavours. That is why sanitation, not sterilisation, is the discipline. I sanitise every surface the cooled must touches with a no-rinse acid sanitiser, keep the ferment under an airlock so CO2 blankets the surface, and never let warm wort sit open. One more myth worth killing: home fruit fermentation does not produce dangerous methanol. The trace methanol from pectin is far below any harmful level — methanol scares belong to improper distillation, which is a different (and in many places illegal) activity I do not cover.
Vessels, Airlocks, and Headspace
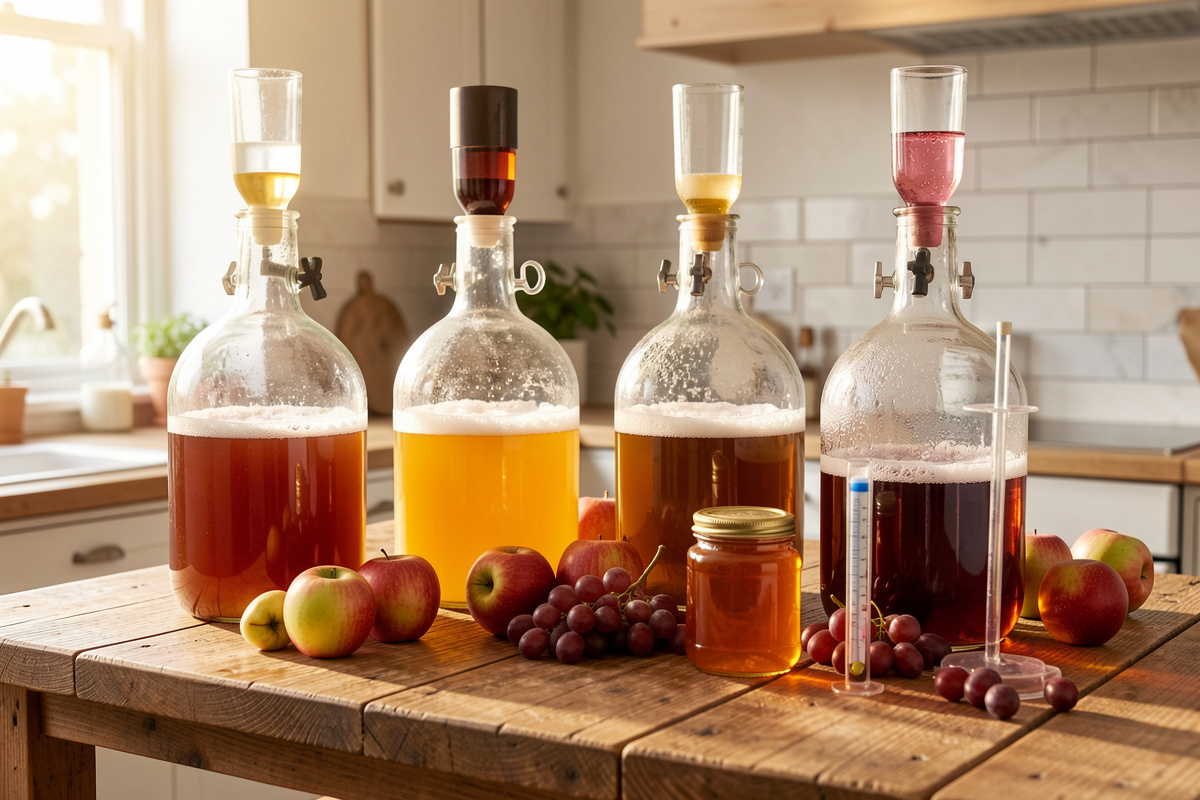
Alcohol ferments need the same anaerobic control as my lacto crocks, just tuned for a longer, more vigorous primary. My beginner rig is a food-grade bucket or a wide-mouth gallon jar for primary fermentation (where the foam and vigour live), then a racking into a glass carboy or jug fitted with a three-piece water airlock for the slower secondary. The airlock lets CO2 escape while blocking oxygen and fruit flies — the exact same waterless-airlock principle as the silicone Pickle-Pipe lids on my kraut jars, scaled up.
Headspace is the variable people get wrong. During primary, leave 25–30% headspace because the krausen (yeast foam) can erupt through a too-full vessel — I have cleaned cider off a ceiling once and never again. During secondary and aging, do the opposite: top up to minimise air contact, because oxygen at this stage oxidises and invites Acetobacter to start making vinegar. Useful when you want vinegar, ruinous when you want cider. Speaking of which, a finished cider deliberately left open with a mother is exactly how I make apple cider vinegar — same chemistry, opposite intent.
Temperature: The Hidden Throttle
Temperature controls fermentation speed and flavour cleanliness. Most beverage yeasts run well at 18–22°C (64–72°F). Warmer than that and you ferment fast but throw fusel alcohols and harsh esters — the “hot,” solvent notes of a rushed batch. Cooler and the yeast slows, sometimes stalls, but rewards you with crisper, cleaner flavour, which is why commercial cider and white wine often ferment cool. In my Swedish kitchen the ambient temperature does a lot of the work for free in winter; in summer I move carboys to the coolest cupboard. A stuck ferment is almost always too cold, too low on nutrient, or finished — check gravity before you panic.
Carbonation and Bottling: Still vs Sparkling
A beverage that has fermented dry is “still” — flat. To make it sparkling you have two routes. Bottle conditioning adds a measured dose of priming sugar at bottling so a tiny secondary fermentation traps CO2 in the bottle. The number matters for safety: too much priming sugar makes bottle bombs. I prime cider at roughly 6–8 g of sugar per litre for a gentle sparkle, always in pressure-rated bottles, never in random screw-top glass. The cleaner, more controllable route is force carbonation — I push my continuous-brew kombucha and the occasional cider into a Cornelius keg and carbonate from a CO2 tank through a dual-gauge regulator, which removes the bottle-bomb risk entirely and lets me dial the fizz exactly.
For still beverages — most wines and meads — you simply rack off the sediment (the lees), bottle, and age. Patience past the point of “drinkable” is where mead in particular transforms; a harsh young mead at two months can be silk at a year.
Choosing Your First Beverage Ferment
If you want a fast, near-guaranteed win, start with tepache or bread kvass — both are low-alcohol, ready in days, and forgiving of mistakes. If you want a real beverage with minimal equipment, hard cider is the best on-ramp: buy preservative-free apple juice, pitch yeast, fit an airlock, wait. From there, beginner wine making and the broader fruit wine method open up everything from a kitchen of berries, and mead teaches patience like nothing else. Each linked guide carries the full recipe, gravity targets, and troubleshooting; this hub is the shared foundation they all stand on.
How These Beverage Ferments Connect to the Rest of the Foundry
The same patience that watches a starter rise watches a salami lose weight watches a carboy bubble down to dry — fermentation is the meta-skill under half the hobbies I run. A cider left open with a mother becomes vinegar; a kombucha pushed anaerobic with champagne yeast becomes hard kombucha; the Lactobacillus dropping pH in my kraut crock is the same acid logic that keeps a wine must safe. If you are building a beverage bench, the core equipment guide and the broader fermented drinks overview are good companions, and the kombucha guide shows where the alcoholic and non-alcoholic drink worlds overlap.
The Two-Stage Process: Primary and Secondary
Almost every beverage in this hub follows the same two-stage arc, and understanding it removes most beginner confusion. Primary fermentation is the loud, fast, foamy stage — the first 3 to 10 days when the yeast population explodes and converts the bulk of the sugar. Gravity drops quickly, the airlock bubbles hard, and a krausen cap forms. This is where 80% of your alcohol is made. I run primary warm-ish (20–22°C) to get a clean, vigorous start and a fast pH drop that locks out spoilage.
Secondary fermentation is the quiet stage. I rack the beverage — siphon it off the thick yeast sediment (the lees) into a clean carboy — fit an airlock, and let it finish slowly over weeks. The yeast cleans up harsh compounds it made during the rush, the liquid clears as particles settle, and flavour rounds out. Racking off the lees matters because dead yeast left too long can throw a sulphury, rubbery off-flavour called autolysis. For a cider I might rack once; for a wine or mead I rack two or three times across months, each time leaving more sediment behind and getting a clearer, cleaner glass. The discipline here is the same patience that watches a sourdough starter wake up — you are not doing much, you are letting biology finish on its own clock.
Yeast Nutrient and Why Mead Is Different
Yeast does not live on sugar alone — it needs nitrogen, vitamins, and minerals to build healthy cells. Fruit juices and grape must usually carry enough of these naturally, which is why cider and wine rarely stall for lack of nutrient. Honey is the exception, and it is the single biggest reason beginner meads ferment slowly, smell of rotten eggs, or stall outright. Honey is almost pure sugar with very little nitrogen, so a mead must needs added yeast nutrient, ideally staggered in across the first few days rather than dumped in at once. This is covered in detail in the mead guide, but the principle applies network-wide: a healthy, well-fed yeast colony makes clean alcohol, and a starving one makes off-flavours.
The same logic explains why tepache and kvass ferment so easily — they are wild, low-gravity, fast ferments where you are not pushing the yeast to its alcohol limit, so nutrient deficiency never becomes the bottleneck. The harder you push toward high ABV, the more the yeast’s health becomes your limiting factor. On my bench, a teaspoon of nutrient and a little patience has rescued more stalled meads than any other intervention.
Reading Off-Flavours: A Troubleshooting Field Guide
Beverage ferments tell you what went wrong if you learn to read them. A rotten-egg or sulphur smell means stressed yeast, usually from low nutrient (classic in mead) — it often blows off on its own, and a good nutrient regime prevents it. A solvent or nail-polish note means fusel alcohols from fermenting too warm; ferment cooler next time. A vinegar smell means oxygen got in and Acetobacter started working — your batch is heading toward vinegar, which I embrace for an intentional vinegar and prevent everywhere else with tight airlocks and minimal headspace.
A flat, cardboard staleness is oxidation from too much air contact during aging. A thin white film on the surface is usually kahm yeast — harmless, the same film I skim off my lacto crocks — while a fuzzy, raised, coloured growth is true mold and means the batch goes in the bin. That kahm-versus-mold distinction is the same call I make on every open ferment in the house: flat white film, skim and carry on; fuzzy and coloured, toss it. None of these are mysteries once you connect the smell or sight to its cause, and almost all of them trace back to the same three levers — sanitation, temperature, and yeast health.
A Repeatable First Batch, Start to Finish
Here is the exact shape of a first batch I would hand any beginner, using cider because it is the most forgiving. Buy one gallon of preservative-free apple juice (no potassium sorbate or sodium benzoate, which inhibit yeast — this is the most common beginner mistake). Pour off a cup to make headspace, take a hydrometer reading (you want around 1.050), and sprinkle in half a packet of EC-1118. Fit a sanitised airlock. Within 24–48 hours it bubbles; leave it at 18–22°C for about two weeks until the airlock slows to one bubble every minute or two and the gravity reads near 1.000.
Rack it carefully off the lees into a clean jug, top up to reduce headspace, and let it clear for another week or two. Take a final gravity reading, calculate your ABV with the (OG − FG) × 131.25 formula, then bottle — still, or with 6–8 g/litre of priming sugar in pressure-rated bottles for a sparkle. That is the entire process, and every other beverage in this hub is a variation on it: change the sugar source, adjust the yeast, tune the temperature, and respect the same sanitation. Pick a cider or tepache for batch one, and let the numbers — not the folklore — guide every batch after. Keep a simple log for each batch: juice, OG, yeast, temperature, FG, and a one-line tasting note. After three or four batches that log becomes more valuable than any recipe, because it is a record of how your kitchen, at your ambient temperature, with your ingredients, actually behaves. That feedback loop is what turns a beginner who follows recipes into a fermenter who reads their own beverages.
Frequently Asked Questions
Is making alcohol at home for personal use legal?
In most countries home fermentation of beer, cider, wine, and mead for personal consumption is legal, often up to an annual volume limit. Distillation (making spirits) is separately regulated and illegal without a licence in many places. Check your local rules; this guide covers fermentation only, never distillation.
How do I know how much alcohol my batch contains?
Take a hydrometer reading before fermentation (original gravity) and after it finishes (final gravity), then apply ABV is approximately (OG minus FG) times 131.25. A juice going from 1.050 to 1.000 yields about 6.6% ABV. Without a hydrometer you are guessing.
Can home-fermented alcohol make me sick from methanol?
No. Normal fruit, honey, and grain fermentation produces only trace methanol from pectin, far below any harmful level. Dangerous methanol concentration is a distillation issue, not a fermentation one. Properly fermented cider, wine, and mead are safe in this regard.
What yeast should a beginner buy first?
EC-1118 champagne yeast is the most forgiving starting point. It tolerates high alcohol, ferments clean and fast, works for cider, wine, mead, and fruit wine, and can even restart a stuck batch. One packet covers nearly every beverage in this hub.
Why did my fermentation stop early (stuck ferment)?
Almost always temperature too low, yeast nutrient depleted, or the batch is actually finished. Check the gravity with a hydrometer first. If sugar remains and it has stalled, warm it to 20-22C, gently rouse the yeast, and if needed pitch a vigorous strain like EC-1118.
Do I need an airlock or can I just cover the jar?
Primary fermentation can run under a loose cover because escaping CO2 protects the surface, but secondary aging needs an airlock. It vents CO2 while blocking oxygen, which prevents oxidation and stops Acetobacter from turning your beverage into vinegar.
Related Guides
- Making Hard Cider at Home: The Beginner On-Ramp
- Wine Making at Home for Beginners
- Mead Making Guide for Beginners
- Fruit Wine Fermentation Guide
- Tepache: Fermented Pineapple in Four Days
- Kvass: Fermented Bread Beer
As an Amazon Associate I earn from qualifying purchases. If you want one tool to start with, a homebrew hydrometer and test jar is the single most useful purchase for any beverage ferment.

About Kenny Nyhus Fadil
A home fermenter documenting brines, bubbles, and the occasional moldy tragedy.