Sourdough Starter Feeding Schedule: Counter and Fridge

A sourdough starter needs feeding at a fixed ratio on a fixed rhythm: 1:1:1 by weight once a day if it lives on the counter, or 1:2:2 once a week if it lives in the fridge. Everything else — how active your starter is, how sour your bread tastes, whether it survives a holiday — is downstream of getting that schedule right.
I keep one starter named Inkbird, continuously alive since spring 2020, and over those years it has run on both schedules depending on whether I am baking weekly or travelling. This is the feeding system I actually use, the ratios that keep it predictable, and the exact recovery moves for when life breaks the rhythm. The companion complete sourdough guide covers building a starter from scratch; this article is only about keeping an established one strong.
Disclosure: FermentFoundry is reader-supported. As an Amazon Associate I earn from qualifying purchases made through links in this article, at no extra cost to you. I only point to gear I actually use or would buy for my own kitchen.
What a Feeding Ratio Actually Means
A feeding ratio is three numbers — old starter to flour to water, always by weight. A 1:1:1 feed means equal grams of each: take 20 g of starter, add 20 g flour and 20 g water. A 1:2:2 feed means twice as much fresh food: 20 g starter, 40 g flour, 40 g water. The bigger the second two numbers, the more fresh food the yeast gets and the longer it takes to peak.
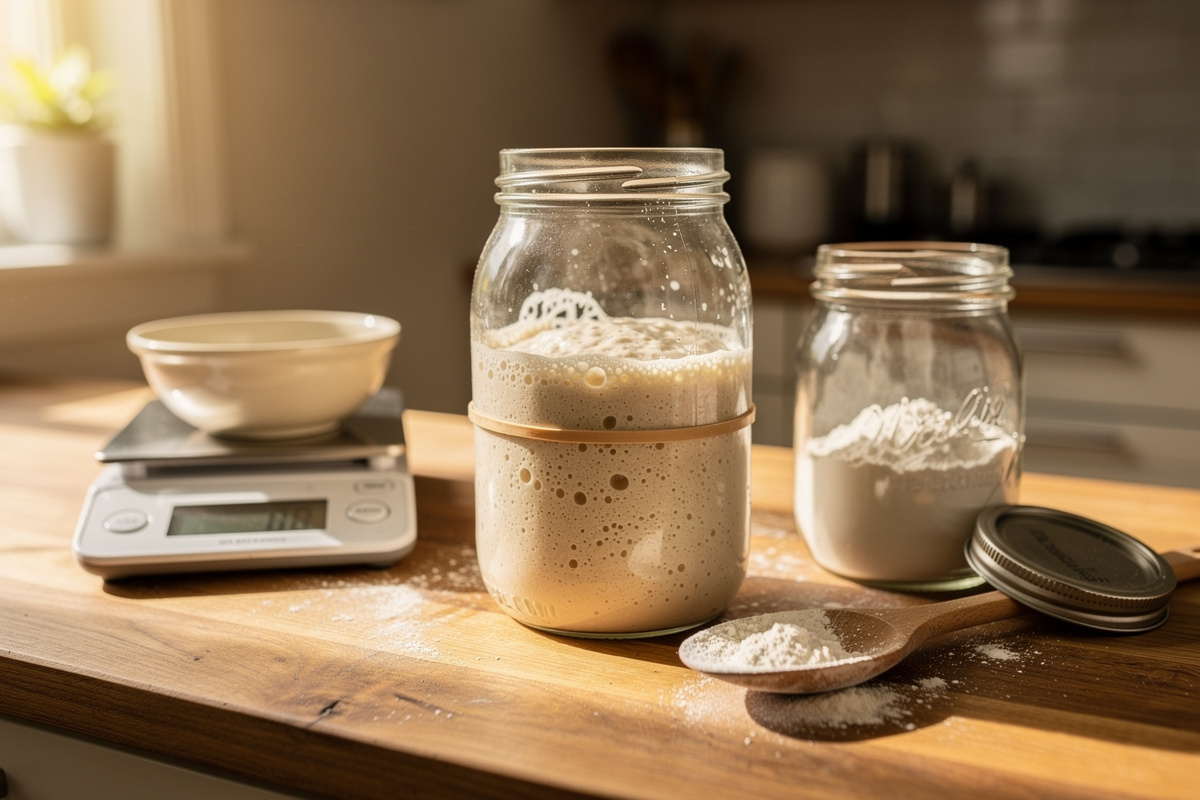
The single mistake I see most often is feeding by volume or by eye. Sourdough is a weight game from the starter jar to the final loaf. A 0.1-gram digital scale is the one tool that turns feeding from guesswork into a repeatable process — the same scale that does my brine math for kraut does my starter ratios, because both are about hitting a number, not a vibe. Once you feed by weight, your starter behaves the same way every single day, and predictability is the whole point.
Ratios scale to how much starter you actually need. For a weekly two-loaf bake I want about 200 g of ripe starter, so the night before I build it up from a 30 g keeper to 240 g in one or two feeds. You never need to keep a giant jar going day to day — keep a small mother (20-40 g) and build up only when you bake. A small mother wastes less flour and is easier to keep at peak.
The Counter Schedule: Once a Day at 1:1:1
Counter storage means feeding once every 24 hours at 1:1:1 and leaving the jar at room temperature, where the starter stays close to peak and is ready to bake any day. This is the schedule for people who bake at least once a week, and it gives the most reliable, fastest-rising starter because the culture never goes dormant.
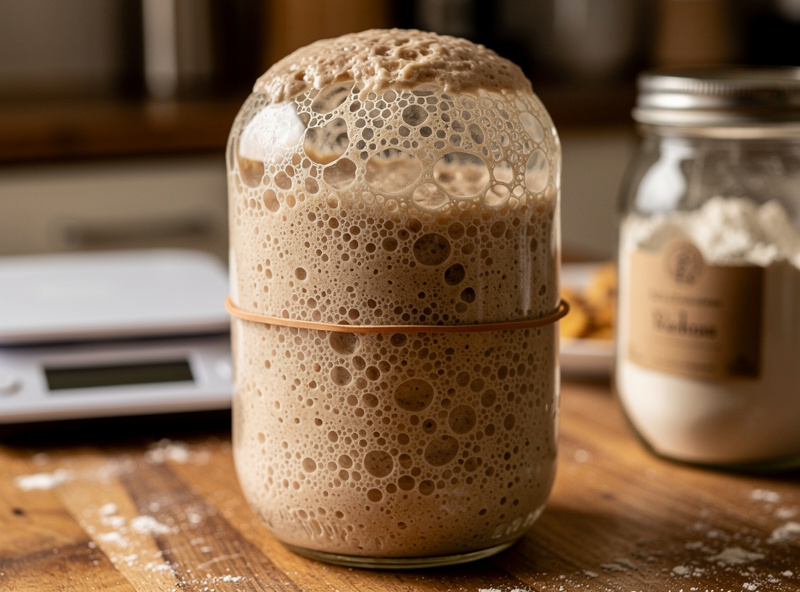
At 22-24 C, a healthy starter fed 1:1:1 peaks (doubles and just starts to dome) in 4-8 hours, then slowly falls. The ideal feeding window is right as it begins to fall from peak — that is when the yeast population is largest and hungriest. If your kitchen runs warm, the cycle speeds up and you may need to bump the ratio to 1:2:2 or even 1:3:3 to stretch a feed across a full day. If it runs cold, the starter peaks late and you can comfortably go a little past 24 hours.
Discard is unavoidable on a daily schedule, because you remove most of the jar before each feed to keep the ratio sane. Do not pour it down the drain — counter feeding generates a steady stream of discard that is genuinely useful for pancakes, crackers, and pizza crust rather than the bin. Water quality matters here too: chlorinated tap water can blunt a starter over time, so I use filtered or overnight-stood water, the same dechlorination habit that keeps a vegetable lacto-ferment from stalling.
The Fridge Schedule: Once a Week at 1:2:2
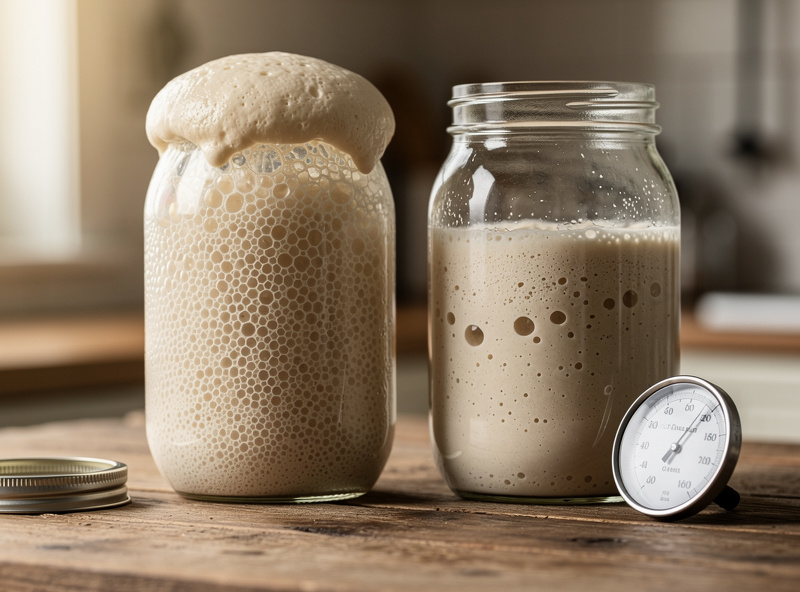
Fridge storage means feeding once a week at 1:2:2, then putting the jar straight back into the fridge at 3-5 C, where cold slows the culture to a near-dormant crawl. This is the schedule for occasional bakers — it cuts feeding from seven times a week to once, at the cost of needing a wake-up before you bake.
The bigger 1:2:2 feed matters for fridge storage: the extra flour gives the slowed culture enough food to coast through a week of cold without starving and going sharply acidic. Feed it, let it sit on the counter for 30-60 minutes to start working, then refrigerate. A week later it will have a thin layer of liquid (hooch) on top and smell strongly acidic — both are normal. Stir the hooch back in or pour it off (pouring off makes a milder starter), then feed again.
To bake from a fridge starter, you wake it up: pull it out, feed it 1:2:2, leave it on the counter, and feed again every 12 hours until it is doubling reliably within 4-6 hours. That usually takes two feeds over 12-24 hours for a recently-fridged starter, or three to four feeds if it has been neglected for a month. Never bake straight from a cold jar — a fridge starter at pull-out is not at peak, and using it cold is the most common reason a loaf comes out dense, which I break down fully in why sourdough bread turns out dense.
Counter vs Fridge: The Schedule Comparison
Neither schedule is better in the abstract — they serve different baking frequencies. Counter starters are always ready but demand daily attention; fridge starters are low-maintenance but need a day of lead time. I switch between them: counter during baking-heavy weeks, fridge when I travel. The table below is the decision I actually make.
| Factor | Counter (1:1:1 daily) | Fridge (1:2:2 weekly) | Notes |
|---|---|---|---|
| Feed frequency | Every 24 hours | Every 7 days | Warm kitchens may need 2 counter feeds/day |
| Ready to bake | Any day, no wake-up | After 12-24 h wake-up | Feed at peak in both cases |
| Best for | Weekly+ bakers | Monthly/occasional bakers | Match the schedule to how often you bake |
| Flour used per week | High (daily discard) | Low (one feed) | Keep a small mother to cut waste |
| Flavour tendency | Milder, yeasty | Tangier, more acetic | Cold favours acetic (sour) acid production |
| Forgiveness if skipped | Low — peaks and falls fast | High — survives weeks cold | Fridge buys you slack |
One nuance worth knowing: cold storage shifts the acid balance toward acetic acid, so fridge-kept starters tend to make tangier bread, while counter starters lean milder and more yeasty. If you love a sharp sour loaf, a fridge starter with a long cold retard is your friend; if you prefer a gentle tang, keep it on the counter and bake young.
Adjusting the Ratio for Temperature and Sourness
The ratio is a dial, not a fixed rule. Bigger feeds (1:3:3, 1:5:5) slow the climb to peak and produce a milder starter; smaller feeds (1:1:1) reach peak fast and lean sour. In a hot summer kitchen I feed Inkbird 1:3:3 to keep it from racing past peak and turning sharp before I am ready to bake; in a cold winter kitchen 1:1:1 keeps it lively.
Temperature is the other half of the dial. Every roughly 10 C of warmth doubles fermentation speed, so a starter that peaks in 5 hours at 26 C may take 10-12 hours at 18 C. If your kitchen swings seasonally, change the ratio to compensate: warm and fast means bigger feeds, cold and slow means smaller feeds. A cheap ambient thermometer next to the jar takes all the mystery out of this — I treat the starter the way I treat any controlled ferment, watching the number rather than guessing.
If your starter is too sour, you are usually feeding it too late (well past peak) or too small a ratio. Fix it by feeding sooner and bigger: a few 1:3:3 feeds in a row at peak will reset a sharp starter to mild within two or three days. If it is sluggish and not rising, switch to a smaller ratio with a touch of whole rye in the flour — rye is the most reliable wild-yeast fuel for building and feeding a starter, the same whole-grain boost the main sourdough guide uses when a new starter stalls.
Feeding Around Travel and Long Gaps
An established starter is far tougher than beginners fear. For a one-to-two week trip, just feed it 1:2:2 and fridge it — it will be hungry but alive when you return. For longer gaps, you need a backup, because a starter pushed past a month unfed gets very acidic and slow to recover.
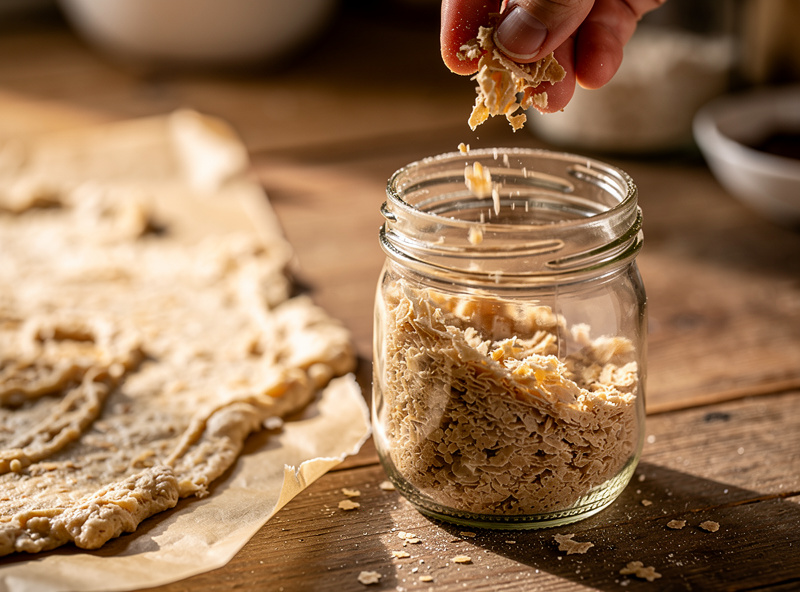
I keep two backups for Inkbird and recommend everyone do the same. The first is a fridged jar of unfed starter pushed to the back of the fridge, revivable within one or two feeds even after two months. The second is dried flakes: smear a thin layer of ripe starter on parchment, let it dry to brittle chips, crumble into a jar, and freeze. Dried starter rehydrates in 4-7 days and is effectively immortal. This is the same perpetual-culture insurance logic I apply to a vinegar mother — keep a backup of any living culture you would be sad to lose.
When you come back from a long gap, do not judge the starter on its first feed. Give it three to four 1:2:2 feeds at 12-hour intervals on the counter before you decide it is recovered. Most starters that look dead are simply hungry and over-acidified; the food and the warmth bring them back. A genuinely failed starter is rare, and the rescue steps for one that truly will not wake up are in rescue a dead or weak starter.
The Gear That Makes Feeding Repeatable
Feeding well needs almost nothing, but two tools earn their place. A 0.1-gram scale makes the ratios exact, and a tall straight-sided jar lets you see the rise clearly — I mark the start line with a rubber band so I can read the peak at a glance. Everything else is optional.
For flour, an established starter happily eats unbleached bread or all-purpose flour day to day, with a spoonful of whole rye flour mixed in when it needs a boost. Bleached flour and the chlorine in some tap water are the two things that genuinely set a starter back, so I avoid both. The full kit I run across every ferment in the kitchen — scales, jars, weights, thermometers — is laid out in my fermentation equipment guide, and the same fermentation weights that hold a kraut under brine show how much of this gear crosses between ferments.
Frequently Asked Questions
How often should I feed my sourdough starter?
On the counter, feed once every 24 hours at a 1:1:1 ratio by weight. In the fridge, feed once a week at 1:2:2. Match the schedule to how often you bake: counter for weekly bakers, fridge for occasional ones. Warm kitchens may need two counter feeds a day to keep the starter from racing past peak.
What does a 1:1:1 feeding ratio mean?
It means equal weights of old starter, flour, and water. Take 20 grams of starter, add 20 grams of flour and 20 grams of water. A 1:2:2 ratio doubles the fresh food: 20 grams starter, 40 grams flour, 40 grams water. Bigger second numbers give the yeast more food and a slower, milder rise to peak.
Can I bake straight from a fridge starter?
No. A cold fridge starter is not at peak and using it that way is the most common cause of dense bread. Pull it out, feed it 1:2:2, and leave it on the counter, feeding every 12 hours until it doubles reliably in 4-6 hours. That usually takes 12-24 hours, or longer if it has been neglected for weeks.
Why is my starter too sour?
You are feeding it too late or in too small a ratio, so acids build up past peak. Fix it by feeding sooner, right as it begins to fall from peak, and using a bigger ratio like 1:3:3 for a few days. Cold storage also pushes flavour toward sharp acetic sourness, so a counter starter baked young tastes milder.
How long can a sourdough starter go without feeding?
An established starter survives one to two weeks in the fridge after a 1:2:2 feed with no problem. Pushed past a month it gets very acidic and slow but usually recovers after three or four feeds. For longer gaps, keep a dried-flake backup in the freezer, which stays viable almost indefinitely and rehydrates in 4-7 days.
Do I have to discard starter every time I feed it?
On a daily counter schedule, yes, because you remove most of the jar to keep the ratio manageable and avoid an ever-growing mass. Keep a small 20-40 gram mother to minimise waste, and use the discard rather than binning it. Fridge schedules generate far less discard since you only feed once a week.
Related Articles on FermentFoundry
- Home Sourdough Bread: The Complete Starter-to-Loaf Guide
- Sourdough Starter Not Rising? Rescue a Dead or Weak Starter
- Why Is My Sourdough Bread Dense? 10 Causes and Fixes
- Fermentation Equipment: The Complete Home Brewer Toolkit
- Lacto-Fermentation for Vegetables: The Complete Home Guide

About Kenny Nyhus Fadil
A home fermenter documenting brines, bubbles, and the occasional moldy tragedy.