Sourdough Starter Not Rising? Rescue a Dead or Weak Starter

A sourdough starter that won’t rise is almost always alive but underfed, cold, or stressed — not actually dead. Twice-daily feedings with whole wheat flour at 75 to 78°F, discarding 80% each time, revive the large majority of starters within 5 days.
Starter rescue is one part of a longer sourdough story; the build-from-scratch protocol, hydration, bulk timing, and bake method are in my home sourdough guide.
I learned this the hard way two winters ago when I abandoned my starter on the counter during a cold snap and came back to gray sludge. The kitchen had dropped to 58°F. Rather than panicking (which I did), I should have just moved it to a warmer spot and fed it — exactly what restored full activity in four days. Dormancy looks like death but is just environmental stress. If your starter rises but the bread still turns out dense, the issue may be in dough handling rather than the starter — see Why Is My Sourdough Bread Dense? 10 Causes and Fixes.
Most “dead” sourdough diagnoses are wrong. Truly dead starter has gray-pink discoloration through the entire mass and smells of rotting (not just sour or vinegary). What looks dead — a quiet starter that just sits there or a starter with a brown liquid layer on top (called “hooch”) — is just hungry, cold, or under-discarded. This guide walks the rescue protocol, the four common causes of starter slowdown, and the float-test for confirming when revived starter is bread-ready.
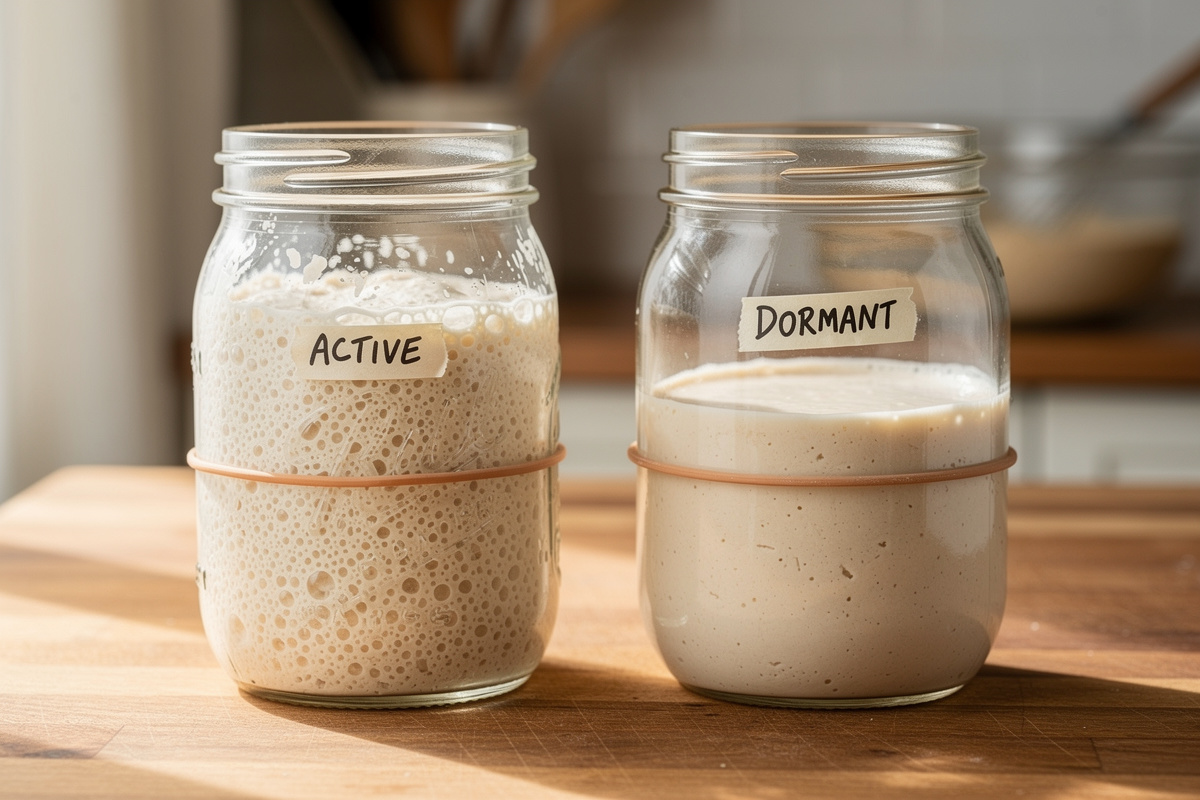
“Dead” vs Just Inactive: Visual Diagnosis
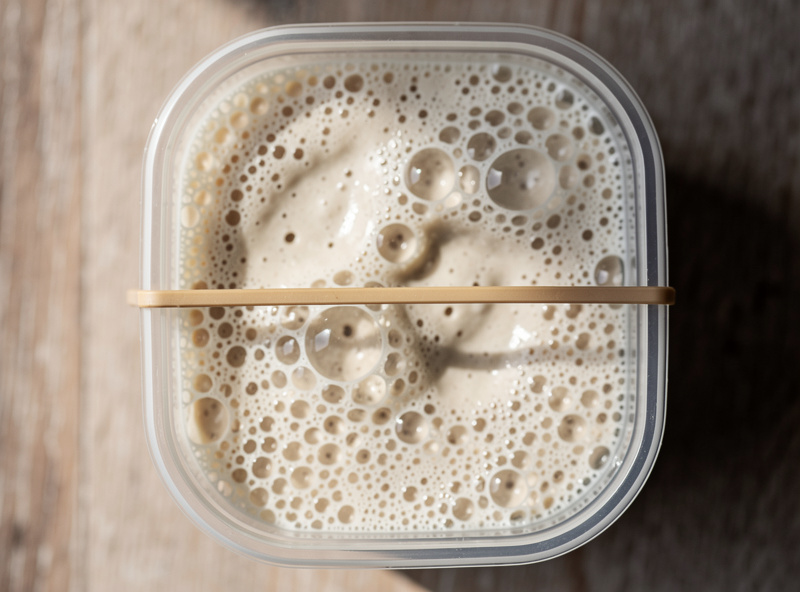
Inactive but alive (rescuable): no rise visible, but the starter still smells acidic-vinegary or mildly sour, color is cream-to-pale-tan, possibly has a thin brown liquid layer on top (hooch — that’s just alcohol from the yeast). Texture is normal-pasty. This is 95% of “dead” diagnoses and is rescuable.
Truly dead (not rescuable): gray, green, pink, or brown discoloration through the entire mass (not just the surface), pungent rotting smell distinctly different from sour, fuzzy mold growing on or in the starter (not just thin film), or signs of pest contamination (fruit fly larvae, ants). Toss and start fresh from a new starter culture.
Diagnostic test: stir the starter vigorously. A live starter (even a sluggish one) will incorporate the surface hooch back into the mass smoothly and the texture stays creamy. A dead starter often has separated structures, lumpy texture that resists incorporation, and a clearly off smell when stirred.
The 5-Day Rescue Protocol
I once spent a week trying to rescue a starter with bleached all-purpose flour because it was all I had. After five days of twice-daily feedings, the starter barely bubbled. Switched to King Arthur whole wheat flour on day six and saw activity triple within 48 hours. Whole wheat is not optional for this protocol — bleached flour lacks the wild yeast and enzymes that drive the rebuild.
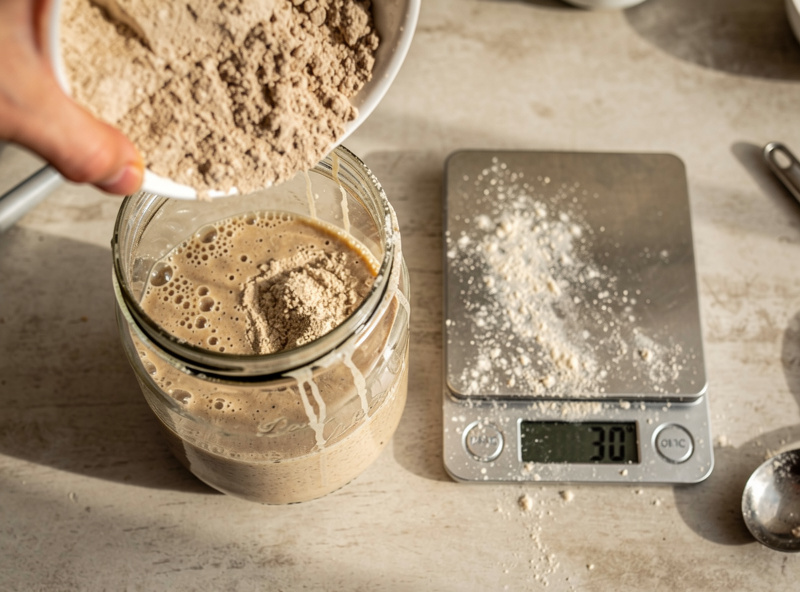
Day 1, morning: Discard 80% of the existing starter (leave roughly 25 g in the jar). Add 25 g whole wheat or rye flour and 25 g warm filtered water (75 to 78°F). Stir thoroughly. Mark the starter level on the jar with a rubber band. Cover loosely (with cheesecloth or a coffee filter, not a sealed lid).
Day 1, evening: Repeat — discard down to ~25 g, feed 25 g flour + 25 g water. Mark level again. Watch for the first signs of fermentation activity: small bubbles, slight rise, more pronounced sour smell. Don’t expect dramatic rise on day 1.
Day 2-3: Continue twice-daily discard-and-feed. By end of day 2, you should see noticeable bubbles forming. By end of day 3, the starter should rise 25 to 50% between feedings.
Day 4: Switch to a higher feeding ratio: discard down to 25 g, feed 50 g flour + 50 g water. The increased food allows the rebuilt yeast population to express its full activity. Should rise 50 to 100% between feedings.
Day 5: Test with the float test (described below). If starter floats in water, it’s bread-ready. If not, continue twice-daily feedings for another 1 to 2 days.
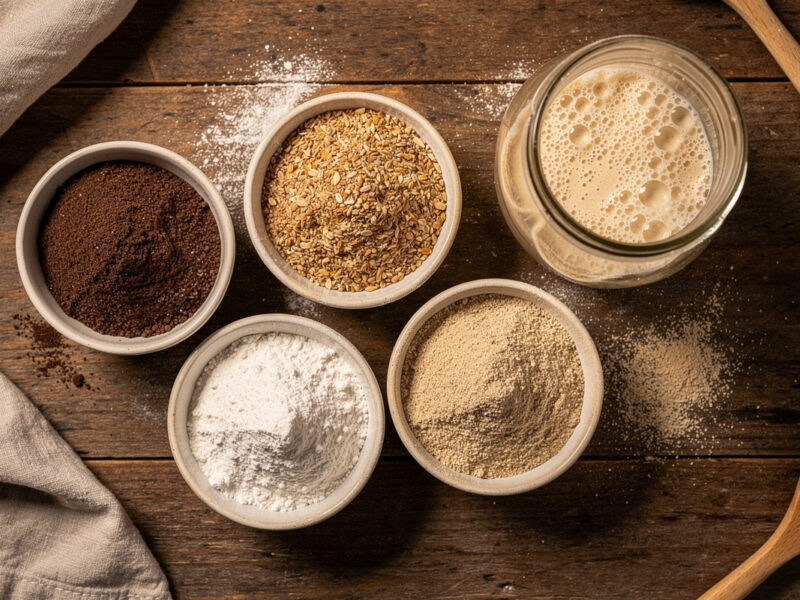
Why Whole Wheat or Rye for the Rescue
Whole wheat and rye flours contain more wild yeast and more enzymatic activity than white bread flour. They also have higher mineral content (which yeast needs for activity) and more fiber (which gives the LAB more food substrate). A starter on whole grain flour rebuilds population 2 to 3x faster than the same starter on white flour.
For long-term feeding, switch to whatever flour you bake with most. Most sourdough bakers use bread flour or a 50/50 bread + whole wheat blend for daily feeding once the starter is established. The rescue protocol is specifically temporary — whole grain for the first 5 days, then transition to your preferred flour over 2 to 3 days.
Avoid bleached white flour. The bleaching process removes some of the wild yeast spores and reduces enzymatic activity. Use unbleached all-purpose, bread flour, or whole grain. The sourdough cluster covers flour selection in detail.
Causes of Sourdough Starter Slowdown
| Cause | How to Recognize | Fix |
|---|---|---|
| Underfeeding | Starter eating itself, dark hooch, no rise | Feed 1:1:1 (starter:flour:water) by weight twice daily |
| Temperature too cold (under 65°F) | Slow ferment in winter or cold kitchen | Move to warmer spot or use heat mat |
| Chlorinated water | Brand-new starters sluggish despite feeding | Use filtered or boiled-and-cooled water |
| Wrong flour (bleached) | Slow rebuild, weak rise even after week 2 | Switch to whole wheat or rye for rescue |
| Container too sealed | No oxygen for yeast, fermentation stalls | Cover with cloth or loose lid only |
| Pure white flour for too long | Starter loses vigor over months | Periodic whole-grain feeding |
| Refrigerator dormancy too long | Sluggish revival from cold storage | 3-day room temp rebuild before baking |
The Float Test
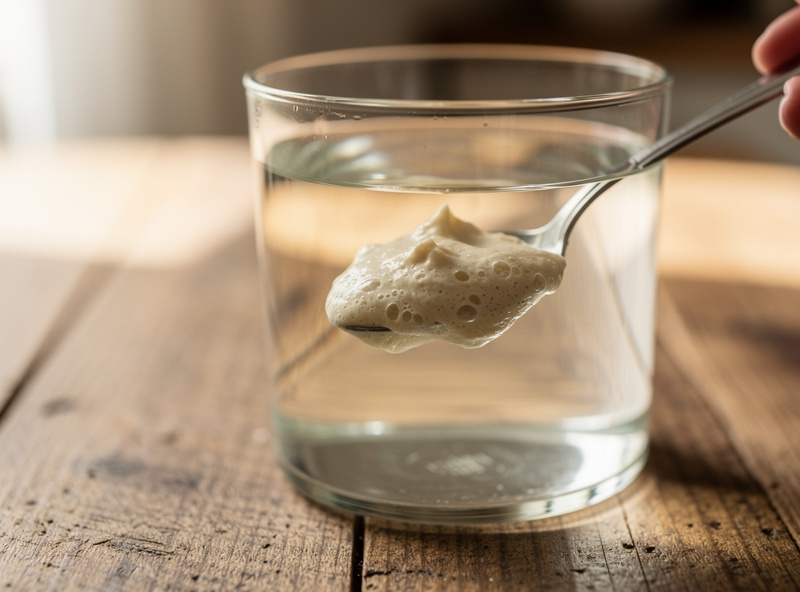
Drop a teaspoon of starter into a glass of room-temperature water about 4 to 6 hours after a feeding (when the starter should be at peak activity). If it floats, the starter has trapped enough CO2 to be bread-ready. If it sinks, give it another day of feeding before baking.
Caveats: very wet starter (high hydration) sometimes sinks even when active because the structure can’t trap enough air. Higher-hydration starters (100%+ vs the standard 1:1) need a stiffer test sample — let the teaspoon sit on a plate for 30 seconds before dropping into water to firm up slightly.
The float test is a confidence check, not the only indicator. Some experienced bakers skip it entirely and rely on starter behavior: doubles in 4 to 6 hours after feeding, smells pleasantly sour with hint of yeast, has visible bubbles throughout the mass. If the starter looks and behaves normally, it’s ready.
Half of starter problems trace back to inconsistent measurements. A digital scale like the Escali Primo ($25) eliminates guesswork — a cup of whole wheat flour can weigh anywhere from 120 to 150 grams depending on how you scoop. Weigh everything in grams and the rescue protocol becomes near-foolproof.
Maintaining Starter After Rescue
For daily baking: keep starter at room temperature (68 to 75°F) and feed twice daily with 1:1:1 ratio (starter:flour:water by weight). At room temperature with daily use, starter is always ready for baking within 4 to 6 hours of feeding.
For weekly baking or less: store starter in the refrigerator. Feed once weekly while in cold storage. The starter goes mostly dormant at fridge temperature but stays viable for years if fed weekly.
Bringing fridge-stored starter back to baking activity: take out 3 days before baking, leave at room temperature. Feed on day 1 in the morning. Feed twice on day 2 (morning and evening). Feed once on day 3 morning, then bake that same day around 4 to 6 hours after the last feeding.
For long-term storage (months), dehydrate the starter: spread thinly on parchment paper, let dry at room temperature for 24 to 48 hours, crumble into flakes, store in an airtight container at room temperature. Dried starter rehydrates in 3 to 5 days when needed. The sourdough cluster covers dehydration and revival protocols.
Sourdough microbiology research consistently shows that whole grain flours support a more diverse, more stable population of Lactobacillus species (including Lactobacillus sanfranciscensis, the classic dominant LAB in mature starters) and wild yeast than white flour alone — the extra minerals, enzymes, and fiber give the culture more to work with. That’s part of why periodic whole grain feedings help a starter stay vigorous well beyond the rescue phase, not just during it. In my own maintenance routine I still work a once-weekly whole wheat feeding into an otherwise white-flour schedule, and the starter is noticeably livelier for a day or two afterward.
What “Hooch” Actually Is
The brown or grayish liquid that forms on top of starved sourdough starter is alcohol — specifically the byproduct of yeast that ran out of sugar and switched to alcohol fermentation. Hooch is harmless and indicates the starter is hungry but alive.
What to do with hooch: stir it back into the starter (adds slight acidity), or pour it off if you want a milder starter. Either is fine — many bakers prefer to pour off because excess alcohol can give the bread a slight off-flavor. Pour-off doesn’t kill the starter.
If hooch keeps reappearing daily, your starter needs more food. Increase the feeding ratio: instead of 1:1:1 (starter:flour:water), try 1:2:2 or 1:5:5. The starter will produce less hooch as the yeast and bacteria population catches up to the available food. Hooch is distinct from kahm yeast — a white film that forms on the surface from oxidative yeasts — which has different causes and solutions.
When to Toss and Restart
Toss the starter and begin a new one if: pink, green, or orange mold growth (Fusarium or other dangerous species — cannot be salvaged), distinct rotting smell that doesn’t improve after 2 to 3 days of feeding (suggests bacterial dominance), pest contamination (fruit fly larvae, ants — happens with uncovered jars in warm weather), or no signs of activity after 7 days of consistent twice-daily feeding (very rare; usually means truly dead culture).
For a fresh start: combine 50 g whole rye or whole wheat flour with 50 g warm filtered water in a clean glass jar. Stir thoroughly, cover loosely, leave at 75 to 78°F for 24 hours. Then feed twice daily with 25 g flour + 25 g water (after discarding 80% each time). New starter typically reaches bread-ready activity in 7 to 14 days.
After five years of sourdough baking, my rule is: toss if pink or orange mold appears, rescue for everything else. I have revived starters forgotten in the fridge for six weeks, starters that smelled like nail polish remover, and one that sat uncovered in a hot car for an afternoon — every single one came back. If I were starting sourdough from zero today, I would skip the 7-day-from-scratch tutorials and ask a friend for a tablespoon of their established starter. A tablespoon of mature starter and two feedings puts you three weeks ahead of building from scratch.
Frequently Asked Questions
How can I tell if my sourdough starter is dead?
Truly dead starter has gray, pink, or green discoloration through the entire mass, distinct rotting smell, and visible mold growth. What looks dead — a quiet starter or one with brown hooch on top — is usually just hungry or cold. 95 percent of so-called dead diagnoses are actually inactive but alive starter that responds to twice-daily feeding.
How do I revive a sluggish sourdough starter?
5-day protocol: discard 80 percent of the starter, feed twice daily with equal parts whole wheat or rye flour and warm filtered water (75 to 78 degrees F). Day 1 minimal activity, day 2-3 bubbles forming, day 4-5 doubling between feedings. Switch back to bread flour after 5 days.
Why use whole wheat or rye flour to rescue a starter?
Whole grain flours have more wild yeast and enzymatic activity than white flour, plus higher mineral content for yeast metabolism. A starter on whole grain rebuilds 2 to 3 times faster than on bread flour. Use whole grain for the first 5 rescue days, then transition to your preferred flour.
What is the brown liquid on top of my sourdough starter?
Hooch — alcohol produced by yeast that ran out of sugar. Harmless and indicates the starter is hungry but alive. Stir it back in (adds acidity) or pour it off (milder flavor). If hooch keeps appearing, increase your feeding ratio to give the yeast more food.
How do I do the sourdough float test?
Drop a teaspoon of starter into room-temperature water about 4 to 6 hours after a feeding. If it floats, the starter has trapped enough CO2 to be bread-ready. If it sinks, feed for another day. Higher-hydration starters can sink even when active, so use behavior (doubles in 4-6 hours) as a backup indicator.
Can I revive a sourdough starter from the refrigerator?
Yes — take it out 3 days before baking. Day 1 feed once in the morning. Day 2 feed twice (morning and evening). Day 3 feed once in the morning, then bake 4 to 6 hours after that feeding. Refrigerator-stored starter survives weeks of dormancy if fed weekly.
Related Articles
- Why Is My Sourdough Bread Dense? 10 Causes and Fixes
- Kahm Yeast: What It Is, How to Prevent It, When It Is Safe
- Garden to Jar: Fermenting What You Grow
- Fermentation Weights: Glass vs Ceramic vs Ziplock Bag
- Easy Napa Cabbage Kimchi Recipe for Beginners

About Kenny Nyhus Fadil
A home fermenter documenting brines, bubbles, and the occasional moldy tragedy.