Homemade Kimchi: The Complete Guide from Cabbage to Stew

Kimchi is the most rewarding ferment I run and the one I have had to learn the hardest. After four years of weekly batches — usually 2 kilograms of napa cabbage on the salt mat by Sunday morning, paste mixed Sunday afternoon, fridged Wednesday — my house has cycled through perhaps 250 jars and I now know the variables that decide whether the result is bright and complex or dull and one-note. The cabbage variety, the paste ingredients, and the timing of the move to cold storage are the three things most beginner guides under-emphasise.
This guide is the full system: the napa-specific salt-rinse procedure, the salt-and-temperature math that keeps every format safe, the gochugaru sourcing that decides flavour depth, the paste binding that decides whether the kimchi tastes integrated or scattered, and the counter-versus-fridge fermentation logic that decides how the kimchi develops over its 4-6 month shelf life. Kimchi is sauerkraut’s louder, busier cousin; once the underlying lacto-fermentation principles are clear (covered in my lacto-fermentation guide), kimchi is a one-week skill.
What Makes Kimchi Different: Regional Styles Compared
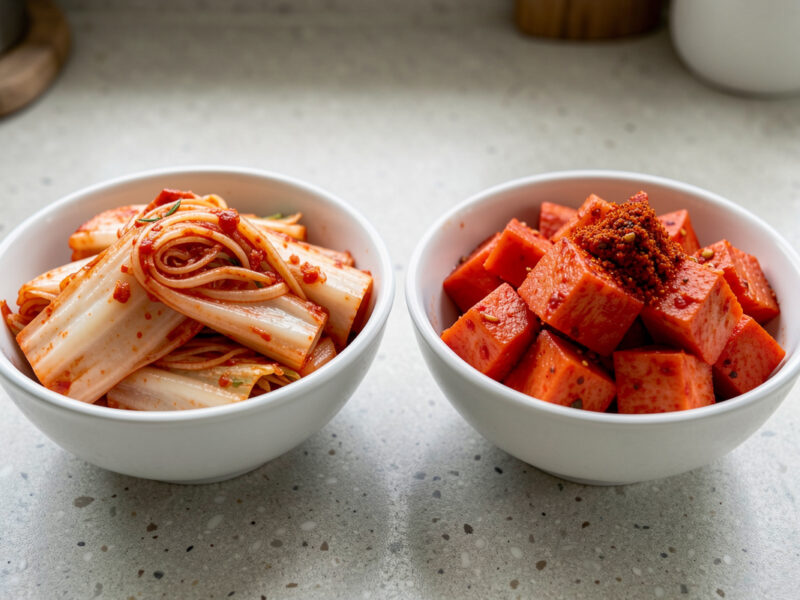
Kimchi is a category of ferments, not a single recipe. The Korean tradition includes hundreds of regional and seasonal variants — the famous napa cabbage version (baechu kimchi) is just one of them, alongside cubed daikon kimchi (kkakdugi), watery summer kimchi (mul kimchi), young radish stem kimchi (chonggak), white kimchi without chilli (baek kimchi), and dozens more. Each follows the same fermentation logic but uses different vegetables, salt strengths, and paste compositions.
| Kimchi Style | Main Vegetable | Paste Style | Ferment Stage 1 | Best Use | Shelf Life |
|---|---|---|---|---|---|
| Baechu (napa cabbage) | Whole quartered napa cabbage | Gochugaru, garlic, ginger, fish sauce, glutinous rice paste | 1-3 days @ 20 C | Side dish, eggs, ramen | 4-6 months |
| Kkakdugi (cubed daikon) | 2 cm daikon cubes | Same as baechu, less liquid | 2-4 days @ 20 C | Stews, BBQ side | 4-6 months |
| Mul kimchi (water kimchi) | Napa, daikon, pear, in brine | Minimal paste, brine-based | 3-5 days @ 18 C | Summer side, broth source | 2-3 months |
| Chonggak (young radish) | Young radish with stems | Standard but slightly looser | 2-4 days @ 20 C | Side, rice topping | 3-4 months |
| Baek kimchi (white) | Napa cabbage, no chilli | Garlic, ginger, pear, pine nuts, no gochugaru | 2-3 days @ 18 C | Gentle side, ramen broth | 4-5 months |
| Oi sobagi (stuffed cucumber) | Whole cucumbers slit and stuffed | Same as baechu, packed inside | 1-2 days @ 20 C | Summer fresh side | 2-3 weeks |
My home rotation runs four of these year-round: baechu in autumn-winter, mul kimchi in summer, kkakdugi continuously, and chonggak when young radishes are in season. Baek kimchi is a special-occasion ferment when I have time for a more delicate flavour profile. The principles transfer cleanly from cabbage to other vegetables — same salt math, same paste-binding logic, same fermentation stages — covered cross-cluster in my lacto-fermentation guide.
The Right Cabbage and the Salt-Rinse Step
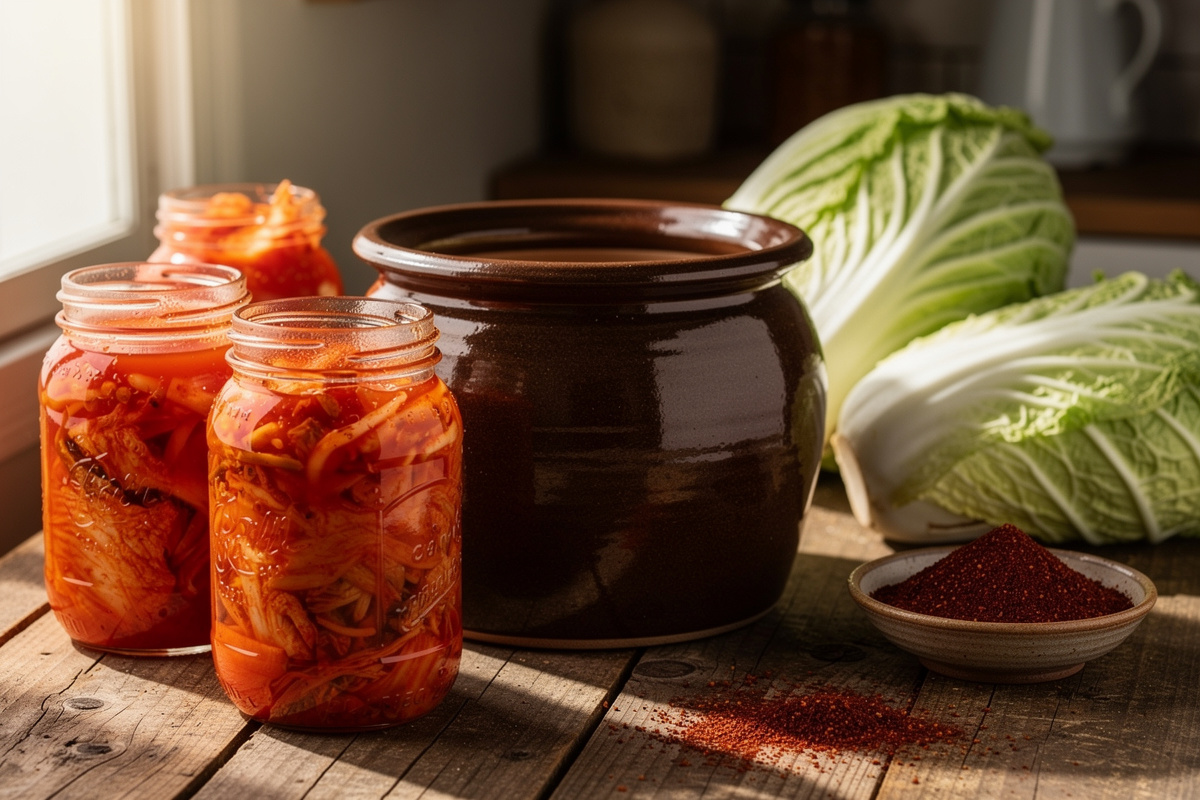
Napa cabbage is the standard and is genuinely different from green cabbage. Lighter cell walls, higher water content, longer leaves that hold paste in the layers. Look for compact heads with bright green outer leaves and pale yellow inner leaves; avoid heads with brown spots, wilted edges, or visible flowering stalks. Asian grocery stores carry better napa than most supermarkets; if you have access to a Korean market, the napa is consistently fresher and denser.
The salt-rinse step is what separates good kimchi from disappointing kimchi. Quarter the napa lengthways, layer salt between every leaf layer (about 60 grams of unrefined sea salt per kilogram of cabbage), and rest for 3-5 hours at room temperature with the cabbage flipped halfway through. The cabbage wilts, the cell walls release water, and the leaves become pliable enough to coat with paste without breaking. After resting, rinse the salt off thoroughly under cold running water — 3 rinses — then drain in a colander for 30 minutes before applying paste.
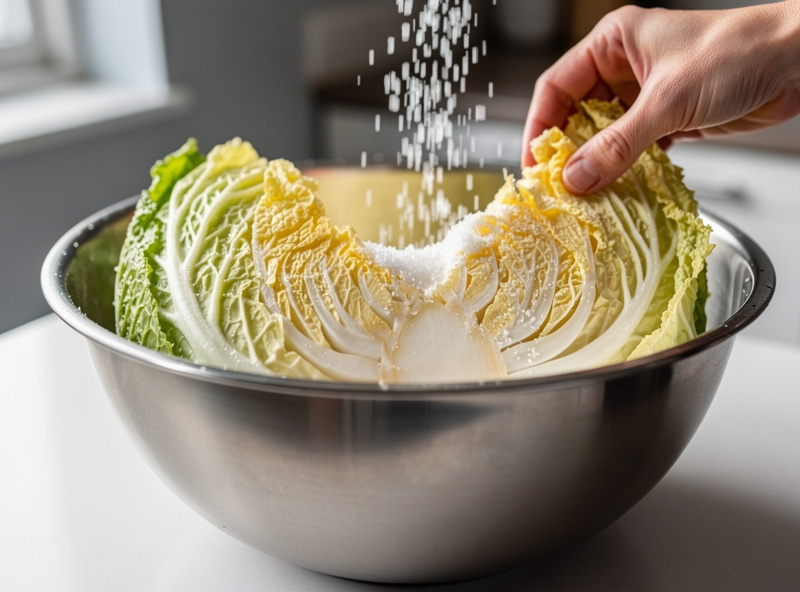
The biggest beginner mistake on the salt-rinse step is insufficient salt or insufficient rest time. Under-salted cabbage stays rigid and the paste does not penetrate; over-rinsing washes out the residual salt the lactobacillus needs to thrive. Aim for cabbage that bends easily without breaking, with a faintly salty residual taste after rinsing — the comprehensive procedure with photos is in my napa cabbage kimchi recipe.
Salt Selection and Ratios by Vegetable
Salt type matters almost as much as salt amount. I use plain, additive-free sea salt or canning/pickling salt for every batch — never iodized table salt (the iodine and anti-caking additives can slow fermentation and cloud the brine), and I’m careful with coarse flake salts, because flake density varies enough between brands that a tablespoon measurement can be badly off from what a recipe assumes. The National Center for Home Food Preservation is blunt about why this matters: salt in a ferment is not just seasoning, it’s the mechanism that favors the lactic-acid bacteria you want over the spoilage organisms you don’t, and cutting back on the salt a recipe calls for is explicitly the wrong place to save money or sodium.
The salt math also shifts with the cut of the vegetable, not just the vegetable itself. My napa salt-rinse above uses roughly 6% salt by weight of the cabbage during the rest, because most of that salt gets rinsed back off after the wilt — the cabbage that actually goes into the jar ends up well below that number once it’s rinsed and drained. That’s different from a straight standing-brine ferment. University extension guidance on home fermentation draws a useful distinction here: a roughly 3% brine is the safe target for shredded or finely cut vegetables, while whole or large-cut pieces need closer to 5%, because a thicker piece has less exposed surface area for the salt to penetrate quickly and needs the extra concentration to stay ahead of spoilage organisms while the interior equilibrates.
In practice I treat my four kimchi styles differently at the salt stage even though the finished jars taste similarly balanced. Kkakdugi cubes get a flat 30-minute dry salt on the cut daikon rather than the multi-hour napa rest, because the small cubes let salt penetrate fast, but I still keep the concentration on the higher side of the range because the pieces are chunkier than shredded cabbage. Mul kimchi, running as a standing brine rather than a rub, sits at the lower end — a brine distributes salt more evenly than a rub-and-rest method, so 2-2.5% in the standing brine does roughly the same protective job that 6%-then-rinsed does on the napa. Whatever the format, the one number I never go below is the safety floor: under 2% salt in the finished ferment, and I’m no longer confident the lactobacillus is reliably outcompeting spoilage bacteria before the batch sours the wrong direction.
Building the Kimchi Paste
The paste is what makes kimchi kimchi. The base for traditional baechu paste is glutinous rice porridge (cooked rice flour and water, gives the paste body), gochugaru (Korean chilli flakes, gives heat and colour), garlic (minced fine), ginger (microplaned), Korean fish sauce or anchovy paste (umami foundation), and a small amount of sugar to balance the salt. Optional: julienned daikon, julienned carrot, scallion, Asian pear or apple grated, and a few pine nuts.
Gochugaru is the ingredient that decides the kimchi’s identity. Korean-grown gochugaru has a smoky, fruity, mildly sweet heat that supermarket “red pepper flakes” simply cannot replicate. Pay attention to the colour and texture: real gochugaru is bright red-orange, slightly oily to the touch from the natural capsicum oils, and ground to a coarse texture (not powder). Store in the freezer to preserve volatile aromatics. Cost is 8-15 dollars for a 500-gram bag from a Korean grocery; supermarket alternatives at the same price are usually inferior.
The paste-binding step is where you make sure all the ingredients integrate. After cooking the glutinous rice porridge and cooling it to room temperature, mix in gochugaru first (it needs time to hydrate and bloom), then garlic and ginger, then fish sauce, then sugar to taste, then optional vegetables. Let the paste rest 30-60 minutes before applying — the gochugaru fully blooms during this time and the paste turns from grainy to silky. Apply the paste glove-deep into every layer of the quartered cabbage, working from inner to outer leaves. For a version without fish sauce or any seafood, the vegan kimchi recipe without fish sauce replaces the anchovy paste with miso and seaweed to keep the umami depth intact without any animal products.
Fermentation: Counter Stage vs Fridge Stage
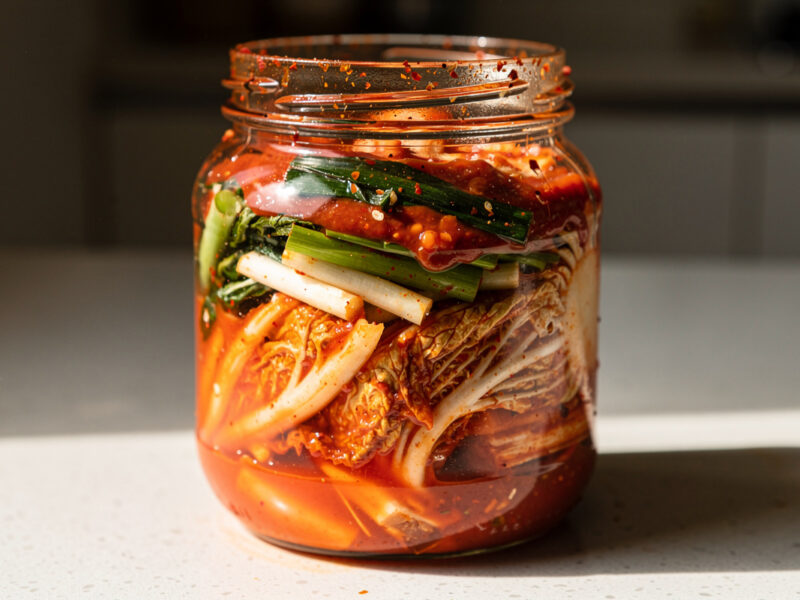
Kimchi runs through two fermentation stages with different bacterial dominance and different flavour outcomes. Stage 1 (counter, 1-3 days at 18-22 C) is where Leuconostoc bacteria dominate, producing the bright clean tang and characteristic CO2 bubbling that announces young kimchi. Stage 2 (fridge, 1-6 months at 2-5 C) is where Lactobacillus takes over from the slower Leuconostoc and develops the deep umami complexity that aged kimchi is famous for.
The transition between stages is the decision that decides your kimchi’s flavour. Move to fridge too early (day 1) and you get bland kimchi that takes 2-3 weeks to develop complexity. Move too late (day 5 or beyond at 20 C) and the kimchi has already gone fully sour and lost the bright Leuconostoc character. The sweet spot is roughly when you see active CO2 bubbling lift the cabbage in the jar — typically day 2 in summer, day 3 in winter, sometimes a touch later in cold kitchens.
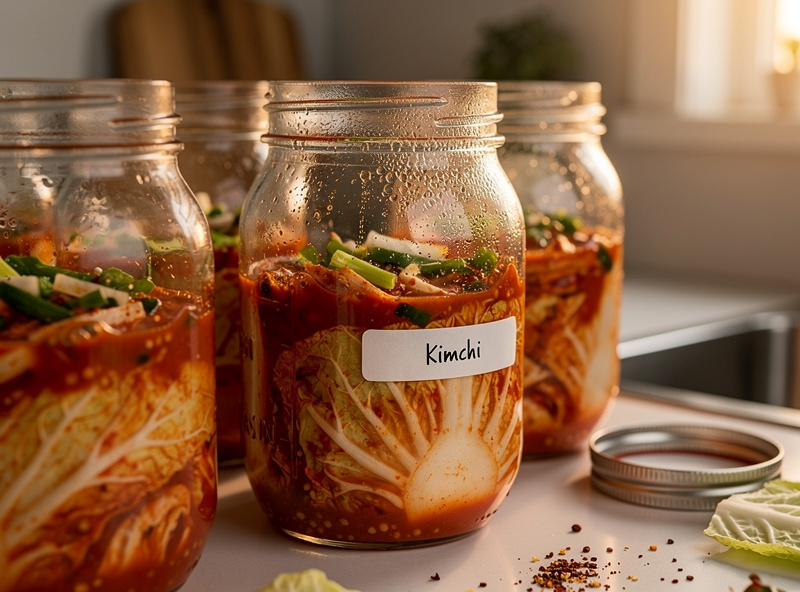
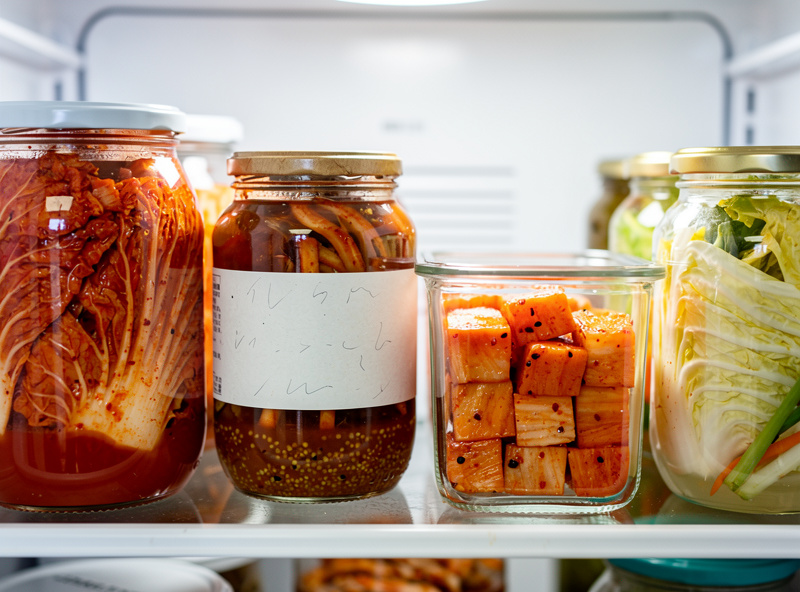
Container choice matters. Tall narrow jars push out the air and minimise headspace; wide squat jars give more surface exposure to oxygen. I use 1-litre tall mason jars filled to 1.5 cm below the rim, pressed down firmly to remove air pockets, with the loosely-twisted lid acting as a one-way valve for CO2 escape during stage 1. On day 2 I burp the jars once (open and let CO2 out — it can build up sharply), then move to fridge by day 3. The full salt-percentage and timing matrix sits within the broader lacto-fermentation guide.
Fermentation Temperature Windows: How Kitchen Climate Changes the Timeline
Temperature is the second lever, after salt, and it’s the one most kimchi guides gloss over because it genuinely varies by kitchen. Extension guidance on home fermentation puts the sweet spot around 68-72°F (20-22°C) for most vegetable ferments, which lines up closely with the counter-stage numbers I gave above for kimchi. Inside that window, fermentation runs at roughly the pace the recipe expects. Push much warmer and things accelerate, but not evenly — spoilage-adjacent organisms and off-flavours get a head start alongside the lactobacillus, which is exactly why I move kimchi to the fridge a full day earlier during a Swedish summer heatwave than I do in a cold snap. Push much cooler and everything slows down together, which is safer but genuinely just takes longer — a batch that hits the CO2-bubbling stage in 2 days at 20 C can take 4-5 days at 15 C, and a cold basement kitchen in winter sometimes pushes even that further out.
My kitchen runs warmer in summer than most guides assume, so I’ve built a rough personal correction into my kimchi timing over the years: every few degrees above the ideal range on my counter thermometer trims time off the stage-1 window I’d otherwise give it, and every few degrees below adds most of a day back. I check with an ambient thermometer sitting right next to the jars rather than trusting the room thermostat, because a counter near a window or a stove reads warmer than the rest of the kitchen. It sounds fussy for a vegetable ferment, but the CO2-bubbling visual cue described above is still the real trigger either way — the thermometer just tells me roughly when to start checking rather than replacing the check itself.
The same temperature logic explains why my four kimchi styles don’t move to the fridge on the same schedule even when I start them the same week. Kkakdugi’s smaller cube surface area means it hits the bubbling stage faster than a whole quartered napa at the same ambient temperature, so I check the daikon jars a half-day to a day ahead of the cabbage. Mul kimchi, running as a thin standing brine rather than a dense paste-packed jar, also tends to show visible activity earlier than baechu — thinner brine, faster diffusion, faster visible signal. None of this changes the underlying safety math; it just means the “day 2 in summer, day 3 in winter” rule I gave earlier is a starting point I adjust per format and per actual kitchen temperature, not a fixed clock.
Six Variations Worth Making
Once baechu is reliable, branch into the wider kimchi family. Kkakdugi (cubed daikon kimchi) is the second-easiest because daikon does not need the same salt-rinse step — just salt the cubes for 30 minutes, drain, and paste. The texture is crunchy where baechu is leafy; the use case shifts toward stews, BBQ pairings, and rice toppings. Chonggak (young radish stem kimchi) appears in early summer when young radishes have just-tender stems still attached; the bunches go into the paste whole and the kimchi has both stem and root in every bite.
Mul kimchi (water kimchi) is the summer side I make weekly from June through August. The base is a brine instead of a paste — water, salt, garlic, ginger, a pear or apple for sweetness, sliced napa and daikon — fermented 3-5 days on the counter then fridged. The drinking-broth that develops is one of the best summer hangover cures I have encountered. Oi sobagi (stuffed cucumber kimchi) is a 2-3 week kimchi made by slitting whole cucumbers and stuffing the gochugaru paste inside; perfect for one-off summer meals.
Baek kimchi (white kimchi, no gochugaru) is the elegant special-occasion version using only garlic, ginger, pear, pine nuts, and chestnuts. The fermentation is gentler and the resulting kimchi reads less as “spicy fermented vegetables” and more as “complex acidic side dish” — pairs beautifully with light fish and rice. The detailed comparison of paste-bound versus brine-bound styles is in my napa kimchi recipe and bridges back to the broader lacto-fermentation framework.
Cooking with Aged Kimchi
Fresh kimchi (under 1 month) is the side-dish kimchi — crunchy, bright, balanced. Aged kimchi (3-6 months) is the cooking kimchi — softer, sourer, deeply umami. Both have a place; treating them interchangeably misses what each is best at. My fridge always has one fresh jar and one aged jar going at any time.
Aged-kimchi dishes: kimchi jjigae (stew with pork belly and tofu — the canonical use), kimchi fried rice (with bacon, scallion, egg on top), kimchi pancake (jeon — flour batter with chopped kimchi), kimchi noodle soup, and the simplest kimchi-and-egg breakfast that has become my year-round Sunday default. The kimchi paste itself can be used as a flavour-base for dishes that do not contain solid kimchi — a tablespoon of paste in a stir-fry or soup carries the full flavour spectrum.
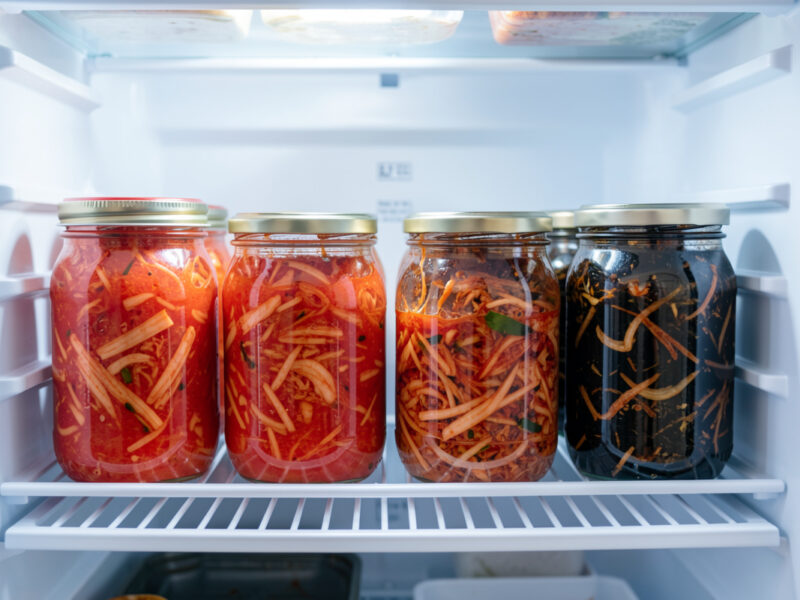
The flavour-deepening through cold aging is the same principle covered in curingchamber.com’s guide to home cheese aging — slow controlled microbial activity at low temperatures producing depth that fast room-temperature processes cannot. Cold-aging kimchi for 4-6 months in a dedicated drawer at 2-3 C reliably produces stew-grade kimchi; warmer fridge sections (vegetable crisper) age slightly faster but with less consistent results.
Troubleshooting: Surface Film, Off-Smells, Texture
The most common kimchi concern is the white film that sometimes forms on top of the brine — usually harmless kahm yeast, occasionally actual mold. The visual distinction is identical to sauerkraut: thin papery white film is yeast (skim and continue); fuzzy raised coloured patches are mold (discard). Detailed photos and the decision tree are in kimchi mold vs safe white film, with cross-application to sauerkraut mold vs kahm yeast — the same diagnostic skill transfers across every lacto-ferment.
Off-smells beyond the normal tangy-funky kimchi aroma usually trace to one of three causes: under-salting the cabbage (under 2.5 percent total weight, leading to early spoilage), using stale gochugaru that has gone musty (sulphurous or papery notes), or over-fermenting at room temperature (sharp acetone notes from yeast metabolism overtaking lactobacillus). The fix is preventive: weigh salt, freeze-store gochugaru, watch the counter-stage timing carefully and move to fridge before day 3 in warm kitchens.
Texture problems split between under-fermented (kimchi feels raw, cabbage too crunchy without enough acidity — give it more counter time) and over-fermented (kimchi is mushy and watery — happens with thin-walled summer cabbages, or with insufficient salt-rinse step). The seasonal cabbage variation is something I track per batch; winter napa from Korean markets produces noticeably crisper kimchi than mid-summer supermarket napa, and the seasonal rotation matters as much for kimchi as it does for garden to jar fermenting.
My Year-Round Kimchi Rotation
One 2-kilogram baechu batch every two weeks (year-round, the workhorse), one 1-kilogram kkakdugi batch every three weeks (alongside baechu but on a different cycle), one mul kimchi batch weekly in June-August, and occasional chonggak in May when young radishes are available. Total active kimchi work: roughly 90 minutes per week including ingredient prep.
Total annual kimchi consumption in my household: roughly 18 kilograms. Per-kilogram cost from scratch: under 4 dollars including gochugaru, fish sauce, garlic, and ginger sourced from Asian grocery stores. The equivalent commercial kimchi (Korean import) at my local grocery runs 16-22 dollars per kilogram and tastes noticeably duller because by the time it reaches the supermarket shelf it has been aging through transport and warehouse stops for 1-3 months at uncontrolled temperatures.
For a beginner’s first kimchi batch, my recommendation is: one head of napa (1.5 kilograms), 90 grams of salt for the rinse step, the simplest possible paste (200 grams glutinous rice porridge, 80 grams gochugaru, 40 grams minced garlic, 20 grams ginger, 40 ml fish sauce, 15 grams sugar), divided into two 1-litre tall mason jars, fermented on the counter for 2 days at 20 C, then fridged. Total cost: under 12 dollars for 2 jars that last 6-8 weeks of regular use. The equipment is identical to the sauerkraut kit — see my fermentation equipment guide for the broader picture and homemade sauerkraut guide for the closely-related sister ferment.
One last note for newcomers: kimchi is the ferment most people try once, find too strong, and never make again. The fix is almost always cold-storage time. Young 2-day-old kimchi tastes raw, sharp, and lopsided; the same kimchi at 3 weeks fridged tastes balanced, layered, and accessible. If your first batch is unpleasant on day 5, do not discard it — fridge it, wait three weeks, and taste again. The transformation is consistent, and the patience is what turns kimchi from “a thing I tried once” into the year-round kitchen workhorse my household runs on.
Frequently Asked Questions
How long does kimchi need to ferment before eating?
Two to three days on the counter at 18-22 C produces young kimchi with bright Leuconostoc tang. Move to the fridge at that point; kimchi continues developing complexity in cold storage for 4-6 weeks before stabilising. Eat as side-dish kimchi from week 2 onwards; eat as cooking-kimchi (for stews and fried rice) from month 3 onwards when the deep umami has developed.
What is the white film on top of my kimchi?
Almost always kahm yeast — a thin papery white film that forms on the brine surface when oxygen is present. Kahm yeast is harmless and cosmetic. Skim it off, push the cabbage back under the brine, and continue. If the growth is fuzzy and raised in any colour (pink, blue, green, black), that is mold and the batch should be discarded.
Why is my homemade kimchi not as flavourful as restaurant kimchi?
Three common causes: gochugaru is stale or low-quality (buy fresh Korean gochugaru and freeze-store it), fish sauce is omitted or replaced with soy sauce (Korean fish sauce is foundational to the umami profile), or kimchi was fridged too early (give the counter stage 2-3 days at 18-22 C to develop the bright Leuconostoc tang before fridging).
Can I make kimchi without fish sauce?
Yes, but the flavour profile shifts. Replace fish sauce with light soy sauce plus a teaspoon of miso for umami depth, or with kelp-based vegetarian dashi. Baek kimchi (white kimchi) is traditionally fish-sauce-free and works beautifully. Pure vegan kimchi tastes different from fish-sauce kimchi but is equally valid; it just is not what most restaurant baechu kimchi tastes like.
How long does homemade kimchi keep?
Four to six months refrigerated at 2-5 C for baechu and kkakdugi; 2-3 months for mul kimchi (water kimchi); 2-3 weeks for cucumber kimchi. The flavour profile shifts over time from bright and tangy at week 2 to deeply umami and softer at month 3. Both stages are useful for different dishes; do not discard older kimchi unless mold appears.
What is the difference between gochugaru and red pepper flakes?
Gochugaru is Korean-grown coarse-ground chilli that is sun-dried, slightly smoky, fruity, and ground to a specific texture between fine and coarse. Supermarket red pepper flakes are typically European or American varieties dried differently and ground to flake size. The flavour difference is dramatic; substituting red pepper flakes for gochugaru produces dull kimchi with sharp generic heat instead of complex fruity warmth.
Related Guides on FermentFoundry
- Gochugaru Guide: How to Buy, Use, and Store Korean Chilli Flakes
- Kkakdugi Radish Kimchi Recipe: Crisp Daikon Cubes from Scratch
- How Long Does Kimchi Last? Fridge, Counter, and Freezer Guide
- Easy Napa Cabbage Kimchi Recipe for Beginners
- Kimchi Mold vs Safe White Film: Photo ID Guide
- Lacto-Fermentation for Vegetables: The Complete Home Guide
- Homemade Sauerkraut: The Complete Cabbage-to-Crock Guide
- Fermentation Equipment: The Complete Home Brewer Toolkit

About Kenny Nyhus Fadil
A home fermenter documenting brines, bubbles, and the occasional moldy tragedy.
Keep Bubbling
How Long Does Kimchi Last? Safe Sour vs Actually Spoiled
Easy Napa Cabbage Kimchi Recipe for Beginners (Step-by-Step)