Homemade Sauerkraut: The Complete Guide from Cabbage to Crock

Sauerkraut is the gateway ferment that taught me everything I now know about lacto-fermentation. After five years of running batches monthly — typically a 4-kilogram crock plus two 1-litre jars of experimental variations — my house has produced roughly 200 kilograms of sauerkraut at a per-litre cost under 60 cents. The cabbage matters less than most beginner guides suggest; the salt, the squeeze, and the temperature decide everything.
This guide is the full system: which cabbage variety actually produces the best texture, the salt percentage that hits the safety window without going chalky, the equipment choice that decides your weekly maintenance load, and the troubleshooting tree for mushy kraut, surface kahm yeast, slow ferments, and the off-flavours that kill batches. Sauerkraut is forgiving once the variables are nailed; it is unforgiving while you are still learning them.
The Five Variables That Decide Sauerkraut Success
Five inputs control the outcome and every one of them is measurable. Cabbage moisture content (decides whether you need added brine), shred thickness (decides texture), salt percentage (decides safety and crunch), temperature during fermentation (decides flavour profile and timeline), and headspace under the weight (decides surface mold risk). The table below is what I check before every batch.
| Variable | Target | Tolerance | Failure if Off | How to Hit It |
|---|---|---|---|---|
| Salt by weight | 2.0% | 2.0-2.5% | Mushy at low, chalky at high | Food scale, weigh cabbage + salt |
| Shred thickness | 2-3 mm | 1-5 mm | Mushy if thin, tough if thick | Sharp mandoline or knife |
| Ferment temperature | 18-22 C | 15-24 C | Harsh above, sluggish below | Basement or seedling mat |
| Ferment time | 14-21 days | 10-28 days | Bland short, sour long | Taste at day 10, then every 3 days |
| Submersion under weight | 1-2 cm brine cover | 0.5-3 cm | Surface mold if exposed | Glass weight or folded cabbage leaf |
| Cabbage moisture | Self-brining | Add brine if needed | Dry kraut if low-moisture cabbage | Pick fresh, dense cabbages |
The single most important variable is salt percentage, and the single most underrated variable is cabbage freshness. A cabbage harvested today and shredded within 6 hours self-brines and ferments cleanly; a cabbage held in a supermarket cold room for 3 weeks loses moisture and ferments poorly even with perfect technique. If you have a garden — or access to a farmers’ market — the texture difference is dramatic. The tested comparison of 2%, 2.5%, and 3% salt ratios — effects on fermentation timeline, crunch, and acidity — is documented in the sauerkraut salt percentage guide.
Cabbage Selection: The Variety That Actually Matters
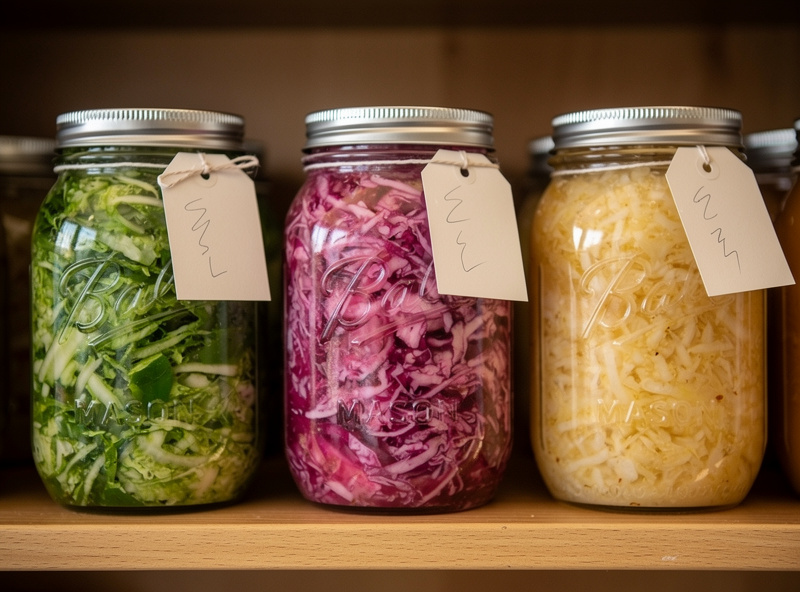
Not all cabbages ferment equally. Dense, late-season cabbages with tight heads outperform loose summer varieties. Brunswick, Late Flat Dutch, Krautman, and Stonehead are the four varieties that earned permanent slots in my garden after testing nine over five years. Round green supermarket cabbage works but produces softer kraut with shorter fridge life. Red cabbage works and produces a stunning pink kraut but takes 30 percent longer to ferment.
The variety guide that finally gave me consistent kraut texture is documented in best cabbage varieties for sauerkraut. Three takeaways from that work: head density correlates directly with kraut crunch (loose heads turn mushy), winter-storage varieties beat summer varieties for fermentation (denser cell walls), and the visible “frost ring” on autumn cabbages (a thin band of darker leaves near the stem) is actually a positive indicator of cell-wall structure, not damage.
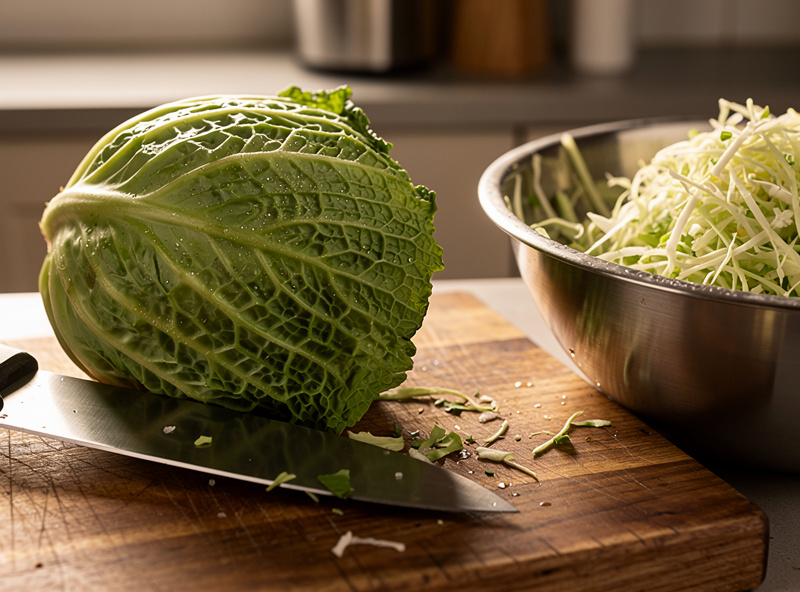
For shred thickness, my mandoline goes to a 2.5 mm setting and I lock it there. Hand-cut with a knife works but produces inconsistent thickness — some strips ferment in 7 days, others in 14, and the kraut develops uneven texture. A mandoline (15-30 dollars at any kitchen store) is the single piece of equipment I would buy first if starting over.
Salt and the Squeeze: The Eight-Minute Massage
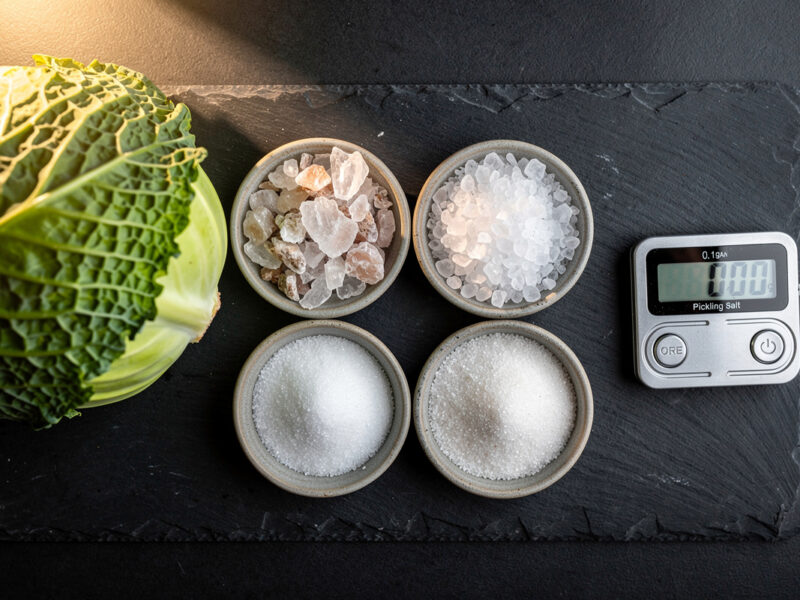
Sauerkraut is dry-salt fermented — no added brine, the cabbage releases its own water under salt and pressure. The procedure: weigh shredded cabbage in a large bowl (1 kilogram is a good first batch), add 2.0 percent unrefined salt (20 grams for 1 kg, weighed on a food scale), and massage vigorously with clean hands for 8-12 minutes. The cabbage releases water progressively; after 8 minutes you should have a glossy wet mass with a pool of brine at the bottom of the bowl.
The massage is the step beginners short-cut and then blame the recipe. Eight minutes feels long; less than eight minutes produces a kraut that has not fully released its water, leading to dry or chalky end results. I time it on a kitchen clock to make sure. Push down with the heel of your hand, fold, rotate the bowl a quarter turn, repeat. By minute 6 the cabbage volume should have visibly decreased by roughly 25 percent; by minute 10 it should fit in roughly half its starting volume.
Salt type matters less than the weight, but only within reason. Use unrefined sea salt, kosher salt, or pure pickling salt. Avoid iodised table salt (the iodine inhibits lactobacillus and the kraut never tangs up properly), avoid salt with anti-caking agents (cloudy brine and off-flavours), and pink Himalayan is fine if you accept slight mineral tinting. The side-by-side performance comparison of sea salt, kosher salt, pickling salt, and iodised across actual batches is in the best salt for sauerkraut guide. The salt percentage rule generalises to every other lacto-ferment — full detail in my lacto-fermentation guide.
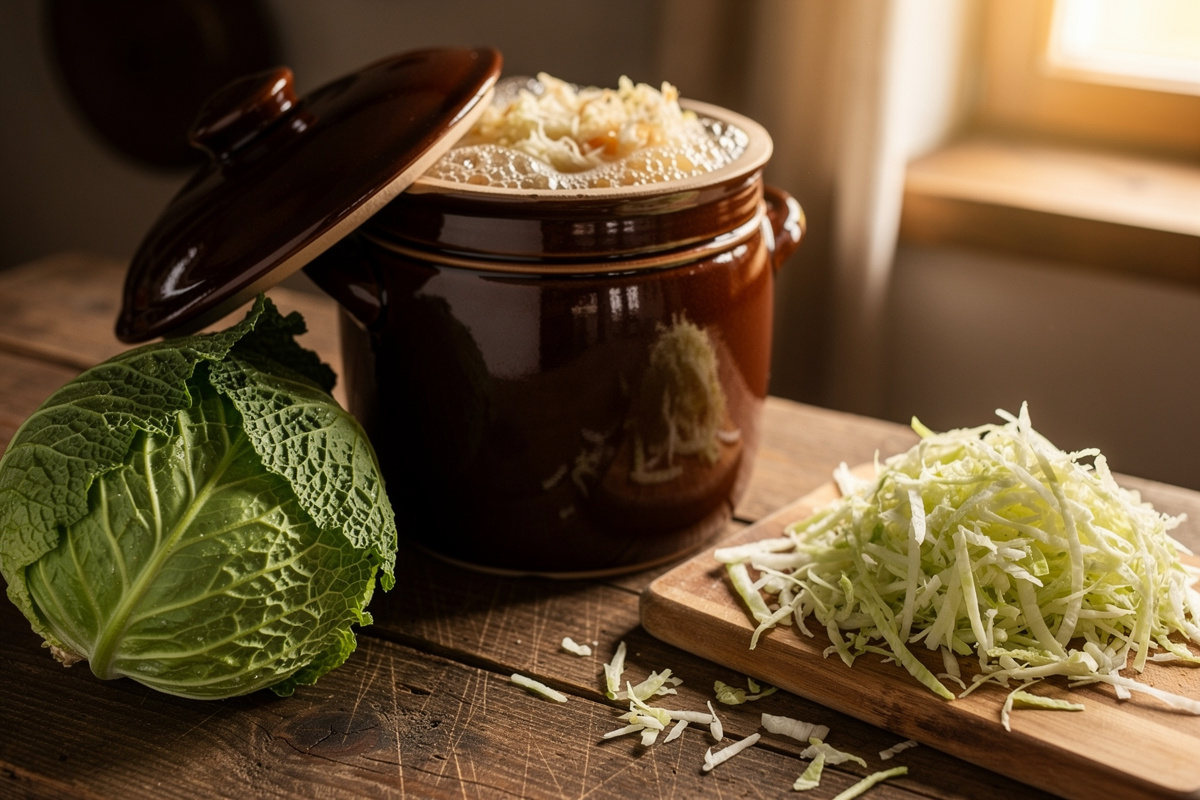
Crock vs Mason Jar: The Equipment Decision
You can make excellent sauerkraut in a 1-litre mason jar with a folded cabbage leaf as a weight. A ceramic fermentation crock with water moat (the traditional Polish-style design) costs 60-110 dollars and makes the work easier for large batches. The decision depends on batch size and how much daily attention you want to give the ferment. My split: jars for experimental small batches (300-500 grams), 4-litre crock for the standard 3-kilogram batch.
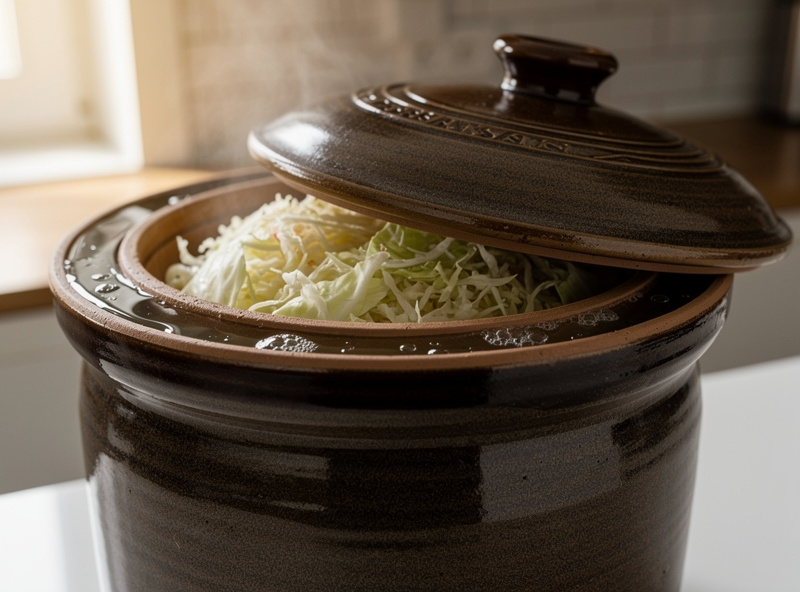
The crock advantage is the water moat. The crock has a lip filled with water; the lid sits in the moat creating an airlock seal that lets CO2 out but no air in. That means zero daily kahm yeast on the surface, no need to skim, and the ferment can run unattended for the full 14-21 day cycle. The crock disadvantage is cost and the volume commitment — 4 litres of kraut at a time is a lot if you live alone.
Mason jars work fine with any of three weight options: a glass fermentation weight disc (12-18 dollars for a set of four), a folded outer cabbage leaf submerging the shredded cabbage (free, requires daily skimming), or a Ziplock bag filled with 2-3 percent brine (free, fits any jar shape, kahm yeast still possible). The cost-vs-effort tradeoff matrix is documented in fermentation weights compared; my recommendation for first-time fermenters is the cabbage leaf — zero cost and you learn what kahm yeast looks like, which is a critical skill.
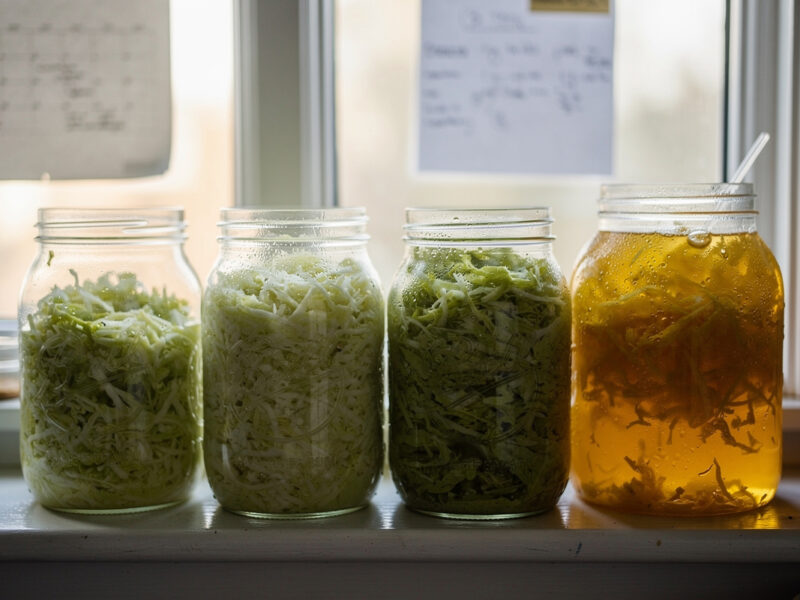
Temperature, Timeline, and the Daily Check
Sauerkraut ferments best at 18-22 C with a target around 20 C. At that temperature a 2-kilogram batch hits day-3 visible bubbling, day-7 mid-strength tang, day-14 fully developed flavour, and day-21 deep complexity. Cooler (16-18 C) extends the timeline to 21-28 days and produces noticeably deeper flavour with more umami. Warmer (24-26 C) compresses to 7-10 days but tends toward harsh acidity and occasional ropy texture.
The daily check is non-negotiable for the first week, regardless of equipment. Look for: active bubbling within 36-48 hours (healthy), cloudy brine from day 3-4 (healthy), surface kahm yeast as a thin white film (cosmetic, skim and continue if using a jar), and fuzzy raised mold patches in any colour (failed batch, discard). The first 48 hours are when most ferments either start cleanly or signal an underlying problem like insufficient salt.
Taste tests start at day 10. I use a clean fork — never reused hands — and pull a small sample from below the brine line. The kraut should taste tangy and pleasant at day 10, fully tangy and slightly sharp at day 14, and deeply tangy with complexity at day 21. Once it tastes the way I want it, the crock moves to a cool basement or fridge to slow the fermentation to a crawl. Slow-finished kraut keeps developing nuance for weeks; uncontrolled kraut keeps fermenting and turns harsh.
Spices, Variations, and Regional Styles
Plain sauerkraut is a workhorse; flavoured variations expand what you can do with the same base technique. The traditional German addition is caraway seeds at roughly 1 teaspoon per kilogram of cabbage; Polish style adds juniper berries and black pepper; Hungarian adds paprika; my personal favourite is a 50:50 cabbage-and-shredded-apple kraut with cinnamon and clove. All variations follow the same 2.0 percent salt rule; the additions are flavour, not structural.
Cross-cultural variations worth trying: kimchi-style sauerkraut with gochugaru, ginger, and garlic (covered in detail at napa cabbage kimchi recipe as the kimchi-specific cousin); curtido (Salvadoran-style with carrot, oregano, and chilli); and the “garbage” kraut I make in autumn with whatever vegetables the garden ends with — cabbage, carrot, daikon, radish, beet, in any ratio that fits the crock. The general principles for using whatever produce you have are documented in garden to jar fermenting what you grow.
Red cabbage kraut deserves a dedicated note: the colour is stunning (deep magenta brine, pink-purple shredded leaves), the flavour slightly different (more tannin, less acid bite), and the timeline 30 percent longer because red cabbage cell walls are denser. I make 1 batch a year of red kraut in late autumn; it ages beautifully through winter and is the highlight of charcuterie boards through December. The full recipe with caraway seed ratio and the extended 30-percent timeline adjusted for dense red cell walls is in the red cabbage sauerkraut guide.
Troubleshooting: Mushy, Slimy, Chalky, Surface Problems
Mushy sauerkraut is the most common failure and the most diagnosable. The three causes: cabbage too old (stored more than 3 weeks before fermenting), salt percentage too low (under 2 percent), or fermentation temperature too high (over 24 C for more than 48 hours). The recovery is preventive: fresh cabbage, weighed salt, climate control. A mushy batch is generally still safe to eat but unpleasant; the full diagnostic flow lives in sauerkraut mushy fixes.
Slimy or ropy texture (rare) indicates Leuconostoc bacteria taking over before Lactobacillus establishes — usually a temperature problem. The kraut is still safe but visually concerning. Discard and restart at a lower temperature with a small inoculum of brine from a known-good ferment to give Lactobacillus a head start. This is the same pattern that occasionally appears in lacto-pickles and is covered in my lacto-fermentation guide.
Chalky or salty kraut means salt percentage was too high (over 2.5 percent). The kraut is safe but harsh; the rescue is to rinse a portion before eating, or use it as a flavour-base in soups rather than a side dish. Surface kahm yeast versus actual mold is the diagnosis that decides whether to skim and continue or discard — the comprehensive photo-and-decision guide is in sauerkraut mold vs kahm yeast, and the visual ID skill transfers across every fermentation discipline I run.
Long-Term Storage and Aging
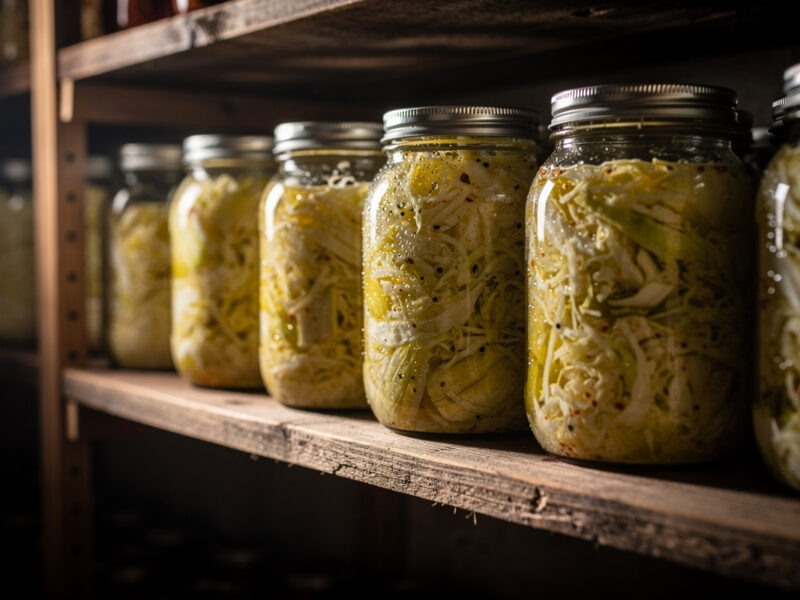
Finished sauerkraut keeps 6-12 months refrigerated in glass jars, and the flavour deepens for the first 4-6 weeks of cold storage before stabilising. My pantry rotation: peak ferment in autumn (October-November), move to fridge in late November, eat from December through July. By July the kraut still tastes excellent — slightly more umami than at month 1 — and the texture is intact provided I started with dense cabbage.
The aging-and-storage discipline is the same one I apply to lacto-pickles in a curing chamber (documented in fermented pickle brining and curing-chamber aging), and the climate-stability principles parallel what’s covered in curing chamber climate control for charcuterie. Different products, identical insistence on stable temperature and oxygen control. For long-storage kraut beyond 12 months, a dedicated refrigerator drawer at 2-3 C extends usable life to 18 months.
One specific trick for long storage: pour a 1-centimetre layer of pressed cabbage leaf and a few drops of brine on top of the kraut before sealing for cold storage. The leaf acts as an anaerobic cap, the brine fills any micro-gaps, and the result is a kraut that stays bright and crisp through summer. Without the cap, oxygen slowly degrades the surface kraut and you end up trimming the top centimetre before eating each jar.
My Five-Year Sauerkraut System
One large batch in October, two small batches in spring, weekly small experimental batches year-round. The October batch is the workhorse — 3 kilograms of Brunswick cabbage from my garden, plain salt, no flavourings, fermented 21 days in the crock, jarred and stored in the cold cellar through winter. The spring batches are for variety — usually red cabbage and a kimchi-influenced variation. The weekly experimental batches use whatever vegetables the garden produces.
Total active work: about 90 minutes for the October batch, 30 minutes for each spring batch, and 15 minutes for each weekly experiment. Total annual yield: roughly 12 kilograms of finished kraut, which covers all household needs and produces enough surplus to gift two or three jars at holidays. Total annual cost: under 25 dollars for salt and jar lids; cabbage is from the garden and the crock is a one-time purchase that has lasted six years and counting.
For a beginner’s first batch, my recommendation is the smallest possible scale that lets you learn the procedure: 500 grams of fresh dense cabbage, 10 grams of salt, 8 minutes of hand massage, packed into a 750-millilitre mason jar with a folded cabbage leaf weight, left on the counter at 18-22 C for 10-14 days, tasted, fridged. Total cost: under 5 dollars. The lessons from that first batch transfer to every other ferment you will run — see the broader framework in my lacto-fermentation guide.
Frequently Asked Questions
What is the correct salt percentage for homemade sauerkraut?
Two percent by total weight of shredded cabbage. For 1 kilogram of cabbage use 20 grams of salt — weighed on a food scale, never measured by volume. The tolerance is 2 to 2.5 percent; below 2 risks spoilage and mushy texture, above 2.5 produces chalky kraut and can stall the lactobacillus. Use unrefined sea salt, kosher salt, or pickling salt — never iodised table salt.
Why is my sauerkraut mushy instead of crunchy?
Three common causes: cabbage held too long before fermenting (use within 48 hours of harvest), salt percentage too low (under 2 percent), or fermentation temperature too high (over 24 C for extended periods). Picking dense winter-storage cabbage varieties like Brunswick or Late Flat Dutch also improves crunch retention significantly compared to loose summer varieties.
How long should I ferment sauerkraut?
At 18-22 C, 14-21 days produces standard tangy sauerkraut. Cooler temperatures (16-18 C) extend to 21-28 days with deeper flavour. Warmer (24-26 C) compresses to 7-10 days with sharper acidity. Taste-test from day 10; once the flavour reaches what you want, move to the fridge where the kraut continues to deepen for 4-6 weeks before stabilising.
Do I need a fermentation crock or can I use a mason jar?
A 1-litre mason jar with a folded outer cabbage leaf as a weight produces excellent sauerkraut for under 3 dollars in equipment. A traditional water-moat ceramic crock (60-110 dollars) is more convenient for large 3-4 kilogram batches because the water seal eliminates the daily kahm-yeast skim. Beginners should start with jars; consider a crock after 3-4 successful batches if scaling up.
What is the white film on top of my sauerkraut?
Almost certainly kahm yeast — a thin papery white film that forms on the surface of vegetable ferments exposed to oxygen. Kahm yeast is harmless and cosmetic. Skim it off with a clean spoon and continue fermenting. The kraut underneath is fine. If the surface growth is fuzzy and raised in any colour (pink, blue, green, black), that is actual mold and the batch should be discarded.
How long does homemade sauerkraut keep in the fridge?
Six to twelve months refrigerated in glass jars at 2-5 C. The flavour deepens during the first 4-6 weeks of cold storage and then stabilises. To maximise long-term storage, leave a folded outer cabbage leaf and a centimetre of brine on top before sealing for the fridge — this creates an anaerobic cap that prevents surface oxidation and keeps the kraut bright through summer.
Related Guides on FermentFoundry
- Sauerkraut Mold vs Kahm Yeast: How to Tell the Difference
- Why Did My Sauerkraut Turn Mushy? 7 Fixes That Actually Work
- Best Cabbage Varieties for Sauerkraut: From Garden to Crock
- Lacto-Fermentation for Vegetables: The Complete Home Guide
- Fermentation Weights: Glass vs Ceramic vs Ziplock Bag Compared
- Sauerkraut Juice Benefits: What the Brine Actually Does

About Kenny Nyhus Fadil
A home fermenter documenting brines, bubbles, and the occasional moldy tragedy.
Keep Bubbling
Best Salt for Sauerkraut: Sea vs Kosher vs Pickling vs Iodized
How to Store Sauerkraut: Fridge, Cellar, and Long-Term Keeping