Salt and Brine Math: The Complete Fermentation Salinity Guide

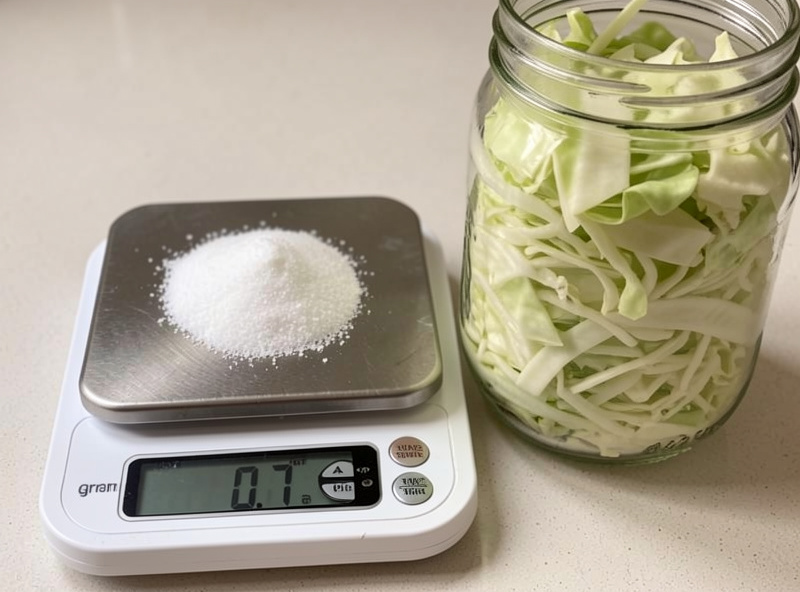
Fermentation salt math comes down to one number: brine percentage by weight. Weigh everything going into the jar — vegetables plus water — multiply that total by the salt percentage you want (2% for kraut, up to 5% for a chili mash), and that many grams of salt is your answer. A 0.1 g scale does the whole job.
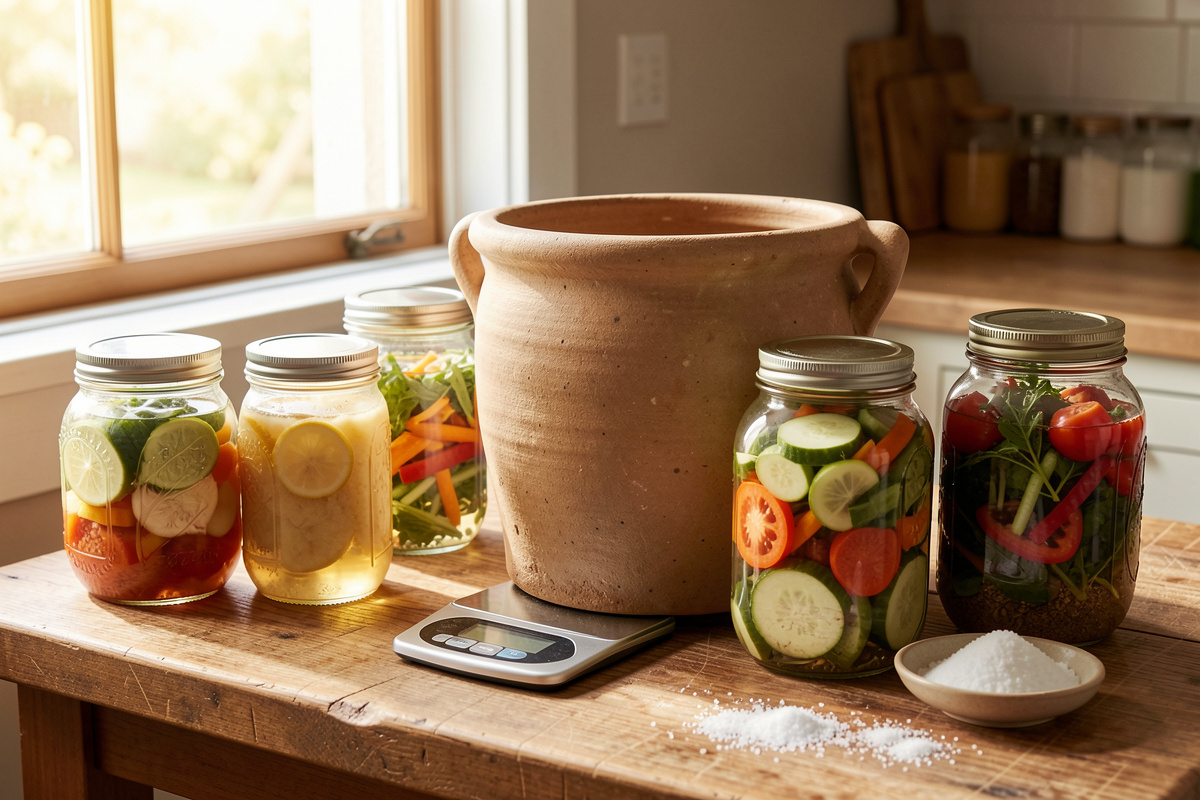
That single calculation is the backbone of every safe ferment in my kitchen, and it is what this guide is built around. I run sauerkraut and kimchi crocks, lacto pickles, hot-sauce mashes, miso and koji, and a continuous-brew kombucha vessel — and every one of them starts the same way: salt weighed on a scale, brine strength checked against a number I trust. After years of running these batches side by side, I have come to think of salt not as a seasoning but as the main control dial on the whole process. Get it right and Lactobacillus does exactly what you want. Get it wrong and you are either gambling with safety or guaranteeing mush. This is the unified salt-and-brine-math territory I wish I had when I started, instead of a hundred scattered per-recipe salt notes.
Why Salt Is the Master Dial in Fermentation
Salt does three jobs at once, and understanding all three is what separates someone following a recipe from someone who can troubleshoot any ferment. First, it selectively suppresses the spoilage organisms while letting salt-tolerant Lactobacillus thrive — that head start is the entire game. Second, it draws water and sugars out of vegetable cells by osmosis, building the anaerobic brine that protects the batch. Third, it firms pectin in the cell walls, which is why a correctly salted pickle stays crunchy and an under-salted one goes to slime.
Because salt is doing safety work and not just flavor work, the percentage is not a matter of taste. It is a measured input. The brines I run cluster into predictable bands by ferment type, and once you internalize those bands you stop needing a recipe at all — you weigh, you calculate, you pour. The rest of this hub is the map of those bands and the math that gets you there. If you want the step-by-step calculation walked out with a scale in hand, the dedicated guide on how to calculate a salt brine percentage by weight takes it slower than I will here.
Brine Percentage by Weight: The Only Formula That Matters
The formula is salt-grams = total-weight × percentage. Total weight is everything in the vessel that the salt has to season — vegetables and water both. If you have 1,000 g of cabbage and 500 g of water, your total is 1,500 g, and a 2.5% brine needs 37.5 g of salt. Volume measurements (teaspoons, cups) are guesses; weight is the truth, which is why a scale beats every measuring spoon in the drawer.
There are two schools of how you express the percentage, and confusing them is the most common math error I see. The clean, defensible method is total-weight brine percentage: salt as a percent of everything in the jar. The older “brine-only” method calculates salt as a percent of the water alone and ignores the vegetable weight, which under-salts a packed jar of produce. Throughout this site I use total weight, because it is the version that actually predicts safety. When a recipe elsewhere gives you a salt figure that seems low, this difference is usually why.
Salt Percentage by Ferment Type
These are the bands I work in, and every one of them is chosen for safety first and flavor second. Treat the lower end as the floor for a fast, warm, crunchy result and the upper end as the choice for slower, longer, or higher-risk ferments.
| Ferment | Brine % by weight | Why this band |
|---|---|---|
| Sauerkraut | 2.0–2.5% | Dry-salted; enough to draw brine and stay crunch-firm without stalling the culture |
| Kimchi | 2.0–3.0% | Brined then rinsed; final salinity lands mid-band after seasoning paste is added |
| Lacto pickles (cucumber, bean, carrot) | 3.5–5.0% | Submerged in brine with no cell-wall salt pre-draw; needs a stronger solution |
| Hot-sauce / chili mash | 3.5–5.0% | Long, warm ferments with high sugar; higher salt holds the line for weeks |
| Miso (long-aged) | 5–13% | Months-to-years aging; high salt is the preservation strategy itself |
| Preserved lemons | 10%+ | Salt-cured rather than lacto-fermented; salt is the whole method |
Notice the spread. A sauerkraut at 2% and a chili mash at 5% are doing the same chemistry — Lactobacillus dropping pH below 4.0 — but the pickle and mash are fully submerged with no osmotic pre-draw, so they need more salt in the water to compensate. The numbers are not arbitrary folklore; they track the physical situation in the jar. For the deep dive on sauerkraut specifically, I tested 2% vs 2.5% vs 3% kraut brines head to head, and the result reshaped how I salt cabbage.
Salt as a Safety Dial, Not Just Flavor
This is the part of brine math that is non-negotiable. The botulism vector in fermentation lives at the intersection of low salt, anaerobic conditions, and a pH that has not yet dropped. Correct salt is what gets you safely across that window. Below roughly 2% in a submerged vegetable ferment you are leaning entirely on a fast pH drop to protect the batch, and if the culture is sluggish — cold kitchen, chlorinated water, weak starter activity — that protection can lag.
The reassuring truth is that the safe ranges are wide and forgiving as long as you stay inside them. A vegetable ferment that hits pH 4.6 or below is in the safe zone for acidity, and salt at the bands above buys you the time to get there. That 4.6 figure is not mine: the National Center for Home Food Preservation uses it as the safety line for fermented and acidified vegetables, and it is the one number in this whole guide I will never round. What you do not do is freelance below the floor to make something “healthier” — that is exactly the move that turns a food project into a risk. I cover where the genuine floor sits, and why, in the guide on how low you can safely go with salt. The short version: respect the floor, and use a pH meter when you push it.
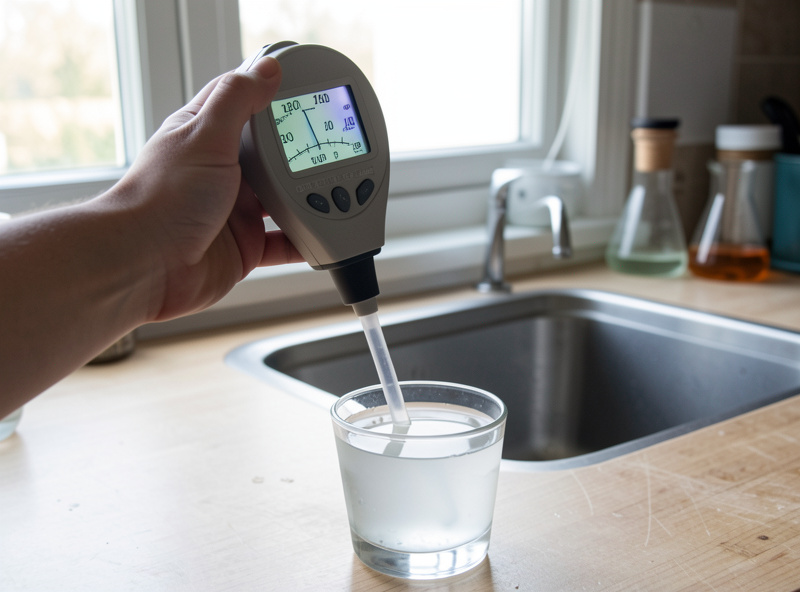
The Measurement Bench: Scale vs Salinity Refractometer
Two tools tell you about salt, and they answer different questions. The 0.1 g kitchen scale tells you what you put in — it is how you build a brine to spec. The salinity refractometer tells you what is actually in the liquid right now — it reads the dissolved salt in a drop of brine and is how you check an existing or topped-up batch. The scale is the planning tool; the refractometer is the audit tool.
For ninety percent of home fermenting, an accurate scale is all you need, because if you weighed the salt correctly the brine is correct by definition. The refractometer earns its place when you are working with a brine you did not build from scratch — a jar someone handed you, a batch you topped up with fresh water, or a recipe where the produce released far more or less liquid than expected. I lay out exactly when each tool wins in salinity refractometer vs kitchen scale. If you only buy one, buy the scale.
| Question you are asking | Right tool | Why |
|---|---|---|
| “How much salt do I add to build this brine?” | 0.1 g scale | Measures the input directly; weight is exact |
| “What is the salinity of this existing brine?” | Salinity refractometer | Reads dissolved salt in the liquid as it stands now |
| “Did topping up with water dilute me below the floor?” | Salinity refractometer | Confirms the live concentration after a change |
| “Is my ferment acidic enough to be safe?” | pH meter | Salinity does not measure acidity; only pH does |
One caution worth stating plainly: a salinity refractometer reads total dissolved solids as if they were salt, so a brine loaded with sugar (a chili-fruit mash, a sweet pickle) will read high. On clean salt-and-water brines it is dead accurate; on sugary or murky ones, trust your scale math instead. As an Amazon Associate I earn from qualifying purchases. If you are shopping, a basic salinity refractometer for brine and a 0.1 g gram scale are the two purchases that pay for themselves the fastest.
Salt Types and Why Weight Beats Volume
Here is the trap with volume measuring: a tablespoon of fine table salt weighs nearly twice what a tablespoon of flaky kosher salt weighs, because the crystal size changes how much packs into the spoon. Two recipes calling for “one tablespoon of salt” can deliver wildly different brine strengths. Weighing eliminates the entire problem — 20 g of salt is 20 g of salt whether it is fine sea salt, kosher, or pickling salt.
For fermentation, use a salt without anti-caking agents or added iodine where you can. Iodized table salt can inhibit some cultures and occasionally tints a brine; the anti-caking agents cloud it. Pickling salt, plain sea salt, and most kosher salts are all fine — the differences are about purity and dissolving speed, not the math. I broke down the trade-offs in best salt for sauerkraut, and the conclusion holds across every ferment: buy clean salt, then forget about the type and trust the gram weight.
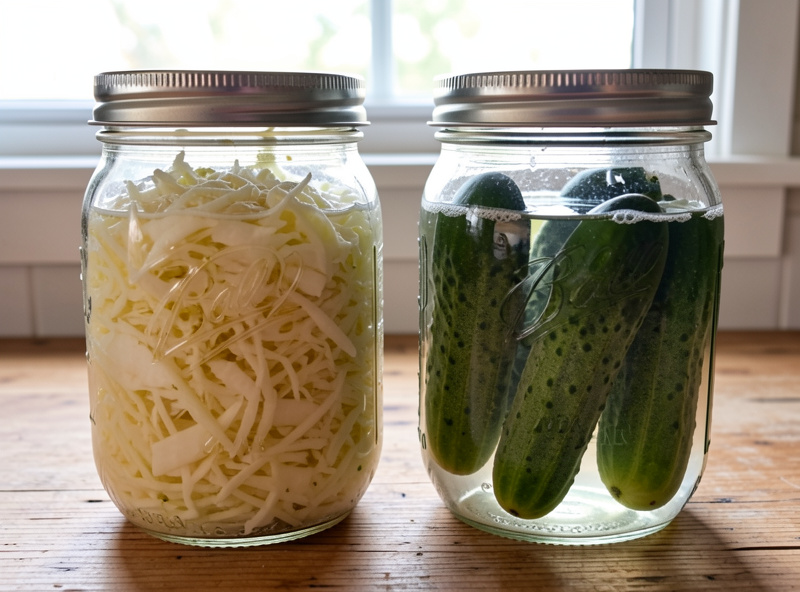
Dry Salting vs Brining: Two Roads to the Same Salinity
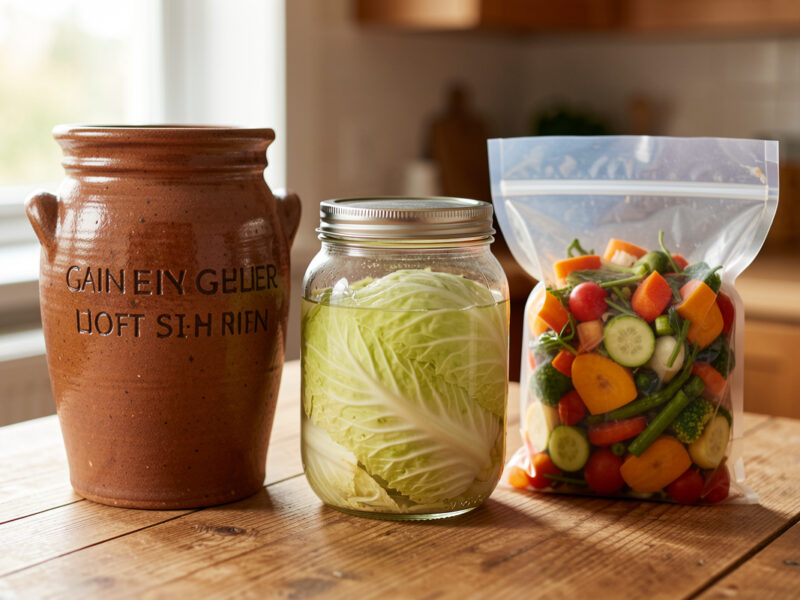
There are two ways to get salt into a vegetable ferment. Dry salting means massaging salt directly into shredded produce — cabbage for kraut, radish for kkakdugi — and letting osmosis pull the vegetable’s own water out to form the brine. Brining means submerging whole or chunked produce in a pre-mixed salt solution. Both land at a safe salinity; they suit different vegetables.
Dry salting works for anything you can shred or slice thin enough to release water — cabbage is the classic. Brining is for produce that holds its structure: cucumbers, beans, carrots, garlic cloves. The choice is mostly about whether the vegetable will give up enough of its own liquid. I walk through which method to pick for which vegetable in dry salting vs brining vegetables. The math is the same number either way; only the delivery changes.
The Quart-Jar Quick Math
Most home batches happen in a quart jar, so it is worth having the numbers memorized. A quart jar packed with vegetables and topped with brine holds roughly 500–750 ml of water on top of the produce. For a 3.5% pickle brine, that is about 18–26 g of salt in the water; for a 5% brine, 25–37 g. I keep a printable set of these in the quart-jar brine cheat sheet so I am not redoing the arithmetic every time I pack a jar.
The reason I still weigh even with the cheat sheet handy is that “a quart jar of cucumbers” is not a fixed weight — a jar of whole pickling cukes holds far more water than a jar of dense carrot sticks. The cheat sheet gets you in the ballpark fast; the scale confirms it. When I am running several jars at once, I weigh the empty jar, fill it, weigh again, and salt to the difference. It takes ten seconds and removes all doubt.
Adjusting Brine Mid-Ferment Without Wrecking It
Brine levels drop. Vegetables float and poke above the surface, evaporation lowers the line, and a vigorous ferment can push liquid out of the jar entirely. The fix is topping up — but if you top up with plain water you dilute the salinity, and if you do it carelessly you can drop below the safe floor on an active batch. The rule I follow is to top up with a brine matched to the original strength, never plain water, and to keep the produce submerged with a fermentation weight so it does not need topping in the first place.
The full procedure — how to mix a matching top-up brine, when it is safe, and how to confirm with a refractometer afterward — is in topping up brine mid-ferment. Done right it is a non-event. Done wrong it is how an otherwise healthy ferment slides into trouble three weeks in.
When the Brine Looks Wrong: Cloudy, Slimy, or Filmed
Brine appearance is a readout of what is happening chemically, and most of what alarms people is normal. Cloudy brine is usually just Lactobacillus doing its job — the cloudiness is bacterial activity and suspended lactic acid, and it clears or settles over time. A white film on top is most often kahm yeast, which is harmless: skim it and continue. Real mold is fuzzy, raised, and colored (green, black, pink), and it means the batch goes in the bin.
Slimy or ropey brine, on the other hand, is a salinity signal — it usually means the brine was too weak, or the temperature too warm, letting the wrong bacteria produce polysaccharide slime. That is a brine-math failure, not bad luck. I cover the full diagnostic — what each appearance means and which are salt-related — in why your brine went cloudy or slimy, and the kahm-versus-mold call gets its own treatment in the kahm yeast guide and the photo comparison of sauerkraut mold vs kahm yeast.
Brine Math Across the Whole Network of Ferments
The thing I love about getting salt math into your bones is that it transfers everywhere. The 2% logic of a kraut crock is the same logic that protects a crunchy lacto pickle, that sets up a kimchi before the seasoning paste goes in, that holds a hot-sauce mash stable for weeks. Even outside vegetables, the principle echoes — the same patience and pH-watching that runs a kraut crock runs the salami in a curing chamber, Lactobacillus dropping pH at a different scale.
If you are setting up your bench, the fermentation equipment guide covers the vessels and tools, and the choice between a crock, jar, or vacuum bag and between an airlock and a silicone lid both feed back into how easy your brine is to manage. Master the number first, though. Everything else is logistics around a value you can calculate in your head: total weight, times the percentage, equals grams of salt.
Frequently Asked Questions
How do I calculate salt for a fermentation brine?
Weigh everything going into the jar (vegetables plus water), multiply that total grams by the salt percentage you want as a decimal, and that is your salt in grams. For 1,500 g of total contents at 2.5%, you need 37.5 g of salt. A 0.1 gram scale does the whole job.
What salt percentage is safe for fermenting vegetables?
Sauerkraut runs 2 to 2.5%, kimchi 2 to 3%, and submerged lacto pickles and chili mashes 3.5 to 5% by total weight. These bands suppress spoilage organisms while letting Lactobacillus drop the pH below 4.6 into the safe zone.
Should I measure salt by weight or by volume?
Always by weight. A tablespoon of fine table salt weighs nearly twice as much as a tablespoon of flaky kosher salt, so volume measurements give wildly different brine strengths. Twenty grams of salt is exact regardless of crystal size.
Do I need a salinity refractometer?
Not for most fermenting. If you weigh the salt correctly, the brine is correct by definition, so a scale is enough. A refractometer earns its place when auditing an existing brine you did not build, or confirming salinity after topping up with water.
Why did my brine go cloudy?
Cloudy brine is usually just Lactobacillus activity and suspended lactic acid, which is normal and harmless. It often clears or settles over time. Slimy or ropey brine is different and usually signals salt that was too weak or a ferment kept too warm.
Can I use iodized table salt for fermentation?
It is better to avoid it. Iodine can inhibit some cultures and anti-caking agents cloud the brine. Pickling salt, plain sea salt, and most kosher salts are all fine. The salt type does not change the gram math, only purity and dissolving speed.
Related Guides in This Cluster
- How to Calculate a Salt Brine Percentage by Weight With a Scale
- Dry Salting vs Brining Vegetables: When to Use Each Method
- Low-Salt Fermentation: How Low Can You Safely Go?
- Salinity Refractometer vs Kitchen Scale: Measuring Brine Strength
- Why Your Brine Went Cloudy or Slimy: Salt and Salinity Causes
- How Much Water and Salt for a Quart Jar: A Brine Cheat Sheet
- Topping Up Brine Mid-Ferment Without Wrecking the Salinity

About Kenny Nyhus Fadil
A home fermenter documenting brines, bubbles, and the occasional moldy tragedy.
Keep Bubbling
Crock vs Jar vs Vacuum Bag: Which Fermentation Vessel Wins
Adding Minerals Back: When Distilled Water Stalls a Ferment
