Wild-Yeast Baking Beyond Sourdough: The Complete Guide

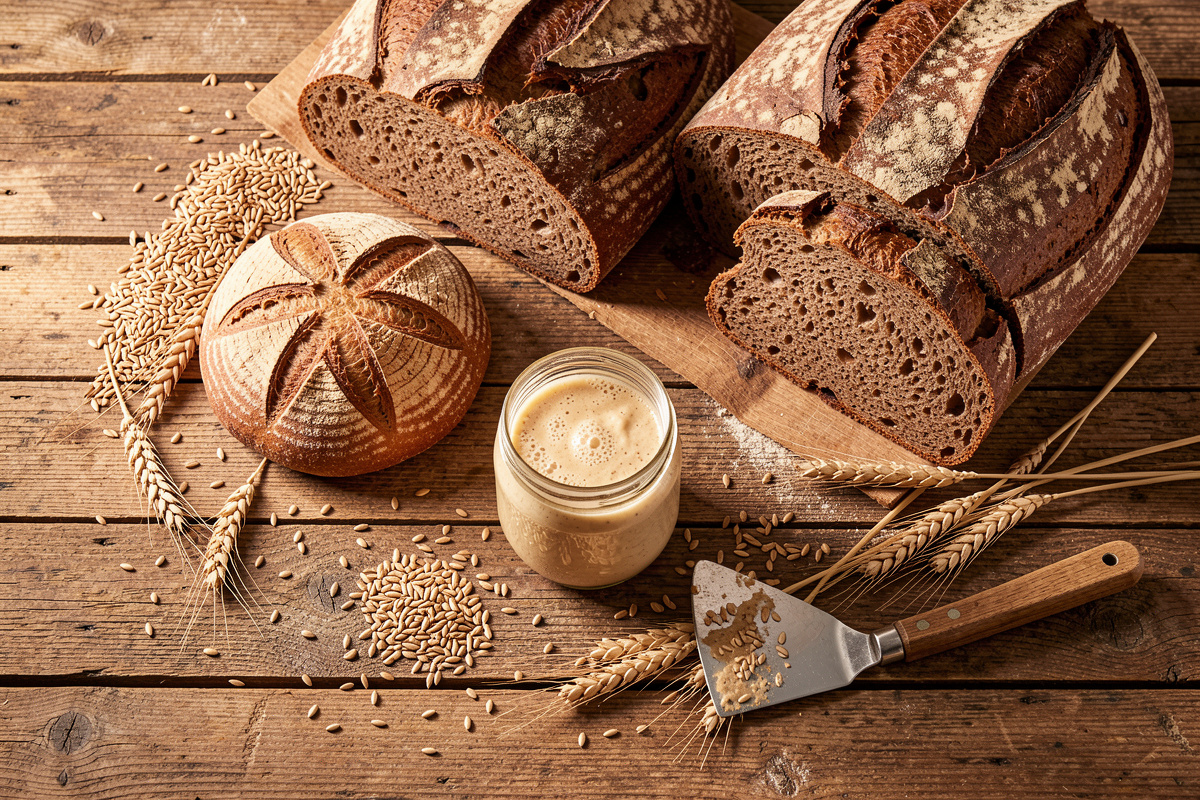
Wild-yeast baking is leavening bread with the yeasts and Lactobacillus bacteria that live on grain and in the air, instead of a packet of commercial yeast. A mature wild leaven drops dough pH to around 3.8–4.3, and that acidity — not just the gas — is what gives the crumb its keeping quality, flavour, and structure.
Most people meet wild yeast as “sourdough” and stop there. But sourdough is one dialect of a much larger language. The same culture that raises a white loaf will raise a dense rye, a nutty whole-wheat pan loaf, a blistered pizza base, and — if you build it from fruit instead of flour — a sweet yeast-water bread that barely tastes sour at all. This guide maps that whole territory the way I run it in my own kitchen: by measurement, not folklore. I salt by weight, I check pH on a calibrated meter, and I treat the leaven as a controlled organism rather than a mystery.
What “Wild Yeast” Actually Means
Wild yeast baking relies on a two-organism partnership: wild strains of Saccharomyces and Kazachstania yeasts produce carbon dioxide to lift the dough, while Lactobacillus bacteria produce lactic and acetic acid that sour and preserve it. Commercial baking uses a single domesticated yeast, Saccharomyces cerevisiae, and skips the bacteria entirely.
That difference is the whole story. A commercial-yeast dough is fast and one-dimensional: the yeast eats sugar, burps gas, and you bake before anything else happens. A wild leaven works on two clocks at once. The yeasts handle rise; the bacteria slowly acidify, and as the pH falls the gluten relaxes, enzymes wake up, and flavour compounds accumulate. When I pull a ripe levain off the counter it reads about 3.8 on my meter and smells of green apple and yoghurt — that is the bacteria talking, and no instant-yeast dough will ever do it. If you want the head-to-head on texture, timing, and digestibility, I broke it down in the yeasted vs sourdough bread comparison.
The “wild” part is also more literal than people assume. The yeast and bacteria in a mature starter mostly come from the flour itself, not the air, which is why your choice of flour for the starter changes how it behaves. Whole rye and whole wheat carry far more microbial load and enzyme activity than refined white flour, and a starter fed on them ferments faster and sours harder.
Beyond Sourdough: The Wild-Yeast Spectrum
“Sourdough” is shorthand for one point on a spectrum that runs from barely-sour to mouth-puckering. Where a given bake lands depends on three things you can actually control: the grain, the hydration, and the ratio of yeast activity to bacterial activity. Manage those and you can aim a wild leaven anywhere on the scale.
At the mild end sits yeast water — a leaven built by fermenting raisins, apples, or figs in water until it fizzes, then using that liquid to inoculate a dough. It is almost pure yeast with very little acid, so it bakes up light and sweet, closer to a mild commercial loaf than a tangy sourdough. At the sharp end sits a cold-retarded rye, where acetic acid dominates and the loaf tastes genuinely sour. Classic white sourdough sits in the middle. I walk through how to build either kind of leaven in the wild yeast starter guide, because the starter is where you set the dial before a single gram of dough flour is weighed.
The point of “beyond sourdough” is that the culture is a tool, not a recipe. Once you stop thinking “sourdough = one sour bread” and start thinking “wild leaven = a controllable rise plus a controllable amount of acid,” the whole catalogue of breads opens up: sandwich loaves, baguettes, focaccia, bagels, crackers, and pizza all come off the same jar of starter.
The Leaven Is the Engine
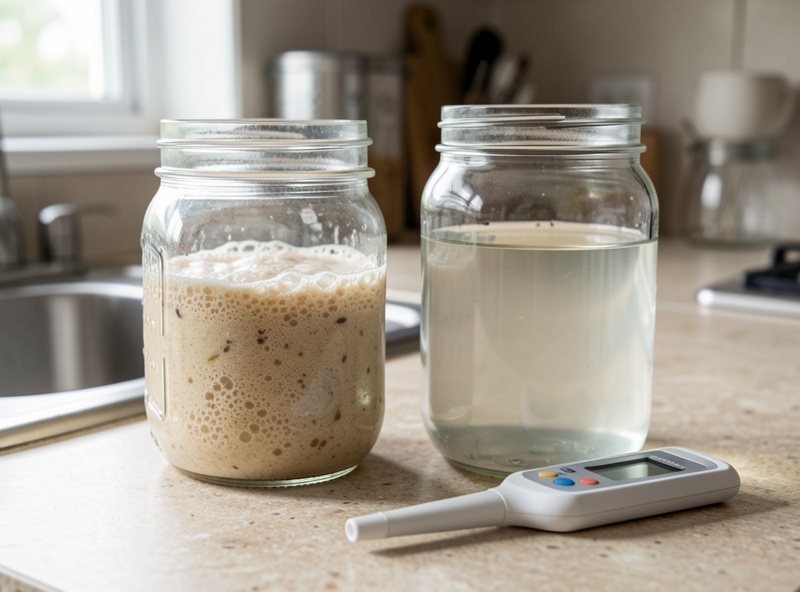
Everything downstream depends on a healthy culture, so the leaven is the first thing to get right. A starter at peak is roughly doubled in volume, domed and just starting to recede, riddled with bubbles, and reads pH 3.8–4.2 on a meter. That window — ripe but not collapsed — is when it has the most live yeast and the cleanest acidity for baking. King Arthur Baking’s sourdough guide describes the same ripe-but-not-collapsed window for reference.
I keep my own starter two ways. In fast cycles it lives on the counter and gets fed twice a day at a 1:5:5 ratio (one part starter, five parts flour, five parts water by weight). When I am not baking it goes dormant in the fridge on a weekly feed. The mechanics of that rhythm — ratios, timing, when to switch between counter and fridge — are laid out in the sourdough starter feeding schedule, and if your culture goes sluggish or stops rising, the starter rescue guide covers the diagnosis. A weak starter is the single most common reason a wild-yeast loaf comes out dense, which I dig into under why sourdough turns out dense.
One safety note that matters from day one: a starter is an acidic, competitive environment, and that acidity is the safety mechanism. A properly maintained leaven sits well below pH 4.6, the floor below which spoilage and pathogenic organisms cannot establish. The white film you sometimes see on a neglected starter is usually harmless kahm yeast, not mould — the difference is covered in the kahm yeast guide — but fuzzy, coloured, raised growth means you discard and rebuild.
The Grain Changes Everything
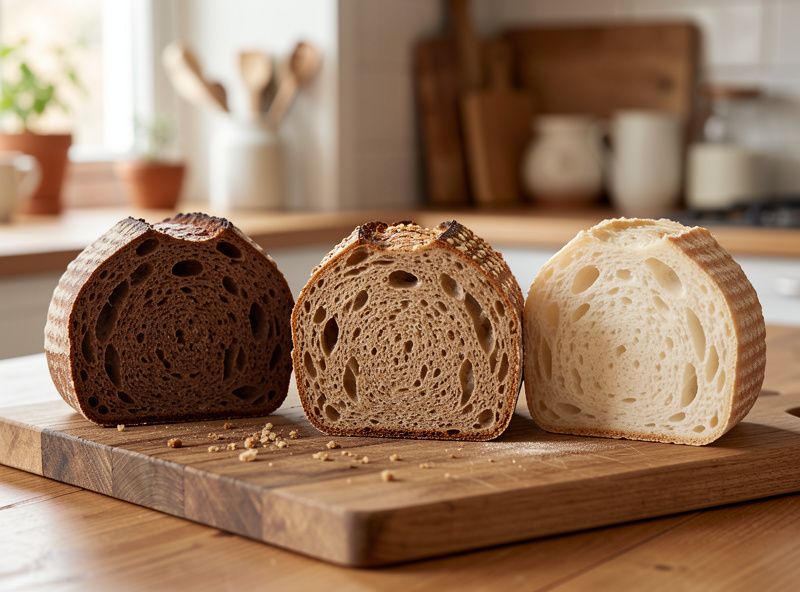
Swap the flour and you change the bake more than any other single variable, because each grain brings different protein, enzyme activity, and water demand. This is where wild-yeast baking earns its depth, and where most of the spokes in this guide live.
White wheat is the forgiving default: high gluten, predictable, the grain behind classic open-crumb loaves and the place beginners should start. Whole wheat adds bran and germ, which means more flavour and more enzyme activity but sharper bran edges that cut gluten strands, so it drinks more water and proofs faster. Rye is a different animal entirely — it has almost no functional gluten and a lot of pentosan gums and amylase enzymes, so it builds structure through starch and acid rather than a gluten net. I cover the wheat-side technique in the whole wheat sourdough guide and the rye-side in the rye sourdough bread guide, because they are genuinely different crafts that happen to share a starter.
Hydration is the lever that ties grain to crumb. A white dough at 70% water and a whole-wheat dough at 70% water are not the same dough — the whole wheat will feel dry because the bran is still absorbing. I keep a running note of what each flour wants, which is really an extension of the sourdough hydration guide: more whole grain, more water, and a longer rest to let it hydrate before you judge the dough.
The Measurement Lens
The reason this site reads differently from most baking blogs is that I treat bread as a process with numbers, not vibes. Four dials — pH, hydration, temperature, and salt — turn “rules of thumb” into repeatable bread. Get a meter and a 0.1 g scale on the bench and the guesswork largely disappears.
Salt is the one I never eyeball. Bread dough runs 1.8–2.2% salt by weight of flour; below that the dough slackens and over-ferments, above it the yeast drags. Temperature sets speed: every 1°C of dough temperature meaningfully changes proof time, which is why bakers track “desired dough temperature” rather than clock time. And pH is the safety-and-flavour readout — a finished sourdough crumb typically sits around 4.0–4.6, acidic enough to keep mould at bay for days. A good pH meter is the tool that lets you stop arguing about whether a loaf is “ready” and just read it.
As an Amazon Associate I earn from qualifying purchases. If you are equipping a bench from scratch, the two purchases that changed my baking most were a calibrated digital pH meter and an accurate 0.1 g kitchen scale — everything else is technique.
Wild Yeast vs Commercial Yeast: How to Choose
Wild yeast is not always the right tool. Commercial yeast is faster, more predictable, and better when you want a neutral flavour or a tight schedule. The honest answer is that a serious baker uses both, and the table below is how I decide which jar to reach for on a given day.
| Factor | Wild yeast leaven | Commercial yeast | Hybrid (both) |
|---|---|---|---|
| Total time | 12–36 hours | 2–4 hours | 4–8 hours |
| Flavour | Complex, tangy to mild | Neutral, “yeasty” | Mild tang, faster |
| Keeping quality | Excellent (acidity) | Stales in 1–2 days | Good |
| Predictability | Depends on starter health | Very high | High |
| Best for | Rustic loaves, rye, pizza | Enriched dough, speed | Weeknight loaves |
| Maintenance | Feed a living culture | Buy a packet | Both |
I lean wild for anything where flavour and shelf life matter — rustic loaves, rye, pizza dough I want to cold-ferment for days — and reach for commercial yeast for enriched dough like brioche, or when I simply did not plan ahead. The full breakdown, including the digestibility question people always ask about, is in the dedicated yeasted vs sourdough comparison.
A Wild-Yeast Bake, Hour by Hour
The thing that intimidates newcomers is the timeline, so here is how a standard wild-yeast loaf actually unfolds in my kitchen across a day and a night. The total clock reads long — roughly 18 to 24 hours — but the hands-on time is maybe 30 minutes spread across it. For a full beginner walkthrough alongside this one, Maurizio’s beginner’s sourdough bread guide at The Perfect Loaf covers the same arc step by step. Most of the work is the culture’s, not yours.
Evening, the night before (5 minutes). I build a levain: a spoonful of ripe starter fed with 50 g flour and 50 g water, left on the counter overnight. By morning it has tripled and reads about pH 3.9. In a cold Swedish winter kitchen I build it warmer or larger so it is ready by breakfast; in summer I build it later or cooler so it does not over-ripen by 6 a.m. This is the single most important step — a flat levain means a flat loaf, full stop.
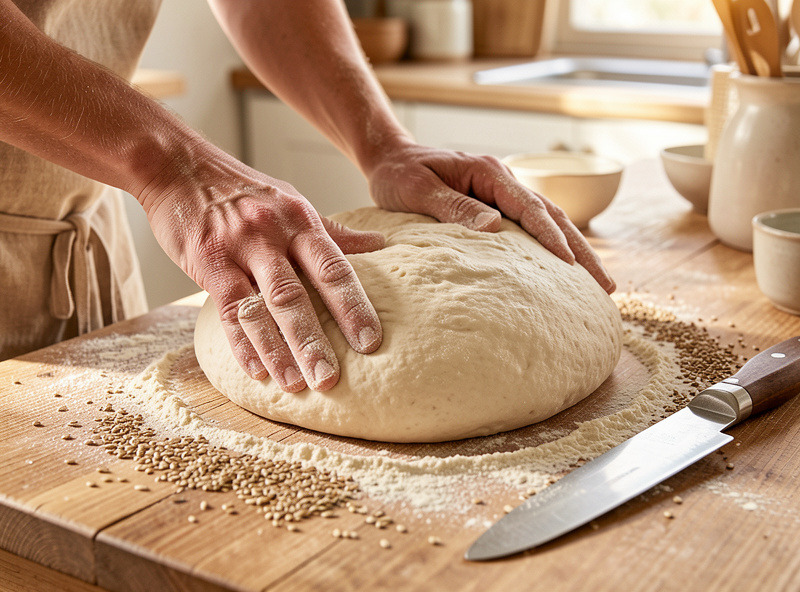
Morning, autolyse (5 minutes plus a rest). I mix the flour and most of the water and let it sit 30 to 60 minutes with no starter and no salt. This rest lets the flour fully hydrate and the gluten begin organising on its own, which matters far more with whole grain than with white. A whole-wheat or rye dough that skips autolyse feels gritty and tears; one that gets it feels supple.
Mid-morning, mix and bulk ferment (4–6 hours). I add the ripe levain and the salt — 2% of the flour weight, weighed, never guessed — and bring the dough together. Then it bulk ferments, and over those hours I give it three or four sets of stretch-and-folds in the first 90 minutes to build strength without kneading. Bulk is done when the dough has risen 50–75%, feels alive and jiggly, and shows bubbles at the edges. I judge this by feel and by dough temperature, not the clock: at 24°C bulk takes about 4 hours, at 20°C closer to 6.
Afternoon, shape and final proof (1–3 hours, or overnight cold). I pre-shape, rest 20 minutes, shape into a proofing basket, and then either proof at room temperature until puffy or — my usual move — retard it in the fridge overnight. The cold proof does two things at once: it slows the yeast so the loaf does not over-proof, and it lets the bacteria keep working, which deepens flavour and builds the acetic tang. A dough retarded 12–18 hours bakes with a darker crust and a sharper taste.
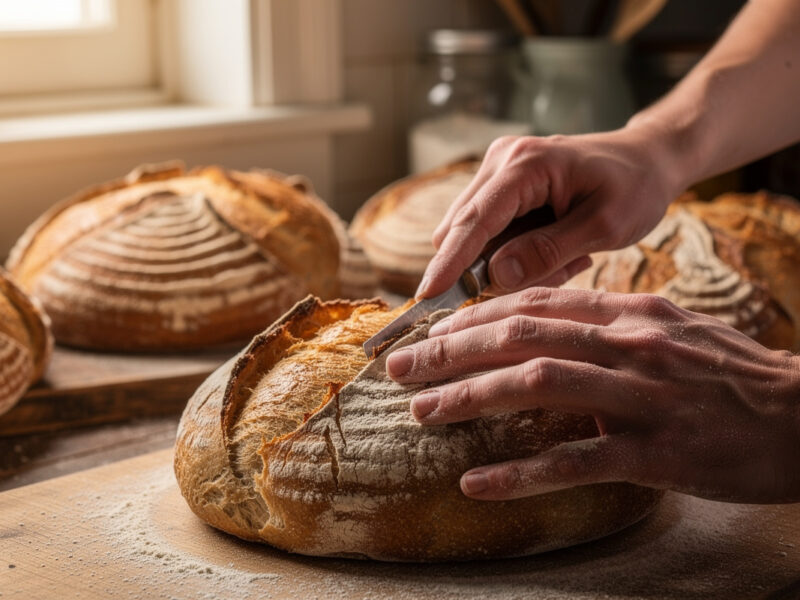
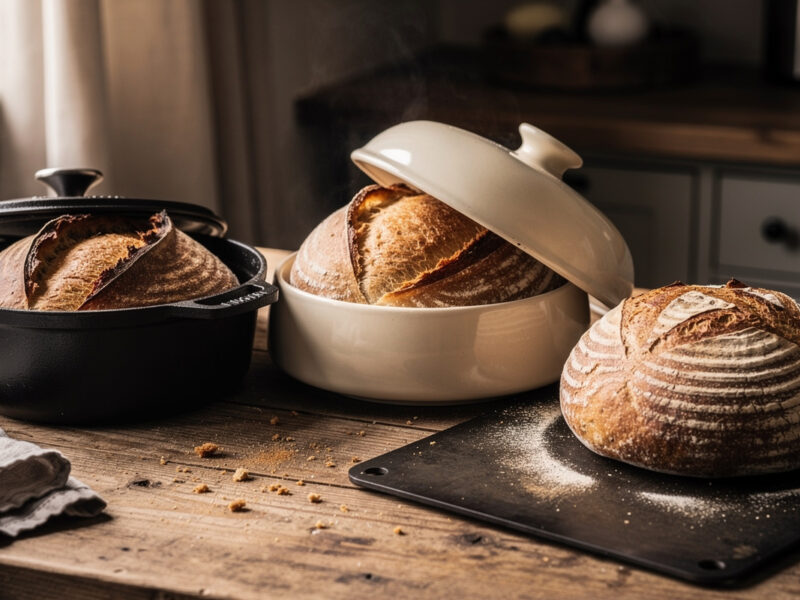
Next morning, bake (45 minutes). Straight from the fridge, scored cold (it cuts cleaner), into a screaming-hot Dutch oven. I bake covered to trap steam for the first 20 minutes, then uncovered to colour, pulling the loaf when the internal temperature passes 96°C. The detail on scoring and baking vessels lives in the scoring guide and the Dutch oven vs cloche comparison.
Reading the Dough: Bulk Fermentation by Feel and Number
If there is one skill that separates good wild-yeast bread from frustrating wild-yeast bread, it is reading the bulk ferment. Under-ferment and the loaf is dense and tight; over-ferment and it spreads into a flat, gummy pancake that tears when you score it. The window is wide enough to be forgiving and narrow enough to matter.
I use three signals together. The first is rise: I want roughly 50–75% increase in volume during bulk, not the full double that older recipes call for, because the dough keeps rising during shaping and proof. The second is feel: a ready dough has gone from slack and sticky to puffy, domed, and full of air, jiggling like a set custard when you shake the bowl. The third is the aroma — it shifts from raw-flour to faintly sour and yeasty as the pH drops. On a controlled day I will spot-check with the meter, but mostly this is feel that you build over a dozen loaves.
Temperature is the dial that governs all of it, and it is the variable most home bakers ignore. Dough ferments roughly twice as fast at 27°C as at 21°C. That is why the same recipe that takes 4 hours in a warm summer kitchen takes 7 in a cold winter one, and why I aim for a “desired dough temperature” by adjusting my water temperature rather than trusting a fixed clock time. A cheap probe thermometer in the dough teaches you more about your bread than any recipe.
Seasonal and Temperature Management
Wild-yeast baking is a seasonal craft whether you want it to be or not, because your kitchen temperature swings and the culture responds. My Sweden kitchen runs cool for half the year, and I bake differently in February than in July without changing the recipe — only the handling.
In a cold kitchen the whole process slows: the levain takes longer to ripen, bulk drags, and an unheated proof can stall overnight. My fixes are to build the levain in a warmer spot (on top of the fridge, near the oven), to use slightly warmer mixing water, and to give bulk an extra hour or two rather than baking on schedule. A small seedling heat mat under the bowl holds a steady 24–26°C if I want predictability. In a hot summer kitchen the opposite is true: everything races, over-proofing is the risk, and I lean harder on the fridge — cooler water, shorter bulk, and longer cold retard to keep control.
The mistake is to keep baking by the same clock year-round and blame the bread. A recipe’s times are written for one temperature; your kitchen is rarely at it. Track dough temperature, adjust the schedule to hit the same fermentation state, and the loaf comes out the same in January and July. This is the same logic I apply to every ferment in the kitchen — the sauerkraut crock and the salami in the curing chamber are running the same chemistry, Lactobacillus dropping pH, just at different temperatures and scales.
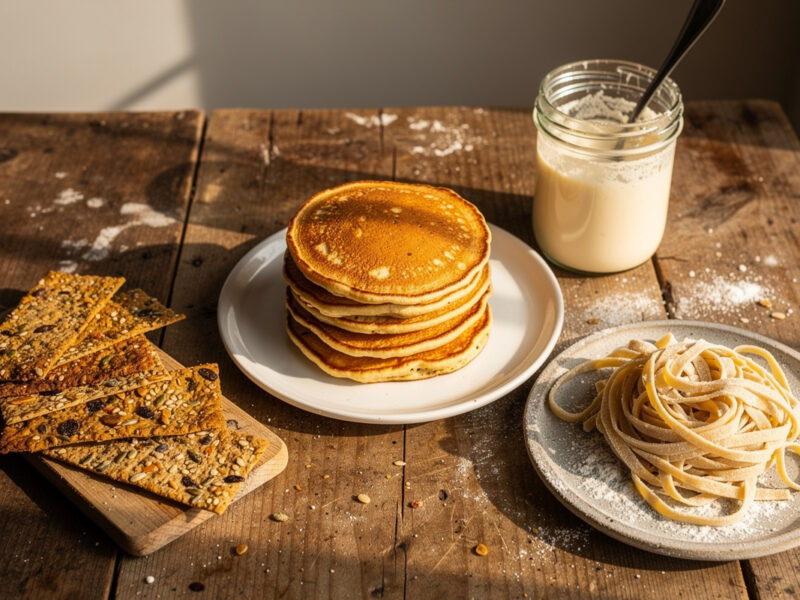
Beyond the Loaf: Pizza and Discard
Two of the best uses of a wild leaven never become a boule. The first is pizza: a sourdough pizza base cold-fermented for two or three days develops a blistered, chewy, faintly tangy crust that no same-day dough can match, and the slow ferment makes it noticeably easier to digest. I keep a dedicated sourdough pizza dough guide for that, because the hydration and handling are different from bread — you want extensibility, not a tall rise.
The second is discard. Every time you feed a starter you throw some away, and over a month that is a lot of perfectly good fermented flour. Rather than bin it, it goes into crackers, pancakes, waffles, and flatbreads — I keep a running list in the sourdough discard recipes roundup. Discard is not a leavening agent (it is past its rising peak), but it carries all the tang and is a free flavour bomb in quick breads.
If you are coming to wild yeast for the first time and want the straight white-loaf path before branching out, start with the complete home sourdough guide and the supporting technique posts: proofing baskets, open crumb, Dutch oven vs cloche baking, and scoring patterns. This hub is the map; those are the turn-by-turn directions.
Troubleshooting Wild-Yeast Bread
Almost every wild-yeast failure traces back to one of three root causes: a weak culture, the wrong fermentation length, or a handling slip. Once you learn to read which one you are looking at, fixing it is straightforward. Here is how I diagnose the usual suspects on my own bench.
Dense, tight crumb with no holes. Nine times out of ten this is an under-ripe starter or under-fermented bulk — the culture simply did not make enough gas. Build the levain stronger and longer, make sure it has tripled before you mix, and let bulk run until the dough is genuinely puffy rather than baking by the clock. Whole grain and rye are denser by design, so judge them against their own kind, not a white loaf. I unpack this fully in why sourdough turns out dense.
Flat, spread-out loaf that tore when scored. This is the opposite problem: over-fermentation. The dough fermented too long or too warm, the gluten degraded, and it lost the strength to hold a shape. Shorten bulk, cool the dough down, and watch the rise rather than the hours. Summer kitchens cause more of these than anything else.
Gummy, under-baked centre. Usually the loaf came out of the oven too soon or got sliced while warm. Bake until the internal temperature clears 96°C and let it cool completely — the crumb is still setting for the first hour out of the oven. Rye especially needs a full day’s rest before slicing; cut it warm and it gums up every time.
No rise at all. The starter is the suspect. A culture that will not lift a loaf is either too young, was stored too long without feeding, or got too cold. The starter rescue guide walks through reviving it; in short, a few days of twice-daily feeds on whole rye flour at room temperature brings almost any dormant culture back.
Sour when you wanted mild, or mild when you wanted sour. This is a dial, not a defect. More acidity comes from longer, cooler ferments (especially a long cold retard) and a wetter starter that favours acetic acid. Less acidity comes from younger levain, warmer fast ferments, and a stiffer starter. If you want genuinely sweet bread with no tang, switch to a yeast-water leaven, which is covered in the starter guide.
Safety: Where the Real Risk Lives (and Where It Doesn’t)
Wild-yeast baking is one of the safest ferments you can run, because acidity does the protective work and a hot oven finishes the job. A ripe leaven and a proofed dough both sit below pH 4.6, the threshold under which Clostridium botulinum and most pathogens cannot grow, and baking takes the crumb past 96°C, well above any survival point.
The risks that do exist are about spoilage, not poisoning. A neglected starter can grow mould (fuzzy and coloured — discard it, do not scrape) as opposed to harmless kahm yeast (flat and white — stir it in or skim it). Pink or orange streaks mean unwanted bacteria and a rebuild. And a finished loaf, despite its acidity, will eventually mould in a humid bag — the acid slows mould, it does not stop it forever. The calm version of the truth is this: respect a fuzzy starter, ignore a white film, and never fear a properly soured dough.
Frequently Asked Questions
What is the difference between wild yeast and sourdough?
Sourdough is one application of wild yeast. Wild yeast baking is the whole category of leavening bread with naturally occurring yeasts and Lactobacillus bacteria, which includes mild yeast-water breads, tangy ryes, pizza dough, and classic sourdough. All sourdough uses wild yeast, but not all wild-yeast bread is sour.
Do I need a sourdough starter for wild-yeast baking?
You need some wild leaven, but it does not have to be a flour starter. You can build a yeast water from raisins, apples, or figs, which gives a milder, sweeter rise with very little sourness. A flour-based sourdough starter is the most versatile and the one most recipes assume.
How do I know my wild leaven is ready to bake with?
A ready leaven has roughly doubled, is domed and bubbly, and reads pH 3.8 to 4.2 on a meter. The classic float test, dropping a spoonful in water to see if it floats, is a rough proxy for the same thing: enough gas trapped to lift a loaf.
Is wild-yeast bread safe to eat?
Yes. A ripe leaven and proofed dough both sit below pH 4.6, the safety floor under which pathogens cannot grow, and baking takes the crumb above 96C. The only real risk is spoilage in a neglected starter, where you discard fuzzy coloured mould but can skim harmless white kahm yeast.
Why is my wild-yeast loaf dense and gummy?
The most common cause is a weak or under-ripe starter that could not produce enough gas, followed by under-proofing and cutting the loaf while still warm. Whole grain and rye doughs are denser by nature. A starter at peak activity and a full proof fix most density problems.
Can I bake with wild yeast and commercial yeast together?
Yes, and it is a useful weeknight trick. A small amount of wild leaven adds flavour and keeping quality while a pinch of commercial yeast guarantees a fast, reliable rise. Hybrid doughs proof in 4 to 8 hours instead of 12 to 36 for a pure wild ferment.
Related Guides
- Wild Yeast Starter Guide: Build a Leaven From Flour or Fruit
- Rye Sourdough Bread Guide
- Whole Wheat Sourdough Guide
- Sourdough Pizza Dough Guide
- Yeasted vs Sourdough Bread Comparison
- Sourdough Discard Recipes

About Kenny Nyhus Fadil
A home fermenter documenting brines, bubbles, and the occasional moldy tragedy.